Performing additional cleaning
You should perform the following cleaning tasks when
necessary.
1. Move the axes into the cleaning position
by selecting the depicted icon in the
Machining view in DENTALCNC.
2. Open the working chamber door.
3. Switch off the machine at the main power switch.
4. Clean the view window with a dry cloth. Use a mild
cleaning agent if necessary.
5. Screw the protective cap off the webcam and clean
the inside of the cap with a dry cloth.
FIG. 50 SCREWING THE PROTECTIVE CAP OFF THE WEBCAM
6. Clean the webcam with a dry cloth. Screw on the
protective cap.
8.7 Cleaning the collet chuck
You need to clean the collet chuck with the spindle
service set which was provided with your machine.
NOTICE
Damaging of the spindle
when cleaning with
compressed air
If you clean the collet chuck with compressed air, the
spindle bearings can be damaged.
Clean the collet chuck only with the appropriate ser-
vice set.
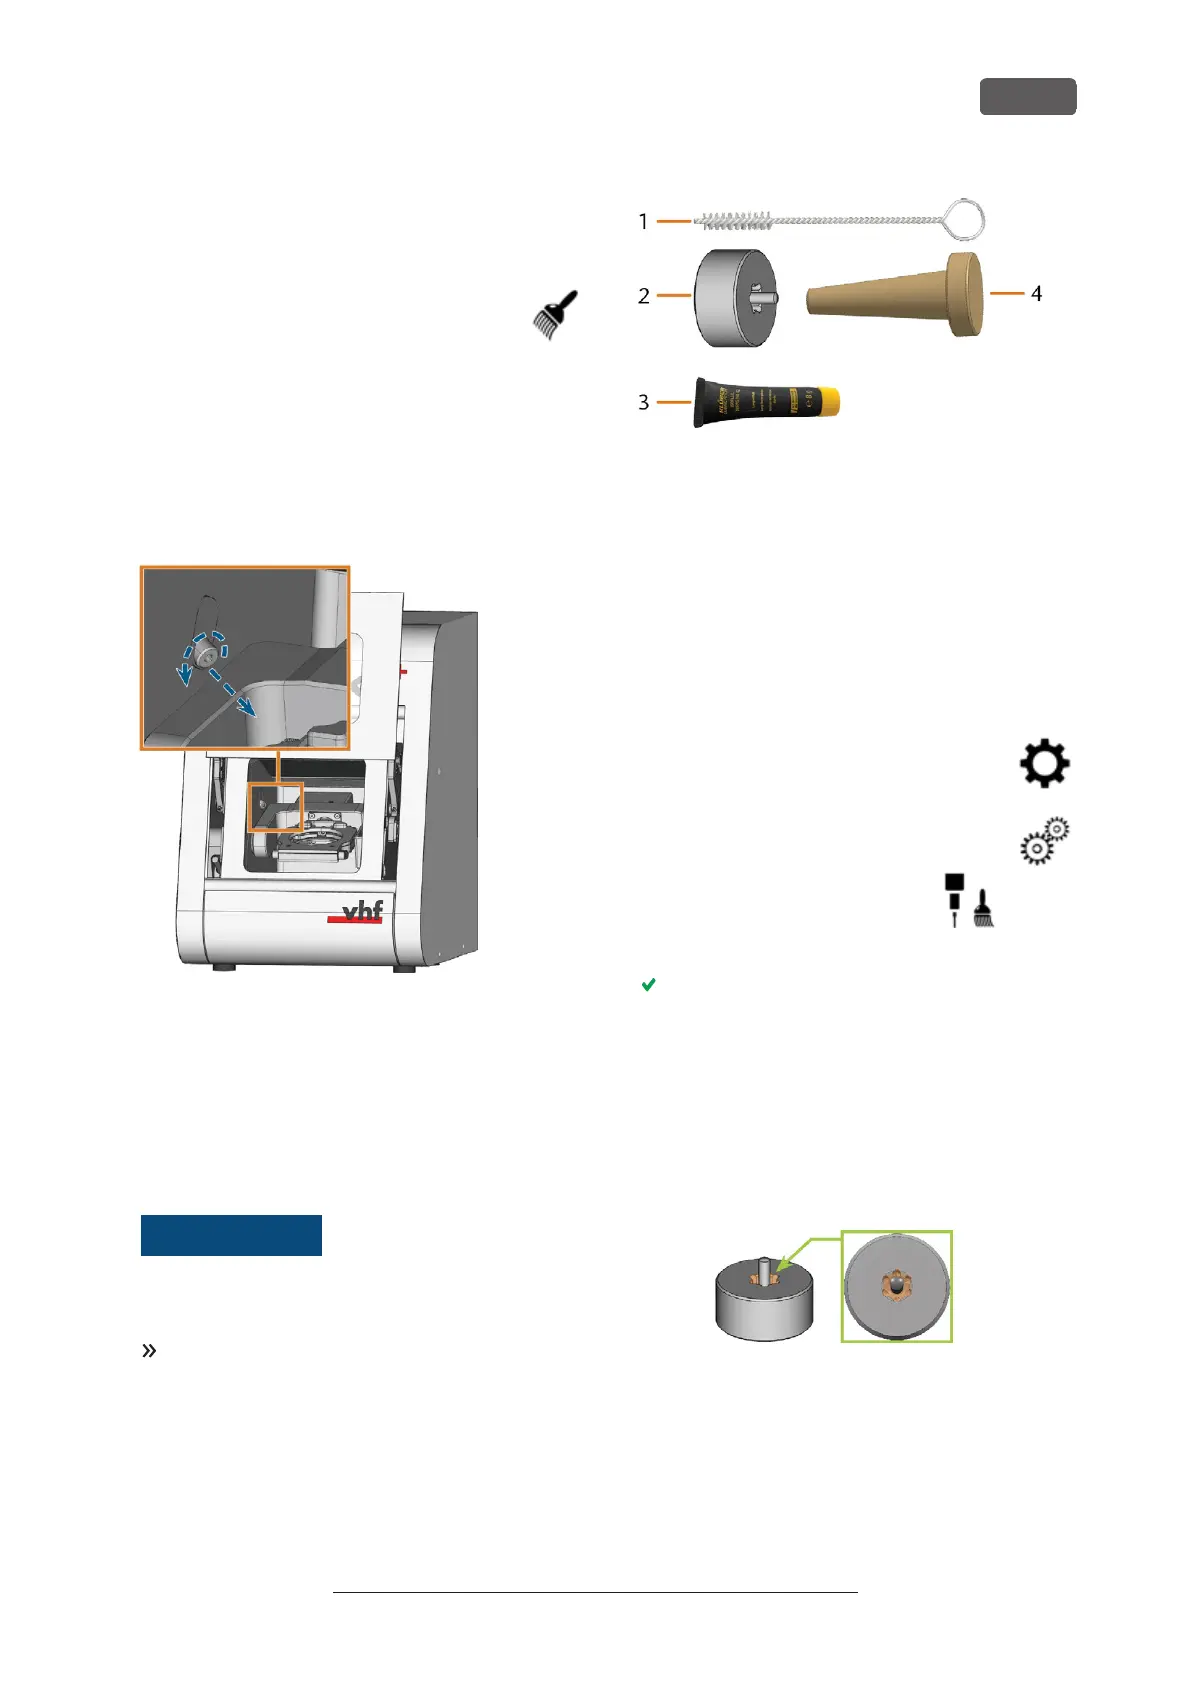
FIG. 51 SPINDLE SERVICE SET
1. Cleaning brush
2. Knurled nut
3. Tube of collet chuck grease
4. Cleaning cone
To clean the collet chuck do the following:
1. Have the spindle service set ready.
2. Close the working chamber door.
3. Open DENTALCNC‘s general application
settings with the depicted icon in the
main icon bar.
4. Open the Machine parameters view with
the depicted icon in the local icon bar.
5. Move the axes into the tool
change position by selecting
the depicted icon in the Machin-
ing view in DENTALCNC.
The spindle moves into the position for collet chuck
cleaning.
6. Open the working chamber door.
7. Untighten the collet chuck with the knurled nut:
a. Insert the pin of the knurled nut into the col-
let chuck.
b. Ensure that the collet chuck fully sits in the
recess of the knurled nut.
FIG. 52 RECESS IN KNURLED NUT (MARKED ORANGE)
c. Twist the knurled nut counter-clockwise.
K5+ – Maintenance and do-it-yourself
EN 43
Original Operating Instructions:K5+
Version: 12/16/2021