Screw, 6-32 x 3/8”, Flat Head Phillips, 82°, Stainless Steel
Assembly Procedure
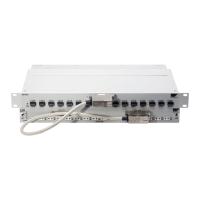
1) Place the chassis on a protected work surface with its input connectors facing front.
2) Using a #2 Phillips screwdriver, install the rack ears (P/N: 41-0482-009) on the front of the
EX10xxA using five (5) 6-32 X 3/8” flat head Phillips stainless steel screws (P/N: 37-0173-
037) for each rack ear. Note that the “Optional Mounting Locations” in Figure 2-1 allow the
EX10xxA to be installed in a rack either flush or recessed.
3) Next, attach the unit support brackets (P/N: 41-0482-010) to the EX10xxA using two (2) 6-32
x 3/8” pan head Phillips SEMS screws (P/N: 37-0028-037) for each bracket (see Figure 2-1).
4) Place the rear rack support brackets (P/N: 41-0482-011) on the inside of the unit support
brackets installed in step 3 and loosely secure them using two (2) 8-32 x 3/8” pan head Phillips
SEMS screws (P/N: 37-0073-037) and two (2) KEPS hex nuts (P/N: 37-0200-832). Loosely
installing the hardware will allow the rear support bracket to adjust to the proper length once
installed in a rack.
5) Place the EX10xxA in the desired rack slot and secure the front rack ears with hardware
provided with the rack. Once the front bracket are secured, slide the rear support brackets so
that they can be attached to the rack as well. After securing the rear support brackets, tighten
the screws and KEPS nuts installed in step 4.