Page 87
CONNECT 1
ST
EXTENSION AND AIR HOSE
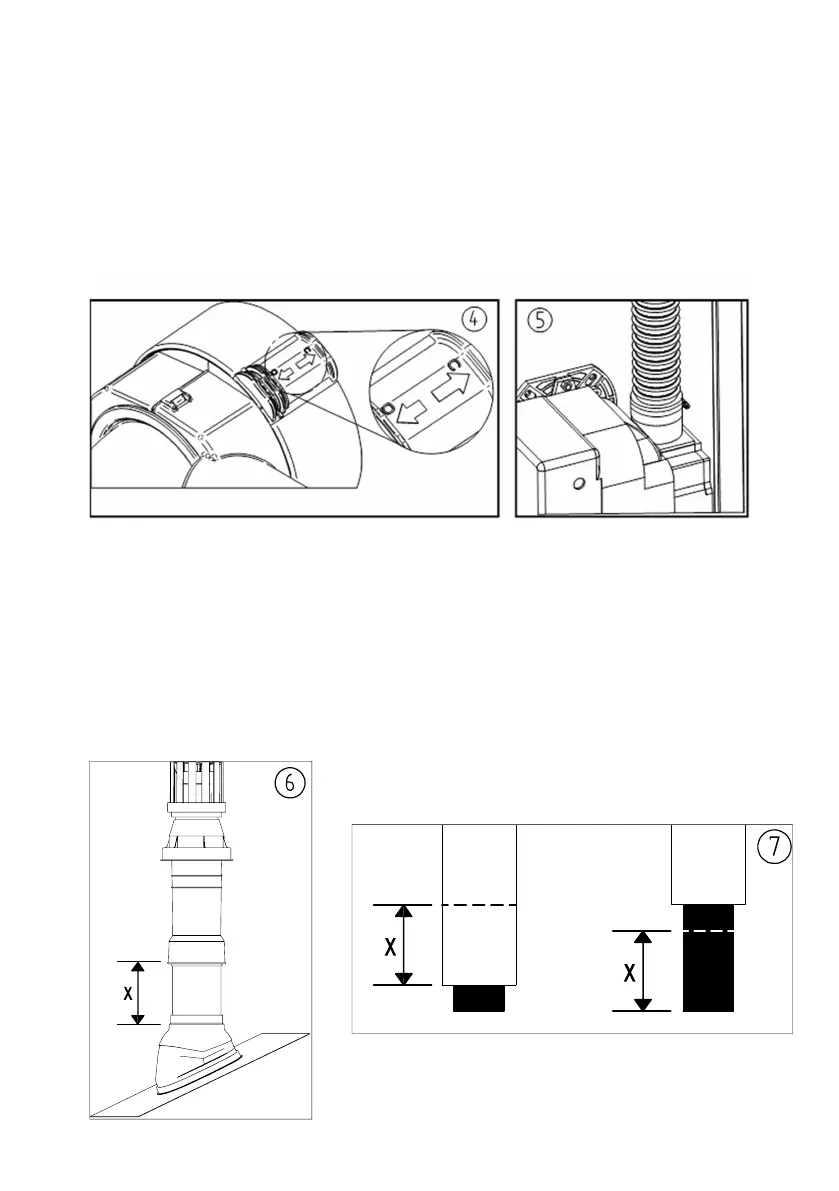
4. Ensure the locking band is open by sliding the clamp to the O (Open) position.
Lubricate and fit the first extension or terminal depending on installation
requirements. Close the locking band, then slide the clamp to the C (Closed)
position, ensuring the flue is secure.
5. Fit the air inlet spigot and gasket to the burner. Attach the flexible air hose to
the burner and starter assembly and secure with the jubilee clips (E) at both ends.
MEASURE AND CUT TERMINAL
6. Fit the flashing and assemble the flue up through the roof, lubricating all seals
and securing all locking bands after installation. Measure the excess length, X,
noting carefully the correct measurement locations.
7. Remove the terminal, cut X mm from the outer pipe of the terminal (C) then X
mm from the inner pipe. Refit the terminal and secure in place with the bracket
(D).