Page 95
CONNECT 1
ST
EXTENSION AND AIR HOSE
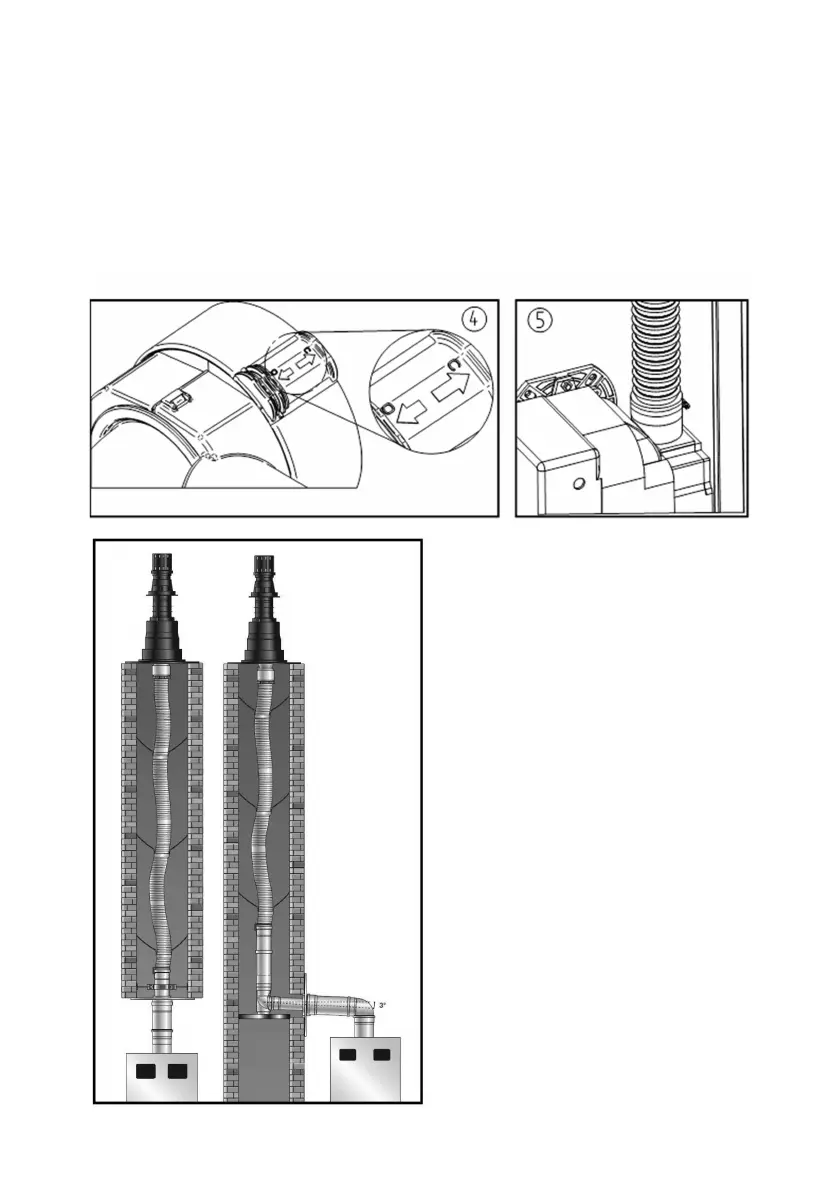
4. Ensure the locking band is open by sliding the clamp to the O (Open) position.
Lubricate and fit the first extension or terminal depending on installation
requirements. Close the locking band, then slide the clamp to the C (Closed)
position, ensuring the flue is secure.
5. Fit the air inlet spigot and gasket to the burner. Attach the flexible air hose to
the burner and starter assembly and secure with the jubilee clips (E) at both ends.
CONNECT TO CLOSURE PLATE
Install the chimney components and
closure plate as instructed in the
separate instruction leaflet.
Run the flue from the boiler to the
chimney closure plate. If necessary,
the extension(s) can be cut to length.
Horizontal entry kits only
Ensure that the ‘horizontal’ section into
the closure plate is inclined back
towards the boiler at a minimum of 3°
to the horizontal as shown.