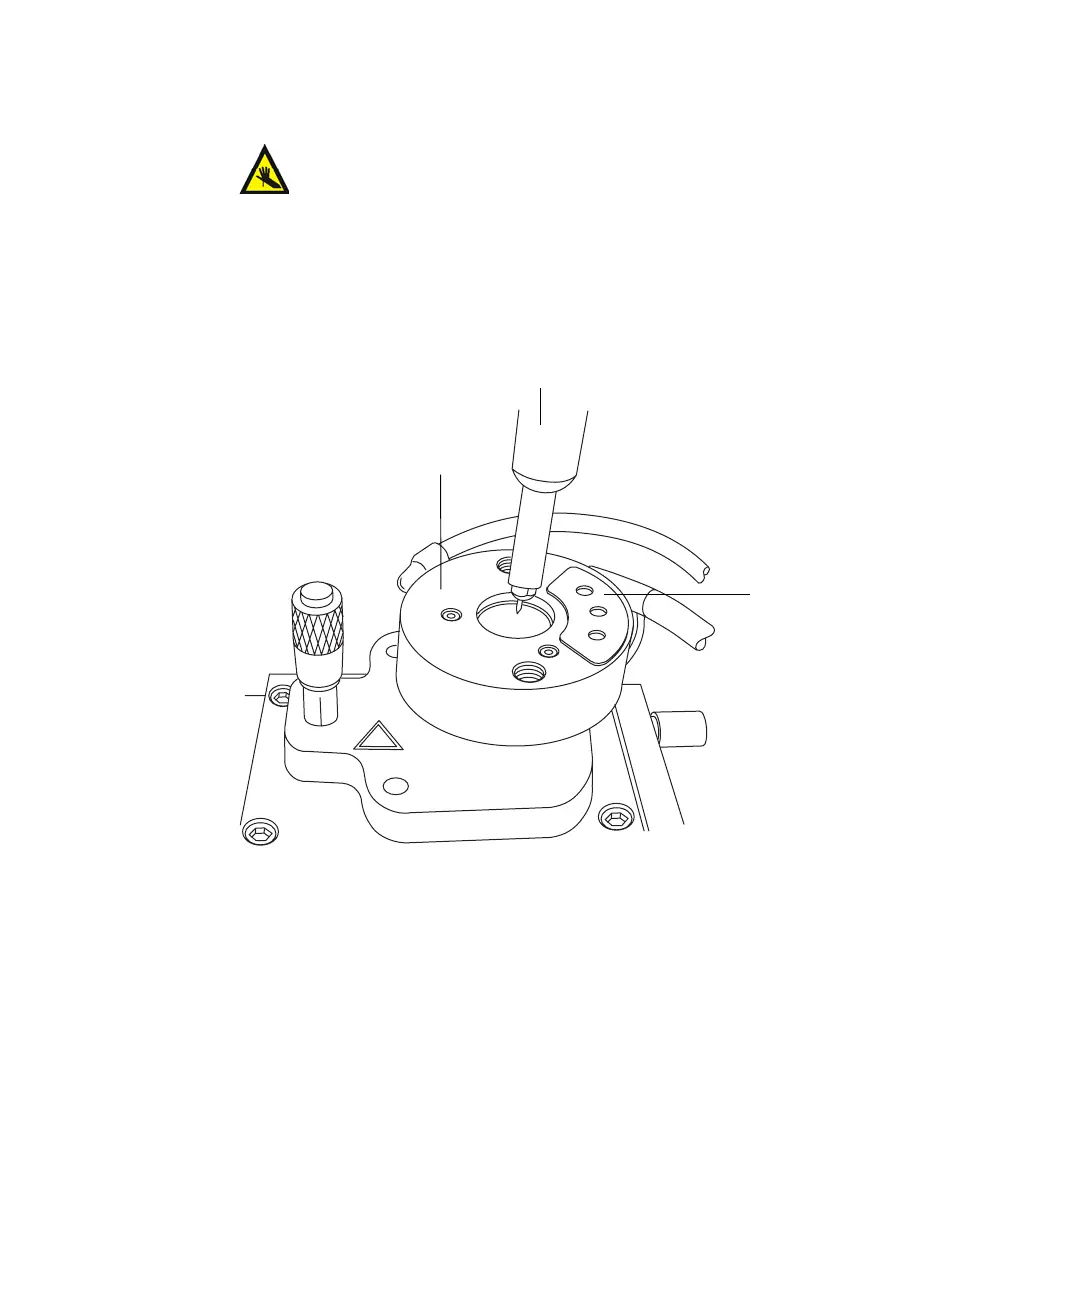
Installing the ESI probe 3-3
3. Remove the protective sleeve, if fitted, from the ESI probe tip.
4. Ensure that the contacts on the ESI probe align with the probe adjuster
assembly contacts, and carefully slide the ESI probe into the hole in the
probe adjuster assembly.
5. Secure the ESI probe by tightening the two thumbscrews.
See also: Figure titled “ESI probe mounted on the source enclosure,
showing the connections to the front panel” on page 3-4.
Warning: The ESI probe tip is sharp. To avoid puncture wounds,
handle the ESI probe with care.
TP02632
ESI probe
Probe adjuster
assembly contacts
Probe adjuster assembly
 Loading...