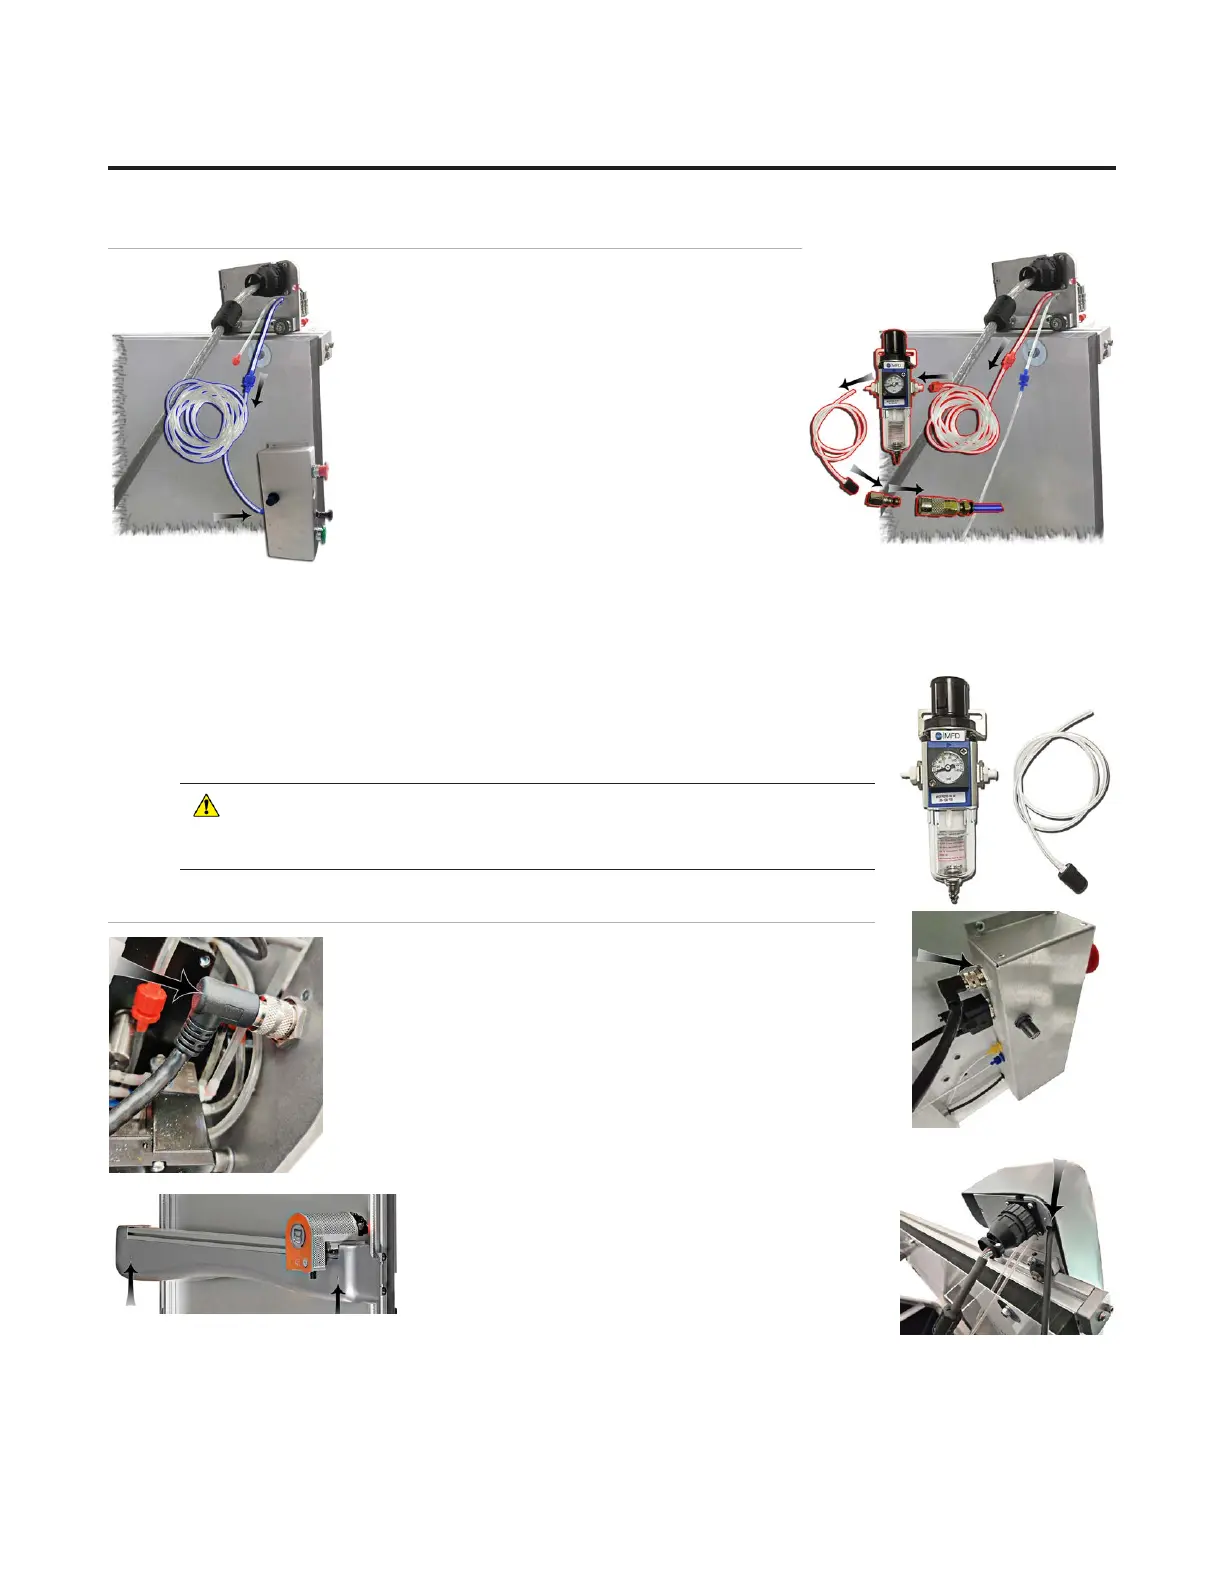
Attaching the Air Lines
1. Follow the air line with the blue connector 1. Follow the air line with the blue connector
from the top of the gantry. Make sure that it is from the top of the gantry. Make sure that it is
connected to the blue connector on the control connected to the blue connector on the control
panel box on the back of the board, and that panel box on the back of the board, and that
none of the air lines are crimped.none of the air lines are crimped.
2. Follow the air line with the red connector from 2. Follow the air line with the red connector from
the top of the gantry. Connect it to the right side the top of the gantry. Connect it to the right side
of the air regulator by inserting the red connector of the air regulator by inserting the red connector
on the end and twisting it into place.on the end and twisting it into place.
3. If it’s not already connected, insert the air 3. If it’s not already connected, insert the air
regulator line (short air line with reducer) onto the regulator line (short air line with reducer) onto the
left connector of the air regulator. left connector of the air regulator.
4. Plug the reducer located on the short air line from the left side of the air regulator 4. Plug the reducer located on the short air line from the left side of the air regulator
into the main air supply via 1/4” NPT female connector or quick disconnect, whichever type was purchased into the main air supply via 1/4” NPT female connector or quick disconnect, whichever type was purchased
(shown is the 1/4” NPT female adapter). Teon tape can be used on the thread to reduce possible air leakage.(shown is the 1/4” NPT female adapter). Teon tape can be used on the thread to reduce possible air leakage.
5. The air compressor should supply at least 100psi.5. The air compressor should supply at least 100psi.
6. Strap the air regulator with the glass bowl down to the left large wall bracket or 6. Strap the air regulator with the glass bowl down to the left large wall bracket or
side of stand, making sure not to crimp any air lines. The hardware to connect the side of stand, making sure not to crimp any air lines. The hardware to connect the
air regulator to the stand is included in the stand hardware kit. air regulator to the stand is included in the stand hardware kit.
* CAUTION: The air regulator is factory-set. Do
not make adjustments to it.*
Attach the M12 Cable to the Control Panel
1. Locate the M12 cable that is plugged into the back plate of 1. Locate the M12 cable that is plugged into the back plate of
the gantry. the gantry.
2. Plug the other end of the M12 cable into the M12 port 2. Plug the other end of the M12 cable into the M12 port
located on the Control Panel on the back of the board, twisting located on the Control Panel on the back of the board, twisting
the thumbscrew to connect it.the thumbscrew to connect it.
3. Replace the gantry cover and attach using the two screws 3. Replace the gantry cover and attach using the two screws
that were removed earlier.that were removed earlier.
4. Make sure that the M12 cable lies within the gantry 4. Make sure that the M12 cable lies within the gantry
channel so that it is not pinched in the gantry cover. channel so that it is not pinched in the gantry cover.
5. Turn on the air. 5. Turn on the air.
12
20-36070-1 GettingStartedManualZ1FrameShop
04/07/21
Wizard™ CMC Model Z1 Hardware and Software Getting Started Guide
 Loading...