Align the Head When Motors are Disengaged
Align the Head
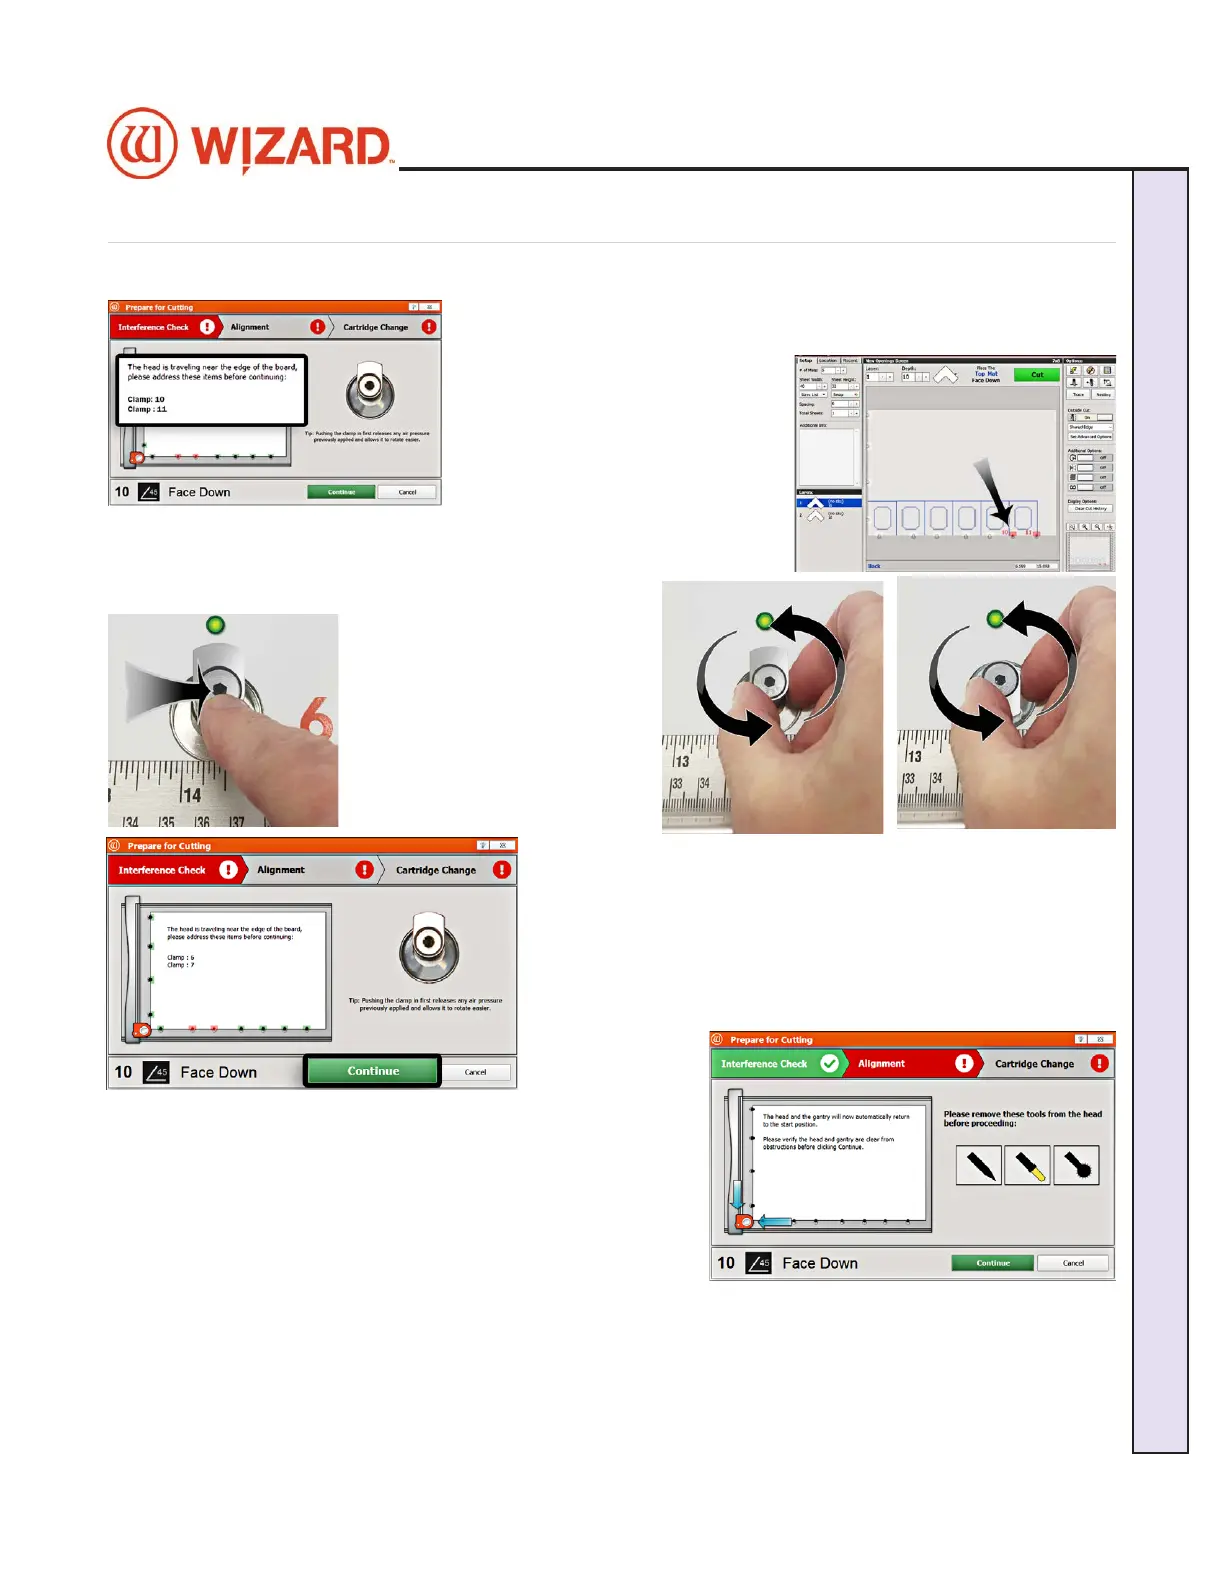
1. The CMC will do an interference check to see if any of the nger-
clamps are in the way of the current cut sequence.
2. If any of the nger-clamps are in
the way, the light above the specic
nger-clamp on the board will ash
red and the Cut Preview screen will
highlight in red which nger-clamp
number needs to be rotated out of
the way before you cut the mat. See
“Head LED Behavior” page 29 and “LED Clamp Behavior” page
30 for information on the LED head and clamp indicators.
3. To rotate the nger clamp out of the way, push the
indicated clamp toward the board
to release the pressure.
4. Rotate the indicated clamps
so that they are facing away from
the center of the board.
5. When the clamps are
engaged, they will be retracted
ush with the board.
6. For the
next cutting job, the clamps should be rotated back toward the
center of the board to hold down the next mat.
7. Click Continue on the Interference screen. It will perform
the interference check again to make sure that all of the nger-
clamps have been correctly rotated.
8. If it passes the interference check, it will continue to the
Alignment
screen.
9. Make sure that the Pen, Vinyl and Crease tools are not in
the foot block. It will then align the head as described below.
10. After aligning the head, it will immediately proceed to the
Cartridge Change screen.
20-36070-1 GettingStartedManualZ1FrameShop
04/07/21
21
Wizard CMC Model Z1 Hardware and Software Getting Started Manual
Wizard™ CMC Model Z1 Hardware and Software Getting Started Guide