Put Matboard on the CMC
1. Make sure there are two layers of disposable 1. Make sure there are two layers of disposable
slipsheets of adequate size underneath the slipsheets of adequate size underneath the
matboard to be cut. This design is cut from the matboard to be cut. This design is cut from the
back. back.
2. Place the matboard face down onto the CMC 2. Place the matboard face down onto the CMC
(facing away from the operator). Make sure the (facing away from the operator). Make sure the
matboard nestles tightly under the horizontal matboard nestles tightly under the horizontal
and vertical clamps of the CMC.and vertical clamps of the CMC.
Click Cut
1. Click the green cut button to cut the mat. 1. Click the green cut button to cut the mat.
2. Because the motors are still engaged, the CMC will 2. Because the motors are still engaged, the CMC will
automatically begin to cut. automatically begin to cut.
Note that because we made no changes to the blade Note that because we made no changes to the blade
depth nor the cartridge, the CMC did not prompt for a depth nor the cartridge, the CMC did not prompt for a
change before cutting. change before cutting.
3. After it has nished cutting, remove the matboard from 3. After it has nished cutting, remove the matboard from
the CMC. The second mat has been cut. the CMC. The second mat has been cut.
4. Click the “X” button to return to the New Openings screen or click the “X” button three times to return to the 4. Click the “X” button to return to the New Openings screen or click the “X” button three times to return to the
Main Screen.Main Screen.
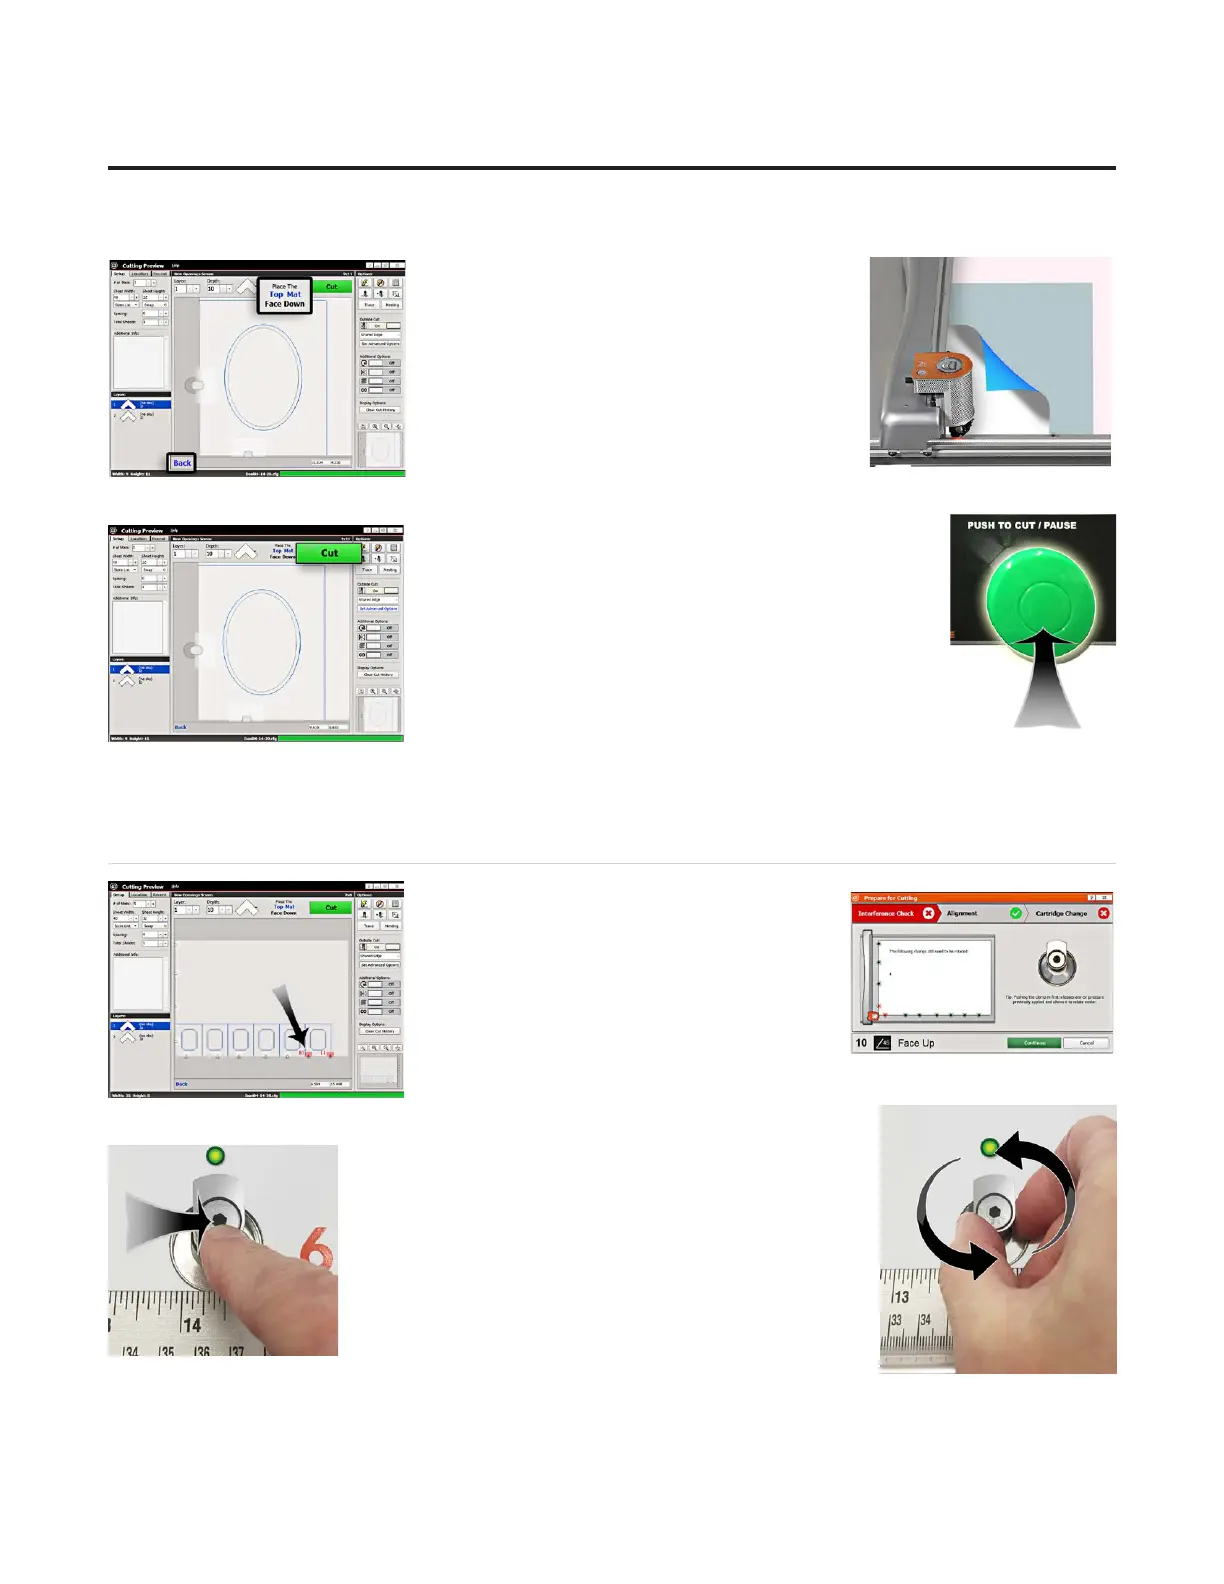
Adjusting Clamps for Zero Waste
1. The adjustable clamp system allows the user 1. The adjustable clamp system allows the user
to cut right up to the edge of the mat, thus not to cut right up to the edge of the mat, thus not
wasting any material. This is especially useful wasting any material. This is especially useful
when tiling.when tiling.
2. The Cut Preview Screen will indicate if any of 2. The Cut Preview Screen will indicate if any of
the clamps are in the way of the foot block. the clamps are in the way of the foot block.
3. When you click Cut, the Interference Screen will also indicate the clamp 3. When you click Cut, the Interference Screen will also indicate the clamp
numbers that need to be rotated out of the way.numbers that need to be rotated out of the way.
4. Push the clamp toward the board to release it.4. Push the clamp toward the board to release it.
5. Rotate the clamps highlighted in red so that they are 5. Rotate the clamps highlighted in red so that they are
facing away from the center of the board. When the facing away from the center of the board. When the
clamps are engaged, they will be retracted ush with the clamps are engaged, they will be retracted ush with the
board. board.
24
20-36070-1 GettingStartedManualZ1FrameShop
04/07/21
Wizard™ CMC Model Z1 Hardware and Software Getting Started Guide