2-26
Installation InformationCT Hoods and DD Ventilation
CONNECT THE CONTROL MODULE
Connect the DIN/RJ45 connector cable to the 1.
backside of the remote-mounted control module.
Connect the other end of the cable to the electrical 2.
connection located on the right side of downdraft
assembly. Make sure that all connections are tight.
Refer to the illustration on the front of the downdraft 3.
for the correct orientation of the DIN connector
during installation into the downdraft assembly.
I
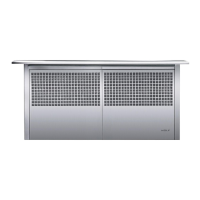
NTERNAL BLOWER WIRING
Models DD30I, DD36I and DD45I
Since these models come with the Blower already 1.
installed in the unit, there is no special wiring
required.
Plug the power cord of the downdraft into the outlet 2.
and energize the receptacle.
REMOTE BLOWER WIRING
Models DD30R, DD36R and DD45R
NOTE: The remote blower may not exceed a 6.0 amp rating
NOTE: Detailed instructions of Remote Blower installation are provided with the blower. Refer to installation
instructions provided with each blower to verify wall or roof cut-outs.
NOTE: Before turning the power on, make sure the blower is in the “OFF” position. Use wire connectors or wire nuts
approved by UL or C/UL.
Locate the blower so the length of the duct run and number of elbows and transitions are kept to a minimum.1.
Where possible, blower should be located between wall studs or roof rafters.2.
Avoid pipes, wires or other ductwork that may be running through the wall.3.
Be sure that there is enough space for any transitions that may be needed between the blower and the 4.
connecting ductwork.
For best performance, locate transitions nearest the blower.5.
CONNECT REMOTE BLOWER
NOTE: Always refer to blower installation instructions provided with the blower for additional mounting and wiring
instructions.
Run 2-wire plus ground power cable from the remote blower to the electrical box on the remote blower adapter 1.
plate.
Connect the downdraft wiring to the power cable from the remote blower. Wire black to black, white to white and 2.
green to green or bare wire. (See Figure 2-50)
Replace the electrical box cover.3.
Plug the power cord of the downdraft into the outlet.4.
I
NSTALL TOP COVER
NOTE: Model DD45 comes with the top cover already installed.
Press the UP/DOWN button on the control module.1.
Remove shipping brackets from the downdraft chimney.2.
Align the mounting brackets on the back surface of the top cover with the corner mounting positions on top of 3.
downdraft chimney.
Screw the top cover mounting brackets into the mounting holes on downdraft chimney with the four screws 4.
provided. Make sure that the top cover is secure and runs fl ush with the front edge of the downdraft.
Figure 2-50 Remote Blower Connection