Access & Removal CT Hoods and DD Ventilation
4-13
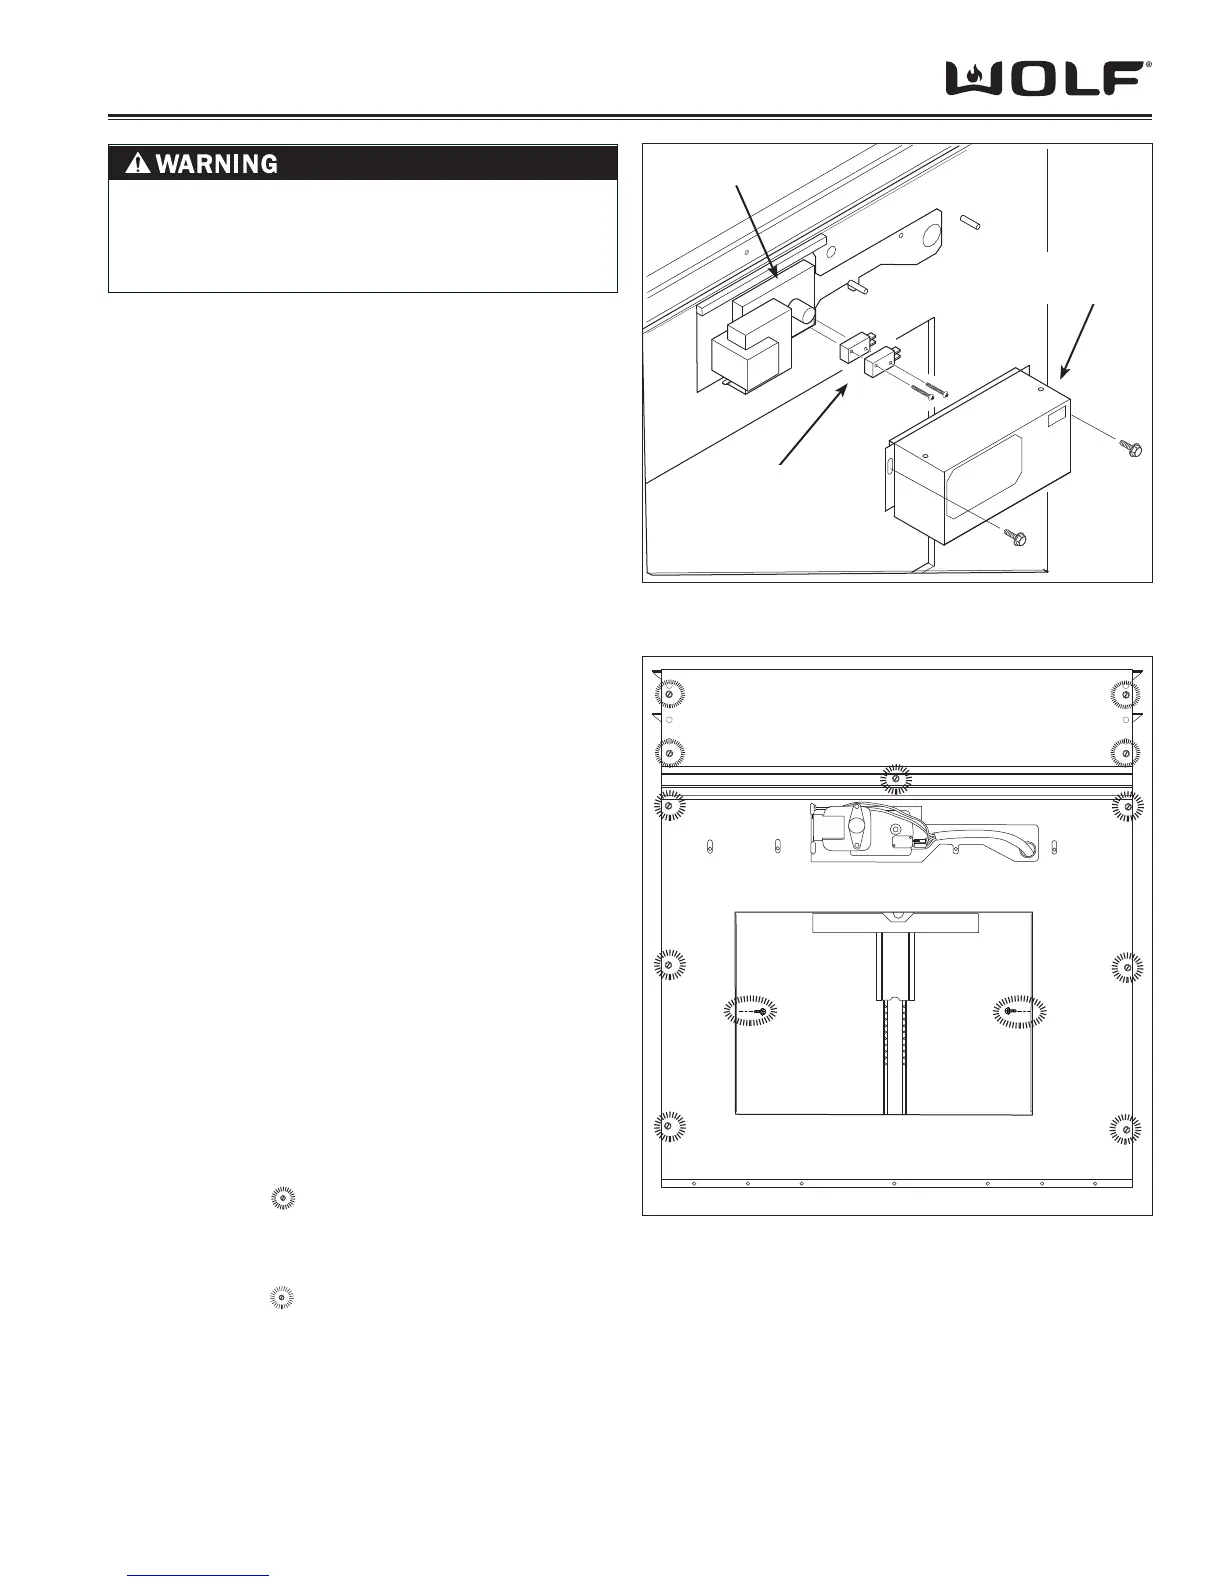
MICRO-SWITCH REMOVAL
NOTE: Refer to all WARNINGS and CAUTIONS at
beginning of this section.
The micro-switches are located on the front of the gear
motor and are secured to the gear motor bracket with two
screws. The set of two micro-switches control the opera-
tion of the chimney assembly.
Depending on installation and cabinet size, the internal
blower assembly may not have to be removed to access
the micro-switches.
To remove the micro-switches, (See Figure 24):
If the internal blower has not been removed, remove 1.
the 3/8” (9.5) nuts from channel clamps. Lift channel
clamps off threaded studs.
Extract screws from gear motor cover. Lift cover off 2.
of unit.
Disconnect electrical leads from micro-switches. 3.
NOTE: The micro-switch electrical connections must
be hooked up in the proper order. Take note or tag wire
leads before disconnecting to assure correct location for
re-assembly.
Extract screws from micro-switches and lift off of gear 4.
motor assembly.
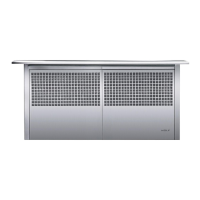
FRONT AIR BOX PANEL REMOVAL
The internal blower assembly must be removed to access
the upper and lower front air box panels. Bolts secure
the panels to the downdraft frame. The upper air box
panel covers the fi lter assemblies, while the bottom air
box panel covers the chimney slide assembly and electri-
cal components.
To remove the front air box panels, remove internal
blower assembly fi rst, then (See Figure 31):
Extract bolts 1. from lower air box panel.
Pull lower air box cover up and away from downdraft 2.
frame and remove from unit.
Extract bolts 3. from upper air box panel, and
remove panel from unit.
Figure 4-30 Micro-Switch Removal
Figure 4-31 Air Box Panels Removal
Gear Motor
Cover
Gear Motor
Micro-Switches
TO AVOID ELECTRIC SHOCK, POWER TO THE
VENTILATION UNIT MUST BE DISCONNECTED
WHENEVER PERFORMING THE FOLLOWING
REPAIRS.
Upper Air Box Panel