Access & RemovalCT Hoods and DD Ventilation
4-12
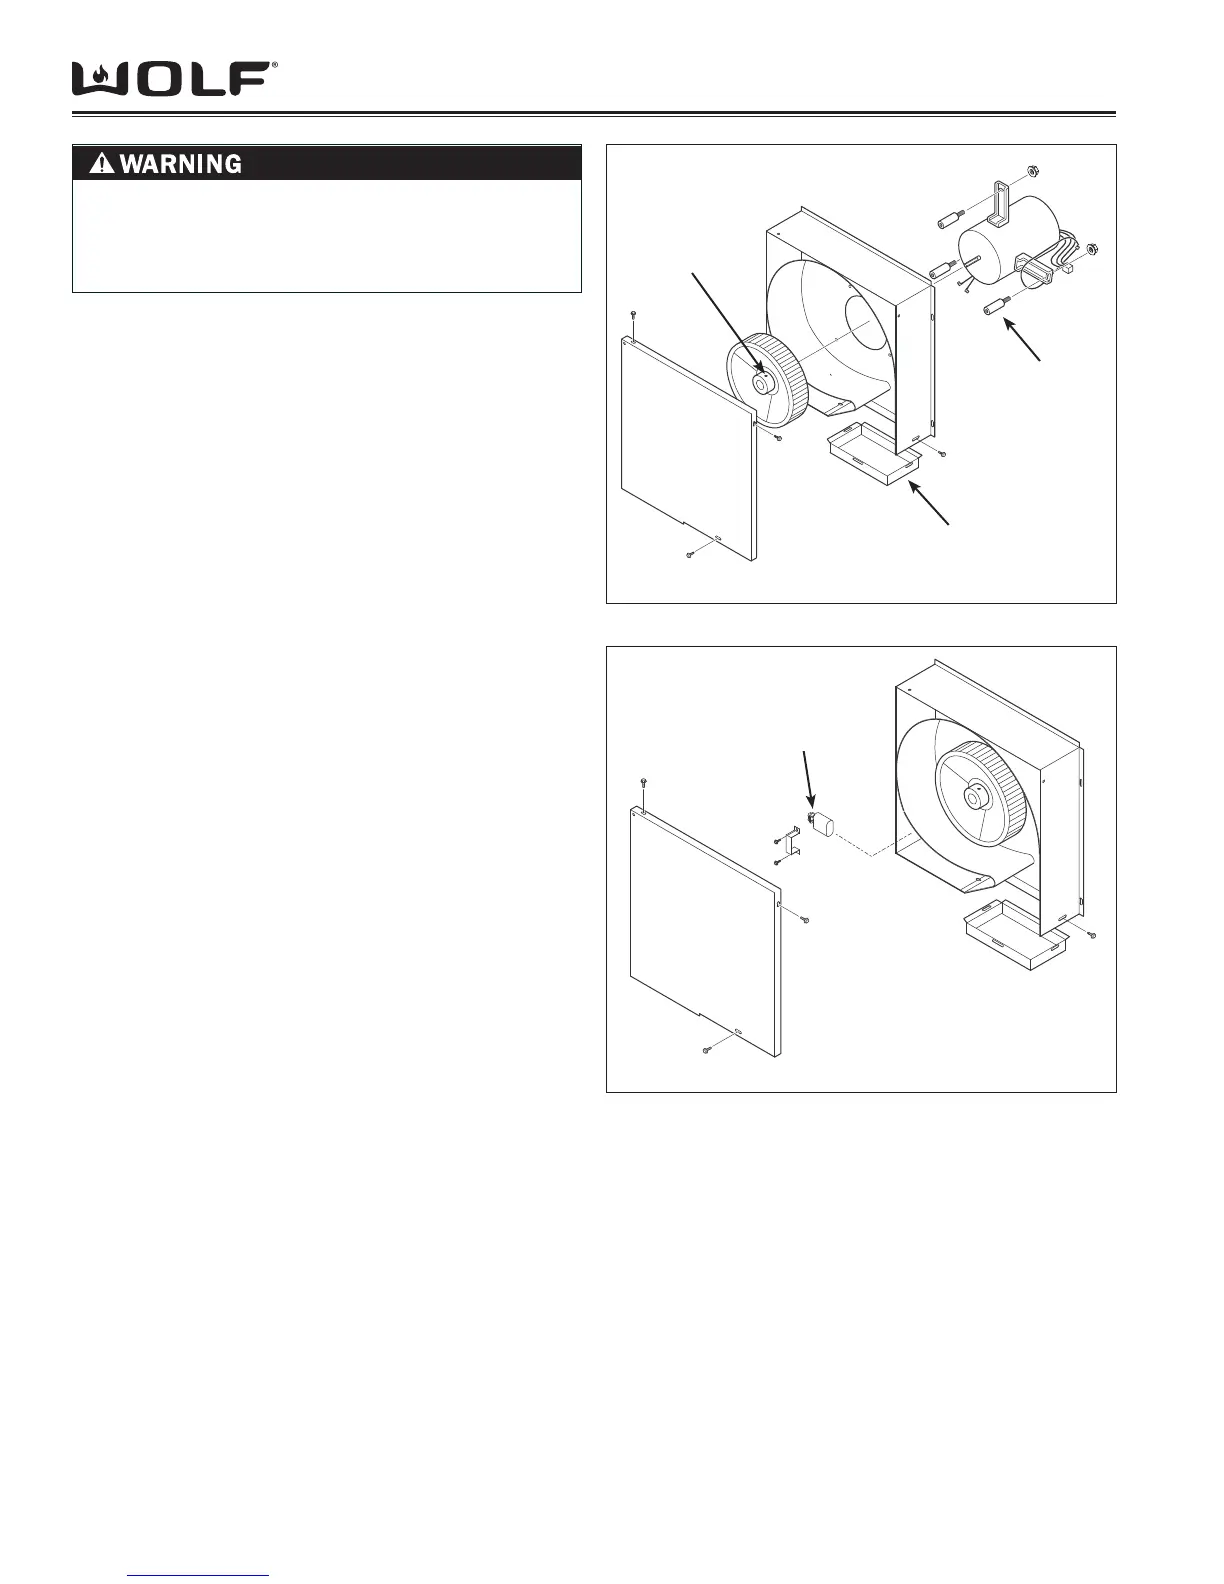
BLOWER MOTOR REMOVAL
NOTE: Refer to all WARNINGS and CAUTIONS at
beginning of this section.
The blower motor is mounted to the scroll box assembly
on three isolators and is secured with nuts. It will be
necessary to remove the internal blower assembly from
its installation position to remove the blower motor.
To remove the blower motor, (See Figure 28):
Extract screws from outside edge of scrollbox cover. 1.
Extract screws and 3/8” (9.5) nut from scroll box
weldment and remove from unit.
Remove blower wheel by extracting setscrew secur-2.
ing the blower wheel to blower motor shaft.
From opposite side of assembly, extract 7/16” (11) 3.
nuts securing blower motor to isolators.
Lift motor off of isolators. 4.
To remove isolators, from blower wheel side of as-5.
sembly, use a 3/8” socket or wrench to extract the
bolts securing the isolators to scroll box frame.
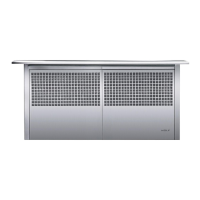
CAPACITOR REMOVAL
NOTE: Refer to all WARNINGS and CAUTIONS at
beginning of this section.
The capacitor is located in the lower left hand corner of
the scroll box assembly and is secured in position by a
bracket and screws.
To remove the capacitor, (See Figure 29):
Extract screws from outside edge of scrollbox cover. 1.
Extract screws and 3/8” (9.5) nut from scroll box
weldment and remove from unit.
Extract bolts securing capacitor bracket to scroll box 2.
assembly. Lift bracket off of capacitor.
Remove rubber cover from capacitor and disconnect 3.
wire leads.
Figure 4-28 Blower Motor Removal
Figure 4-29 Capacitor Removal
Isolator (3)
Scroll Box
Weldment
Set Screw
Capacitor
TO AVOID ELECTRIC SHOCK, POWER TO THE
VENTILATION UNIT MUST BE DISCONNECTED
WHENEVER PERFORMING THE FOLLOWING
REPAIRS.