Access & Removal CT Hoods and DD Ventilation
4-7
Screwdriver
Retaining Clip
TO AVOID ELECTRIC SHOCK, POWER TO THE VENTILATION UNIT MUST BE DISCONNECTED WHENEVER
PERFORMING THE FOLLOWING REPAIRS.
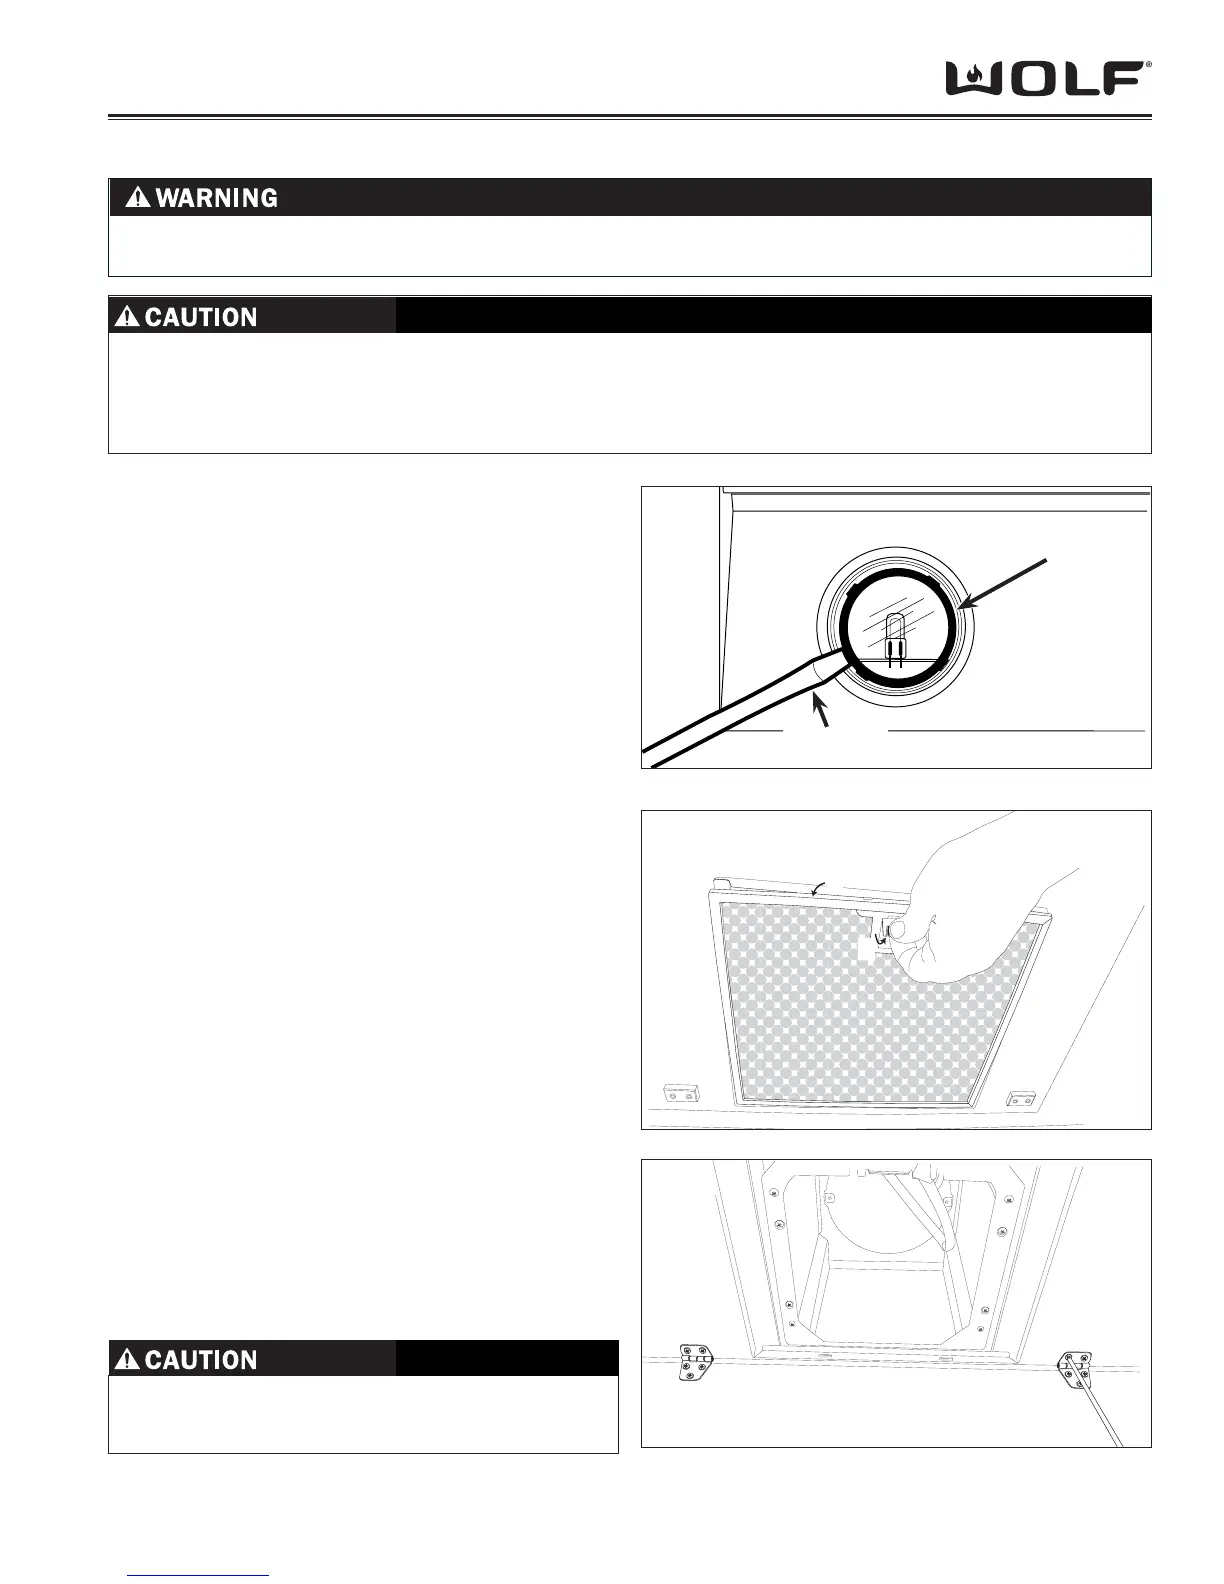
HALOGEN BULB REMOVAL
NOTE: See Caution above.
The halogen bulb may be removed without removing
the lamp assembly. With a small fl at bladed screwdriver
or fi ngernails, pry out metal retaining clip securing the
lens to the lamp assembly, using care not to damage the
retainer or lens. (See Figure 13)
The halogen bulb has two metal electrodes that press
into the socket of the lamp assembly.
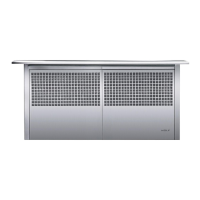
FILTER REMOVAL
Lower the drop plate by pulling down on the front 1.
edge to dislodge it from the snap fasteners and allow
it to hinge down and back.
Place one fi nger under the fi lter latch and pivot the 2.
latch forward and down until the front of the fi lter is
allowed to freely drop out of the fi lter opening.
Lean the fi lter down and out of the 2 slots in the back 3.
of the fi lter opening. (Figure 14)
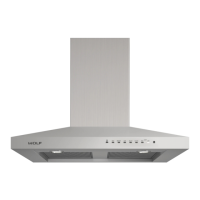
DROP PLATE REMOVAL
Pull down on the front edge of the drop plate to dis-1.
lodge it from the snap fasteners.
Using a Phillips screw driver, remove the (4) hinge 2.
screws as shown in Figure 15.
NOTE: To prevent damage, you will need to support the
plate with one hand while removing the screws with the
other.
HOOD INNER PANEL REMOVAL
Remove Drop Plate and Filter(s). (See previous 1.
page)
MAKE SURE BULB IS COOL BEFORE TOUCHING. HALOGEN BULBS GET HOT INSTANTLY AND ADJA-•
CENT PARTS MAY RETAIN HEAT.
DO NOT TOUCH REPLACEMENT BULB WITH BARE HANDS. USE A PAPER TOWEL OR CLOTH WHEN •
HANDLING BULB TO KEEP OIL FROM FINGERS FROM TOUCHING BULB.
1
2
Figure 4-13 Bulb Lens Removal
Figure 4-14 Filter Removal
Figure 4-15 Drop Plate Hinge Screws
COMPONENT ACCESS AND REMOVAL FOR MODEL CTEW
ALWAYS WEAR GLOVES WHEN HANDLING SHEET
METAL DUE TO THE POSSIBILITY OF SHARP
EDGES.