Access & RemovalCT Hoods and DD Ventilation
4-10
INTERNAL BLOWER REMOVAL (CONTINUED)
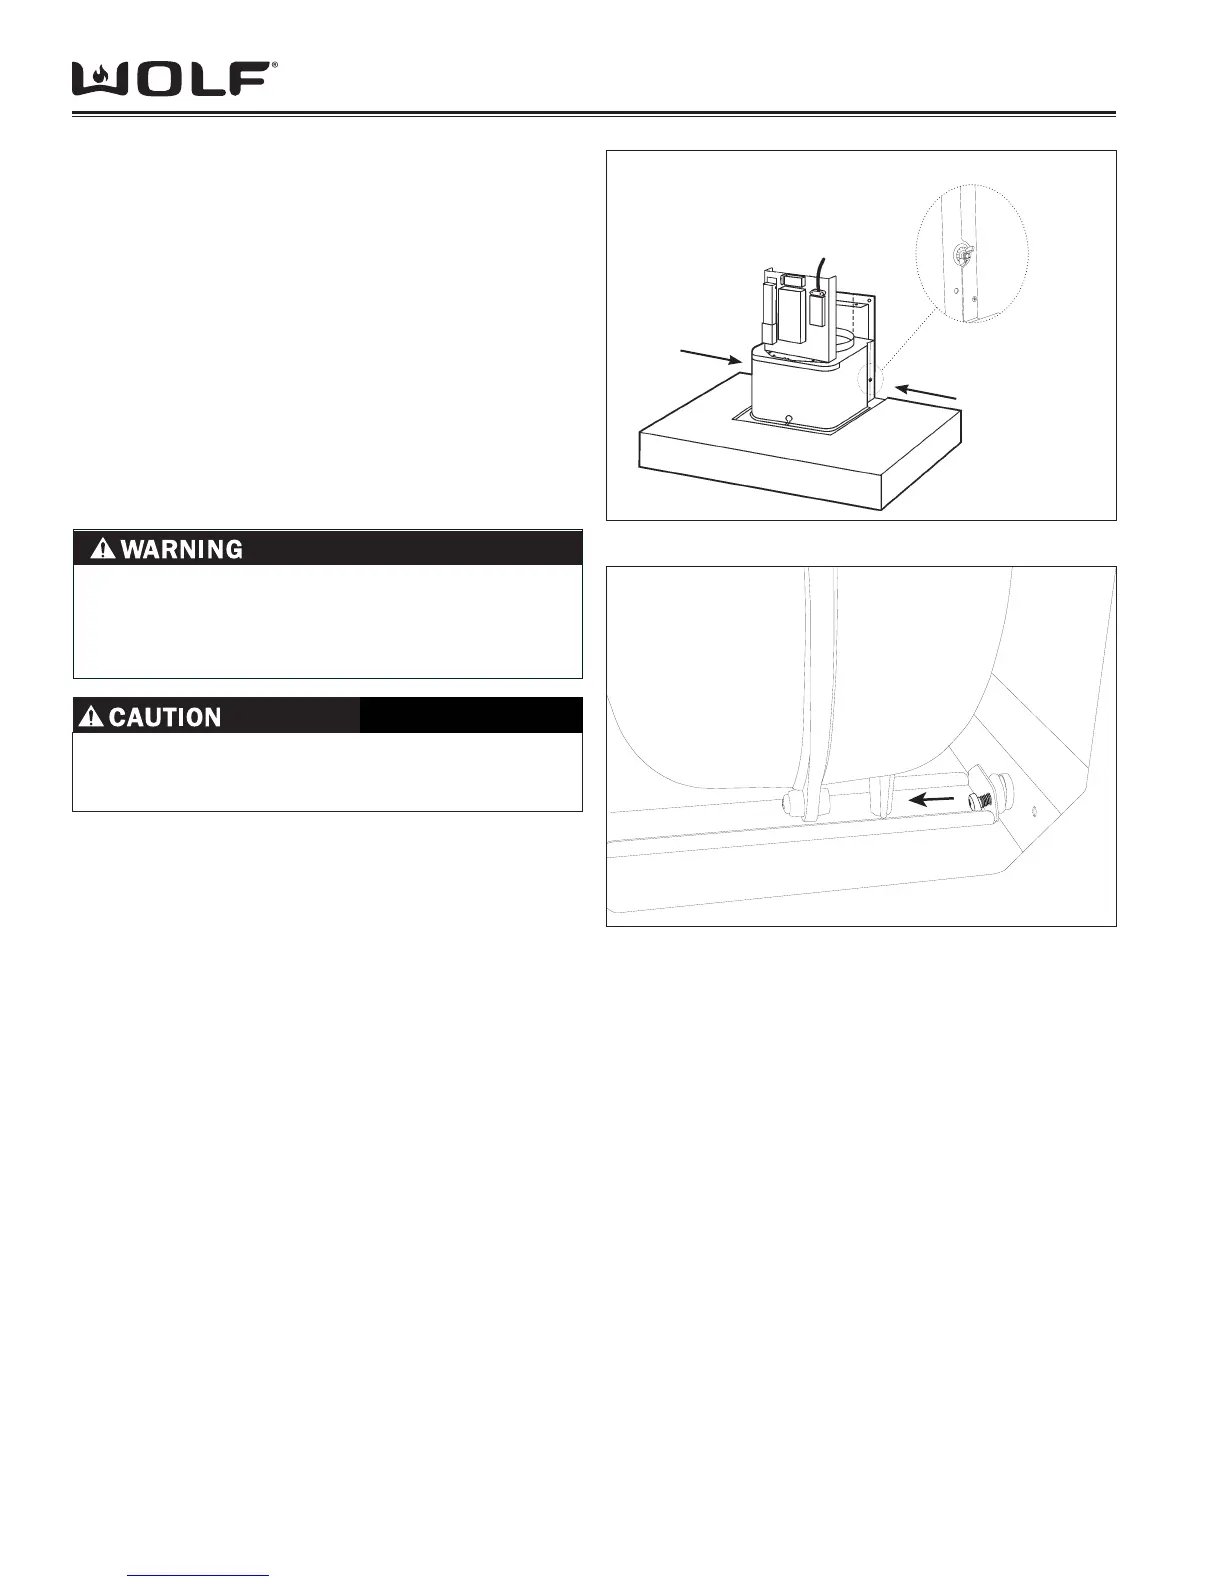
Remove the wing-nuts on either side of the blower 9.
housing. (See Figure 24)
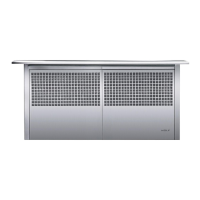
While supporting the blower, remove the screws 10.
(Figure 25). Once the screws are removed the blower
can be lowered out of the hood.
NOTE: You will need to rotate the blower assembly
slightly within the hood to attain the correct
orientation for removal.
NOTE: Do not lose the tubular screw spacers that
are inside of the rubber mounts. These spacers
prevent the possibility of crushing the rubber mount
during reinstallation.
Figure 4-24 Blower Mounting Wing-nuts
Figure 4-25 Blower Mounting Screws
CONTROL BOARD REMOVAL
Disconnect electrical supply. (See 1. WARNING above)
Slide the bottom section of chimney fl ue up to gain 2.
access to the controls. (See Figure 20)
Remove the Control Board housing cover and unplug 3.
electrical connectors.
NOTE: Mark wire connectors as you remove them to
insure proper connection on replacement board.
TO AVOID ELECTRIC SHOCK, POWER TO THE
VENTILATION UNIT MUST BE DISCONNECTED
WHENEVER PERFORMING THE FOLLOWING
REPAIRS.
ALWAYS WEAR GLOVES WHEN HANDLING SHEET
METAL DUE TO THE POSSIBILITY OF SHARP
EDGES.