2-25
Installation Information CT Hoods and DD Ventilation
ADJUSTING BLOWER DISCHARGE
Wolf downdraft systems have an adjustable discharge that
will allow you to negotiate ducting around fl oor joists and
other obstacles. The blower is shipped with the discharge
facing down.
L
EFT TO RIGHT ADJUSTMENT
Adjusting the down discharge left to right will keep the
blower discharge in the down position but allows some
side-to-side adjustment. (See Figure 2-47)
Place the downdraft assembly on its back on a fl at work 1.
surface.
Loosen the 4 nuts and 2 clamp channels.2.
Slide the blower to the desired position.3.
Use the supplied cover plate to close any open space.4.
Tighten nuts to secure the top of blower and use sheet 5.
metal screws through the bottom fl ange to secure the
bottom of the blower.
CHANGING DISCHARGE DIRECTION
Substituting down discharge with left or right discharge will
switch the blower discharge from the down position to the
left or right of downdraft assembly. (See Figure 2-48)
Place the downdraft assembly on its back on a fl at work 1.
surface.
Remove the 4 nuts and 2 clamp channels.2.
Carefully lift the blower and disconnect the motor plug 3.
if necessary. Reposition the blower and reconnect the
motor plug.
Use the supplied cover plate to close any open space.4.
Replace the clamp channels and use the nuts to secure 5.
the blower in its new position.
Use sheet metal screws through the bottom fl ange to 6.
secure the bottom of the blower.
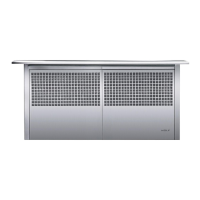
DOWNDRAFT INSTALLATION
MOUNT THE UNIT
Set the downdraft into the opening. Extend the leveling 1.
brackets to the fl oor of the cabinet so the downdraft sits
straight and connect the ductwork.
NOTE: The leveling brackets can be removed and reat-
tached in other positions. The fl ange of the leveling bracket
may have to face inward in tight cabinet installations. Refer
to the illustration below.
Secure the downdraft to the countertop by holding the 2.
downdraft against the back of the countertop cut-out
and tightening the two mounting screws (one on each
end of unit) on the underside of the countertop. (See
Figure 2-49)
Screw the leveling brackets to the bottom of the cabi-3.
net. Tighten the screws holding the leveling brackets to
unit on each side.
Figure 2-47 Left to Right Adjustment
Figure 2-48 Rotating Blower Discharge Direction
Figure 2-49 Mounting Downdraft Into Cabinet