16.4 Crankshaft Connecting Rod Assembly
Removal
Remove left crankcase.
Remove washer and location pin.
Remove drive gear.
Remove the crankshaft connecting rod assembly from the right
crankcase.
* Attention: Please do not hurt washer and closing surface.
Inspection
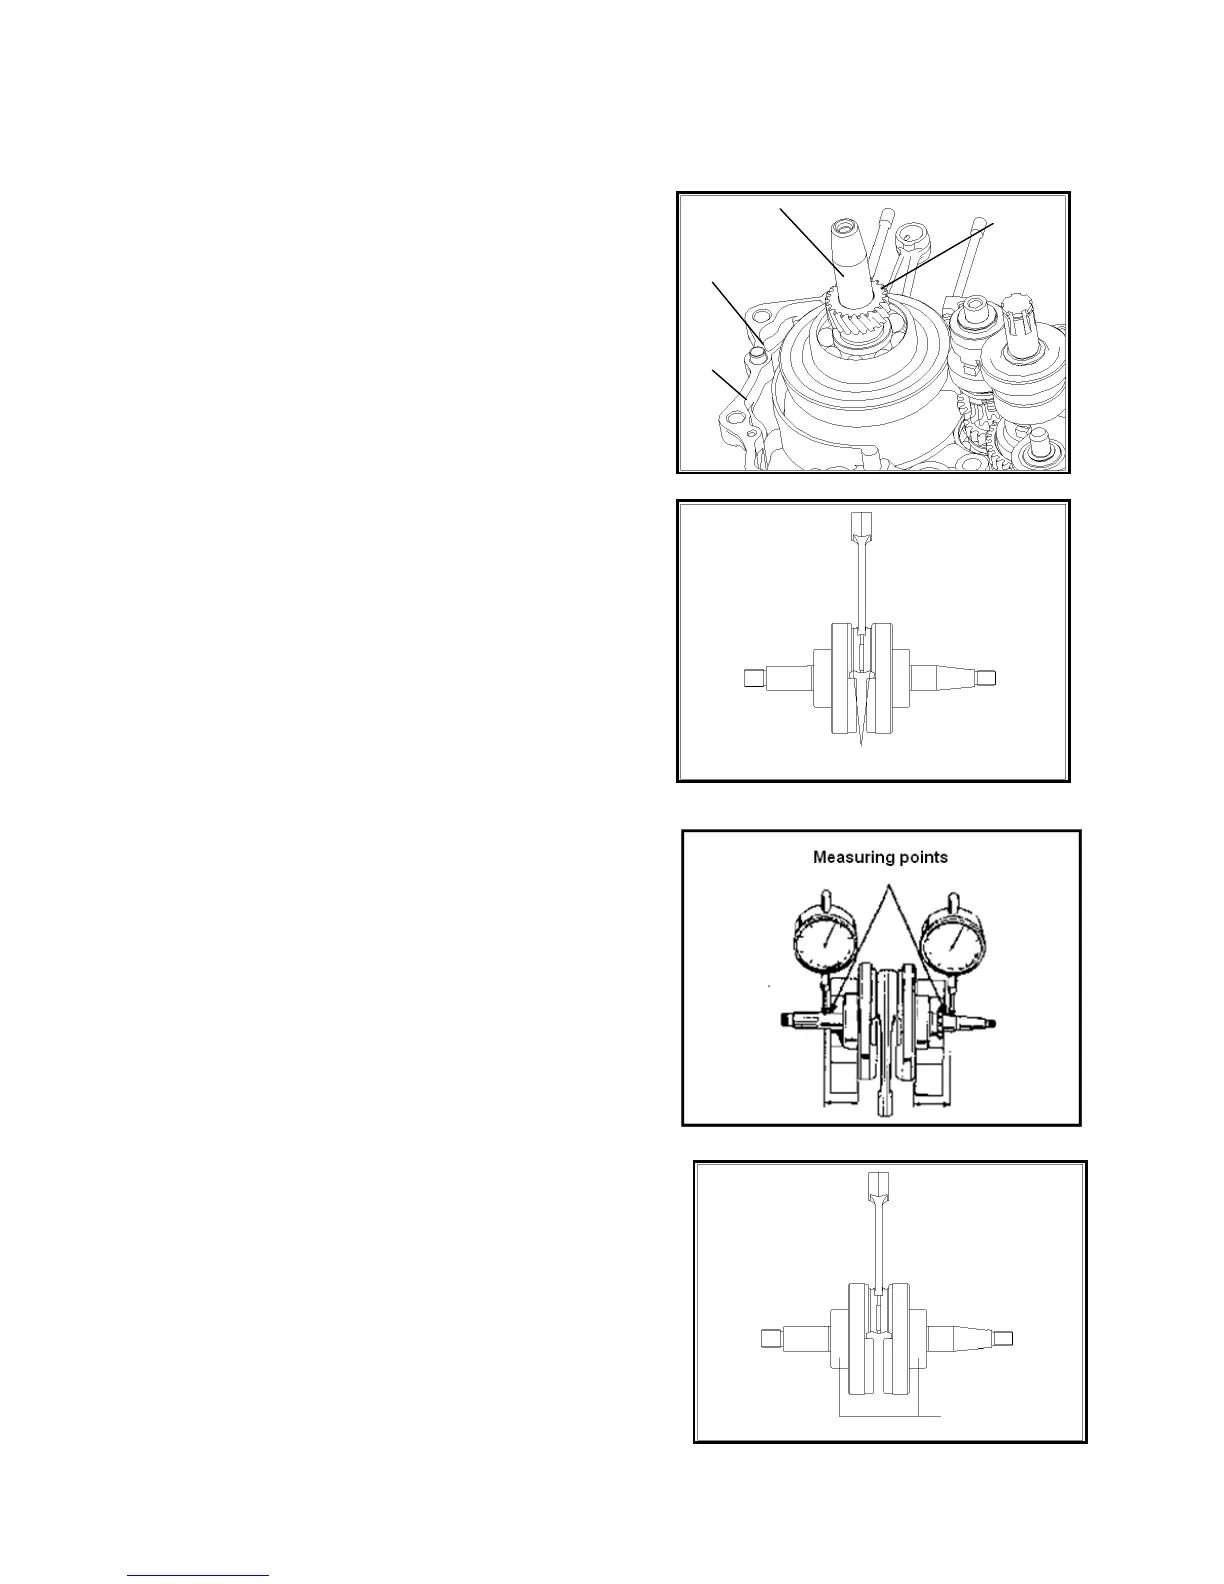
Measure connecting rod big end left-to-right clearance.
Allowable limit: 0.55mm.
Measure connecting rod big end clearance along X-Y direction.
Allowable limit: 0.05mm.
Crankshaft shimmy measurement.
Allowable limit: 0.01mm.
Check if there is abnormal noise and looseness when the
crankshaft is rotating.
If there is, replace the crankshaft.
* Attention:
Install together crankshaft connecting rod assembly and gearshift
mechanism on the crankcase.
Crankshaft connecting
rod assembly
Location pin
Washer
Drive gear
Measuring position of C.R big end
Crankshaft bearing

 Loading...