ELECTRICAL SYSTEM
STW34, STW37, STW40, WSM
9-S26
(12) Safety Switch
Safety Switch Continuity
1. Remove the safety switch leads.
2. Connect the circuit tester to the safety switch leads.
3. Measure the resistance between leads.
4. If the safety switch is defective, replace it.
9Y1211109ELS0030US0
Adjusting Safety Switches
(Safety switch for clutch pedal)
1. Disconnect the safety switch connector and remove the safety
switch (2) once.
2. Fully depress the clutch pedal and hold it.
3. Connect the leads of the ohmmeter to the safety switch lead
terminal.
4. Screw in the safety switch (2) until the ohmmeter begins to show
0 ohm.
5. Further screw in the safety switch by 1/2 turn and tighten the
lock nut (1).
(Safety switch for HST)
1. Disconnect the safety switch connector (3) and remove the
safety switch (4) once.
2. Set the HST at neutral position.
3. Connect the leads of the ohmmeter to the safety switch lead
terminal.
4. Screw in the safety switch (4) until the ohmmeter begins to show
0 ohm.
5. Further screw in the safety switch by 1/2 turn and tighten the
lock nut (5).
9Y1211109ELS0031US0
Seat Switch Continuity Check
1. Disconnect the seat switch leads.
2. Connect the circuit tester leads to the seat switch terminals.
(When seat switch is not pushed)
1. Measure the resistance between terminals.
2. If the continuity is not infinity, the switch is faulty, replace it.
(When seat switch is pushed)
1. Measure the resistance between terminals.
2. If the continuity is not 0 Ω, the switch is faulty, replace it.
9Y1211109ELS0032US0
Resistance Across
switch terminal
When switch push is
pushed
0 Ω
When switch push is
released
Infinity
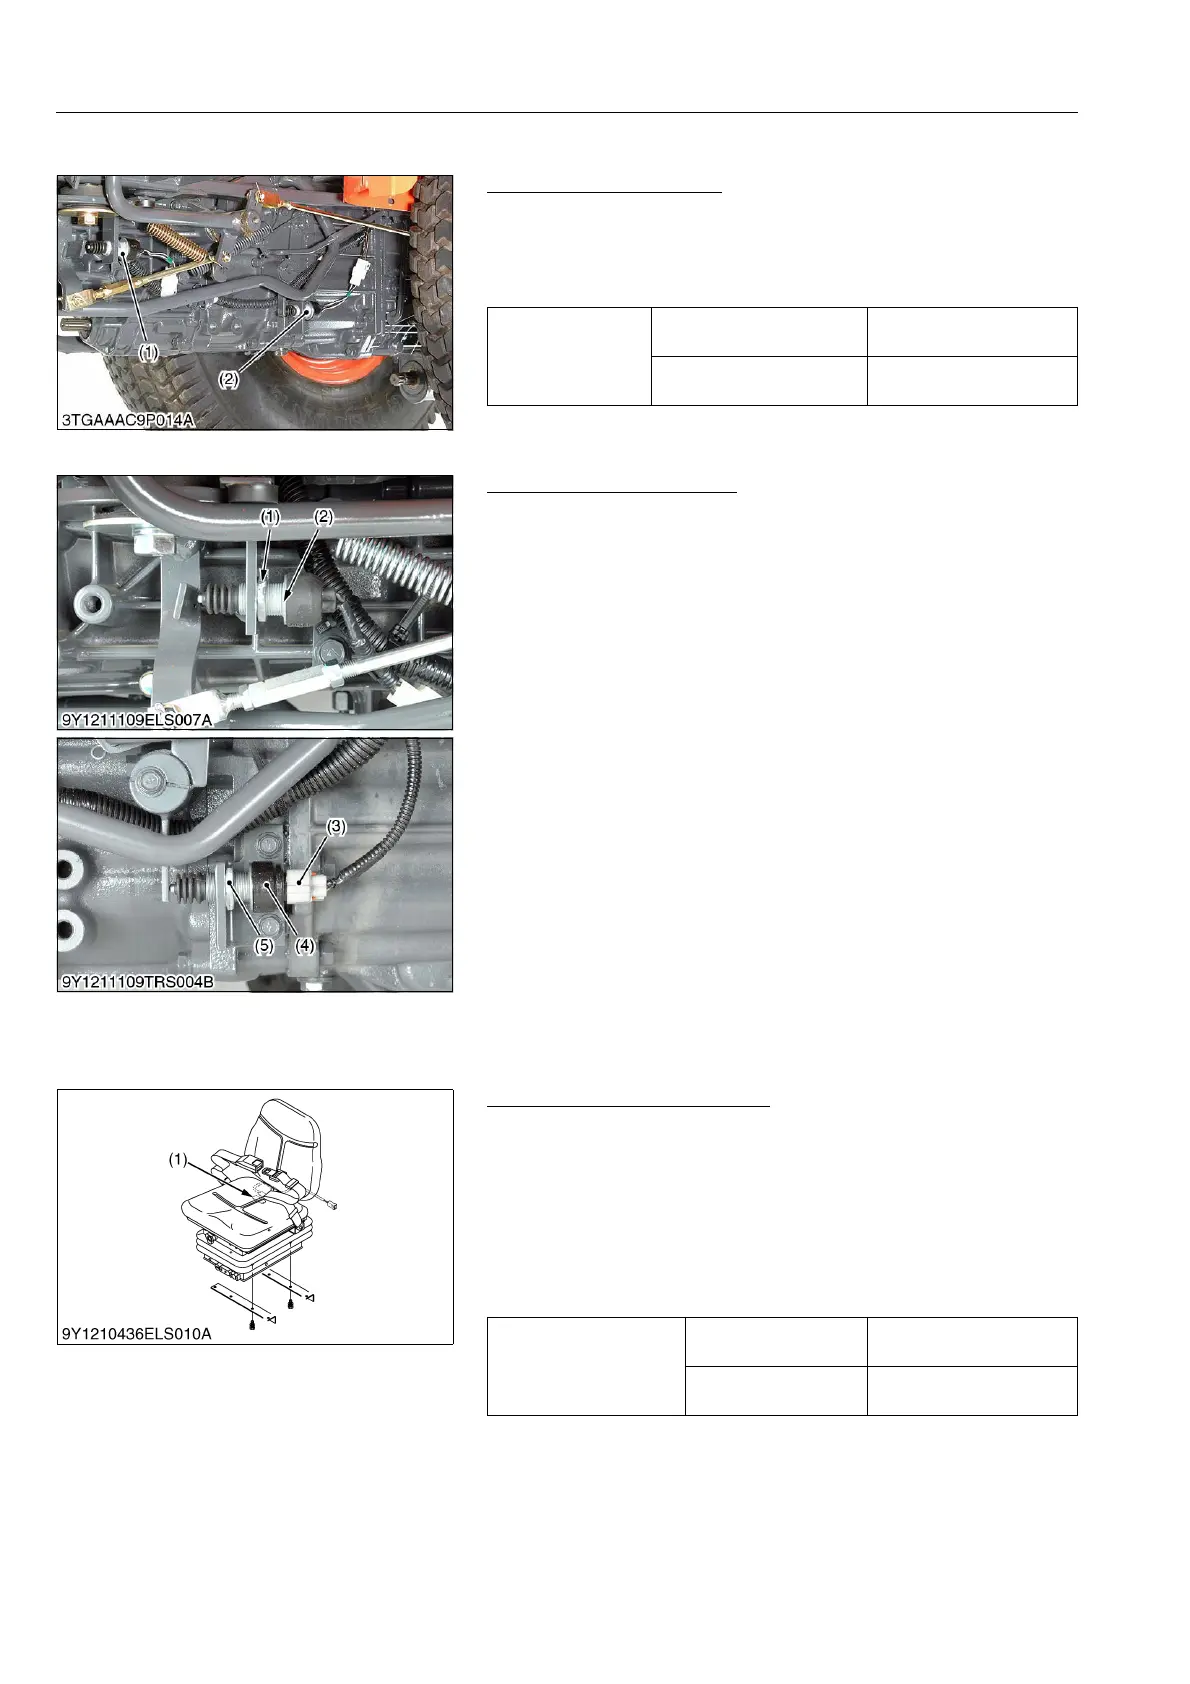
(1) Safety Switch for Clutch Pedal (2) Safety Switch for HST
(1) Lock Nut
(2) Safety Switch (for Clutch Pedal)
(3) Connector
(4) Safety Switch (for HST)
(5) Lock Nut
Resistance
When seat switch is
not pushed
Infinity
When seat switch is
pushed
0 Ω
(1) Seat Switch



 To Next Page