EasyManua.ls Logo

Wunder-Bar JoeTap NITCOM - Page 18

Default Icon
95 pages
Print Icon
To Next Page IconTo Next Page
To Previous Page IconTo Previous Page
Loading...
Page | 18
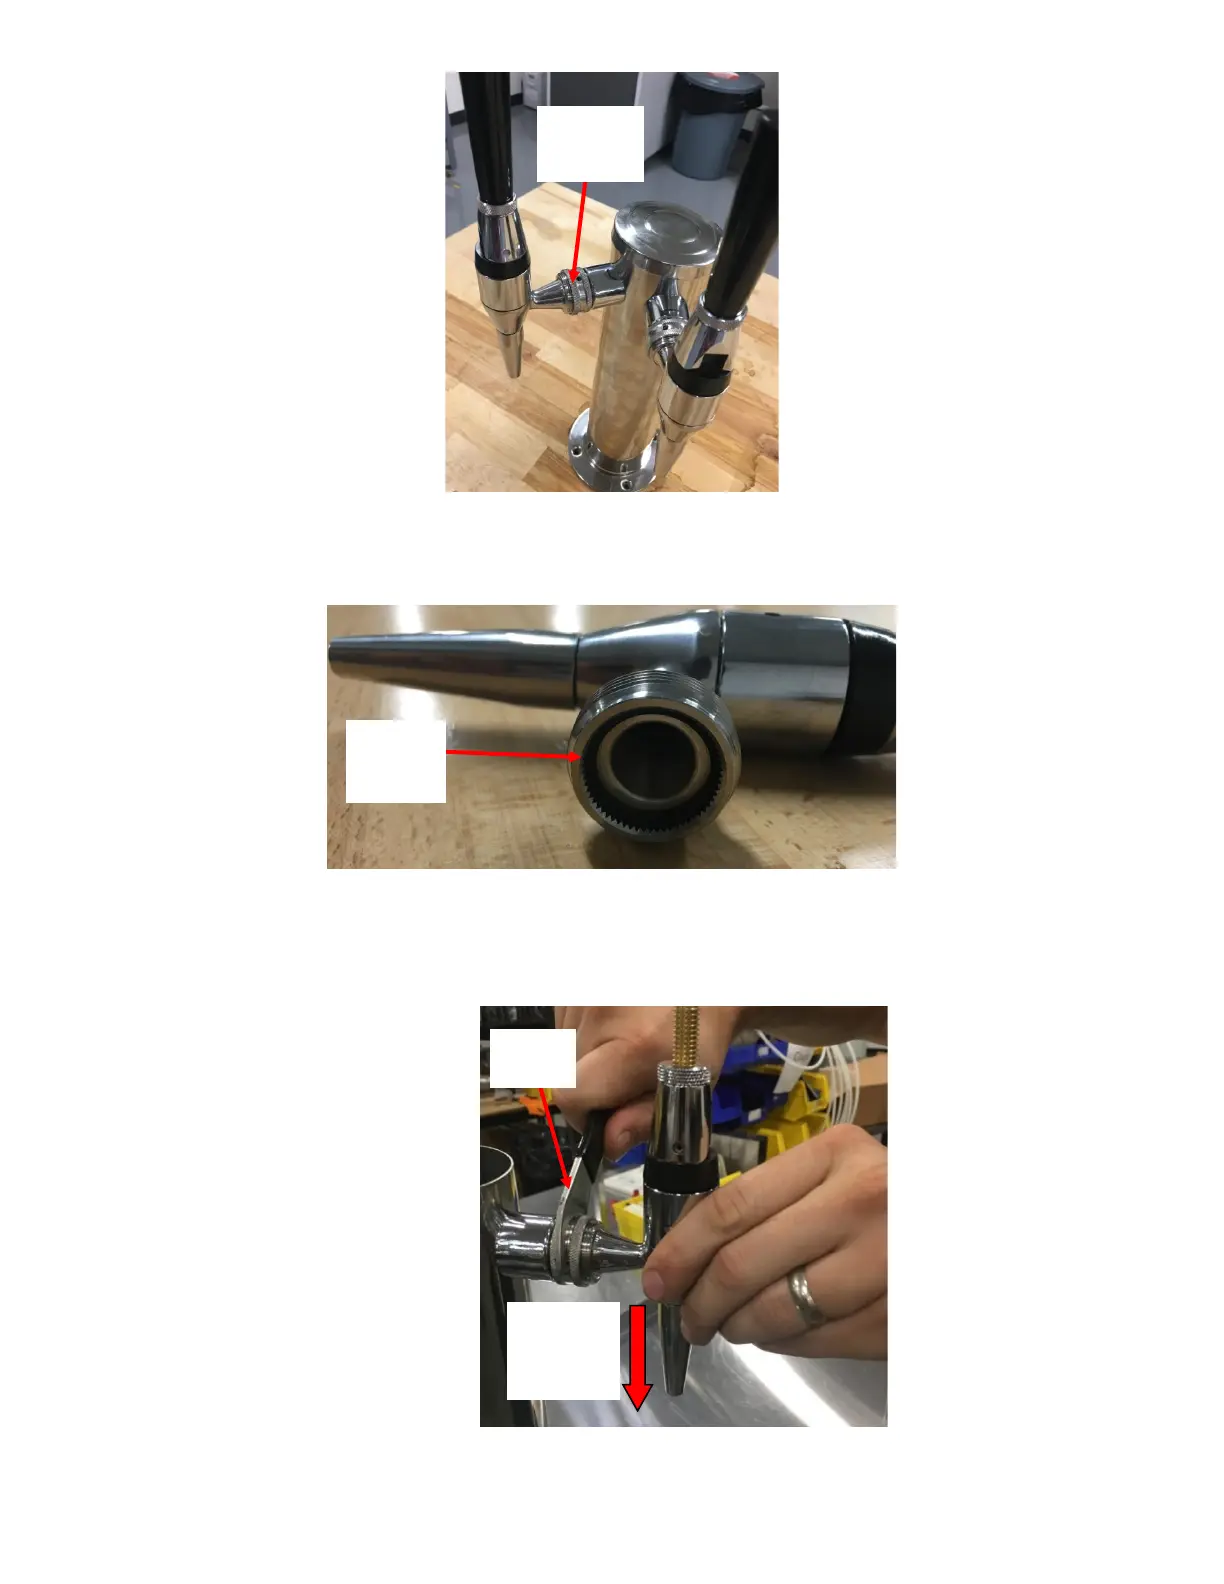
a. Remove the Faucet to verify that the Faucet has a O-Ring in it. If no O-Ring is present, then install a new O-
Ring or a new Faucet depending on availability. See Figure 34.
b. Use the Faucet Wrench to tighten the Faucet securely in place. Ensure that the nozzle opening is facing
downwards. Insert the pin on the Faucet Wrench in the opening on the Shank Nut and apply leverage to
tighten the Shank Nut. See Figure 35.
Figure 35: Install Faucet with Nozzle facing downwards.
Tighten the Shank Nut with Shank Wrench
Nozzle
Opening
pointing
Downwards
Faucet
Wrench
Ensure O-
Ring is
Present
Figure 34: Faucet O-Ring.
Leak from
this
Connection
Figure 33: Locknut on Faucet shown.

Table of Contents

Related product manuals