Page | 61
Appendix G: Nitrogen Line Solenoid Replacement
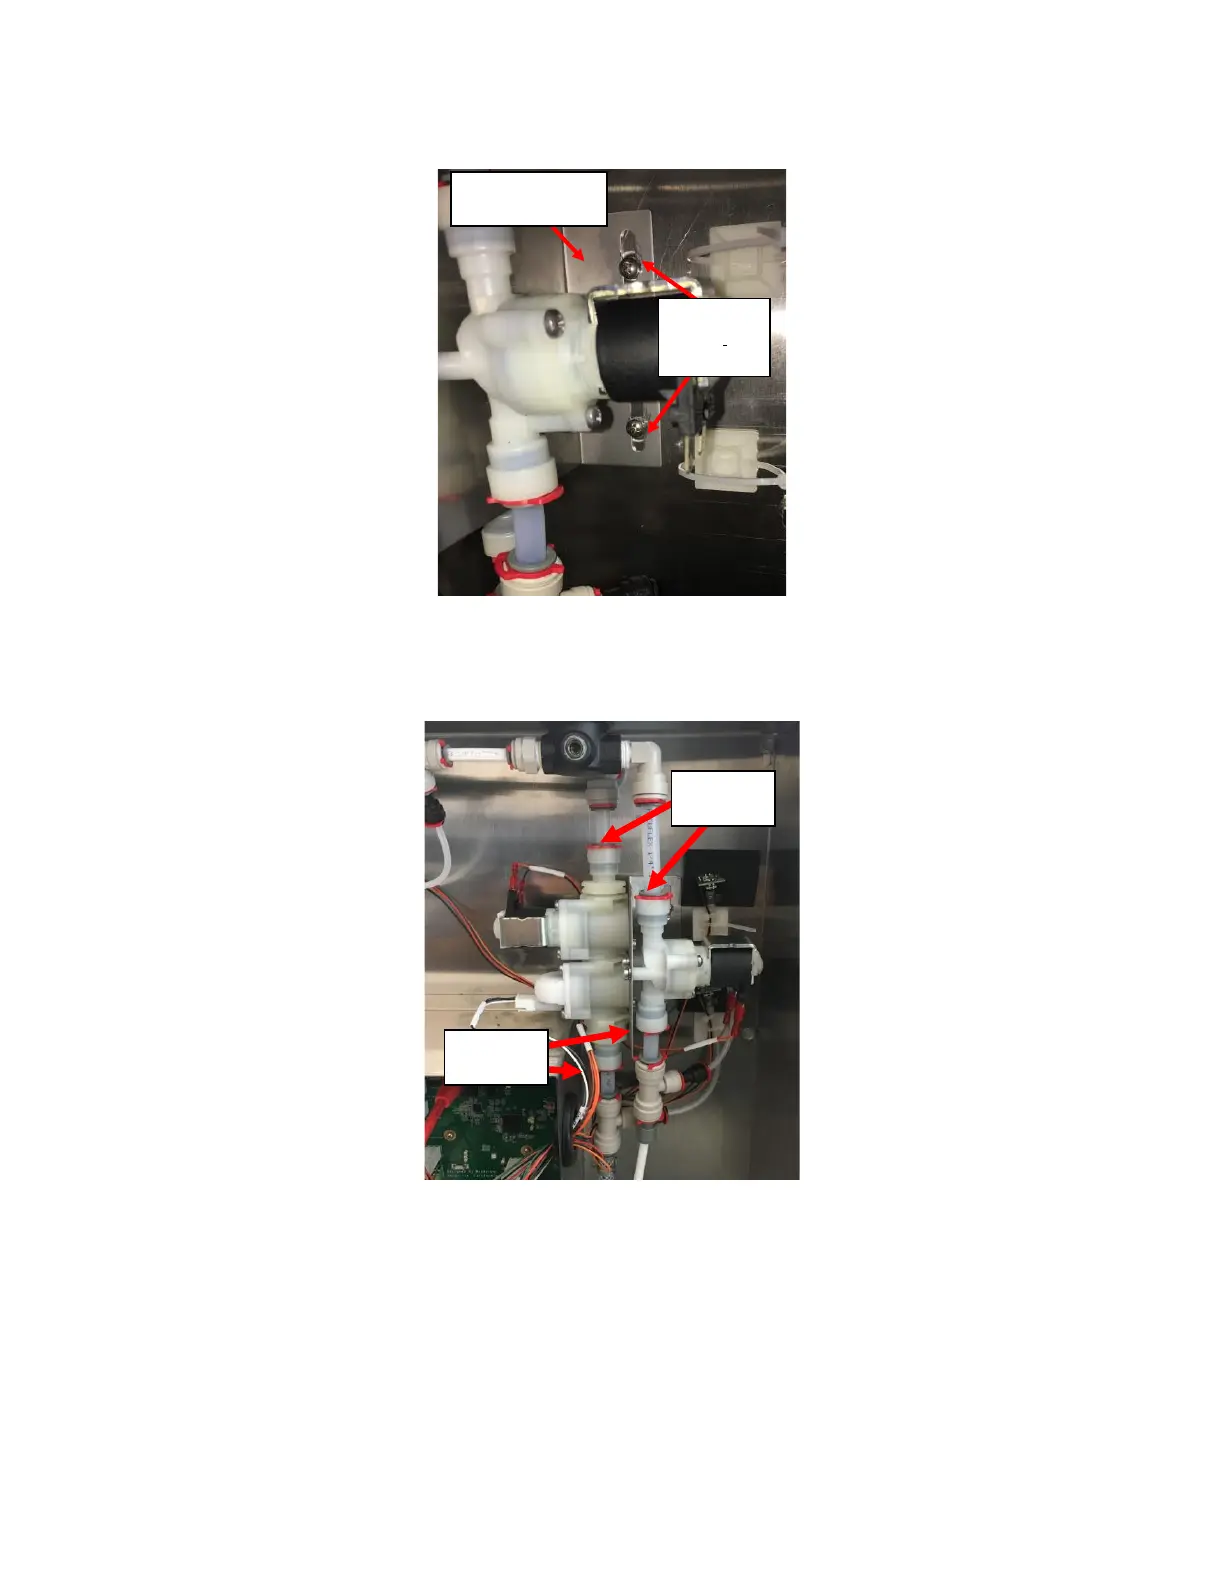
1. Remove the two screws (8-32) holding the flowmeter-solenoid bracket in place. See Figure G1.
2. Remove all four locking clips holding the Flowmeter/Solenoid Module on the bottom end of the Solenoid Flowmeter
Module and remove the 3/8” tube from it. See Figure G2.
3. Remove the Solenoid Flowmeter Module, Bracket, and Solenoid from the Rear Enclosure.
4. Remove the Solenoid Flowmeter Module from the bracket by removing the two screws and split washer holding it in
place with a T20 Drive Screwdriver. See Figure G3.