EasyManua.ls Logo

Wunder-Bar JoeTap NITCOM - Page 62

Default Icon
95 pages
Print Icon
To Next Page IconTo Next Page
To Previous Page IconTo Previous Page
Loading...
Page | 62
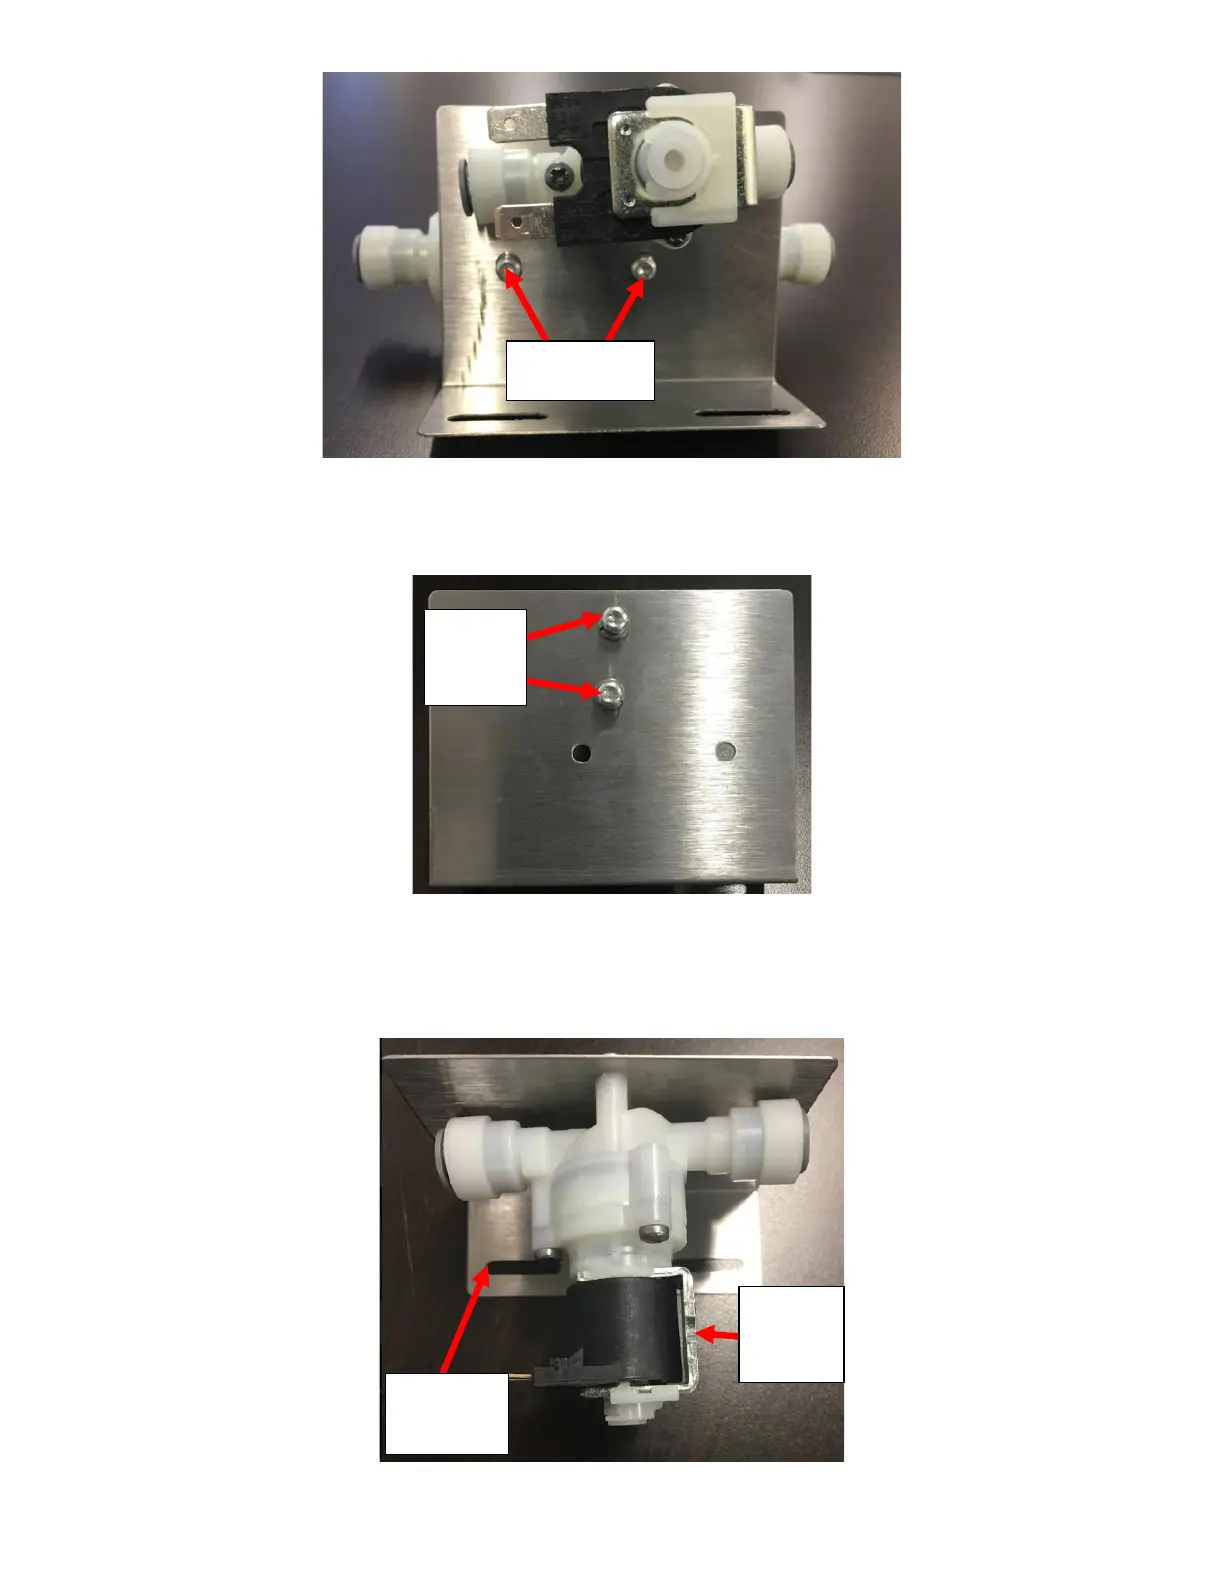
5. Remove the Solenoid from the bracket by removing the two screws and split washer holding it in place with a T20
Drive Screwdriver. See Figure G4.
6. Replace the Solenoid with a new unit. Remember to reinstall the split washer removed when reinstalling the new
Solenoid to prevent it from getting damaged. The Solenoid should be installed so that the U-Bracket on the Solenoid
is on the Right with the bracket flange facing towards you. See Figure G5.
Remove with T-
20 Screw Driver
Remove
with T-20
Screw
Driver
Solenoid
U-Bracket
on RIGHT
SIDE
Bracket
Flange facing
towards you
Figure G3: Screws Shown.
Figure G4: Screws Shown.
Figure G5: Orientation Shown.

Table of Contents

Related product manuals