Page | 8
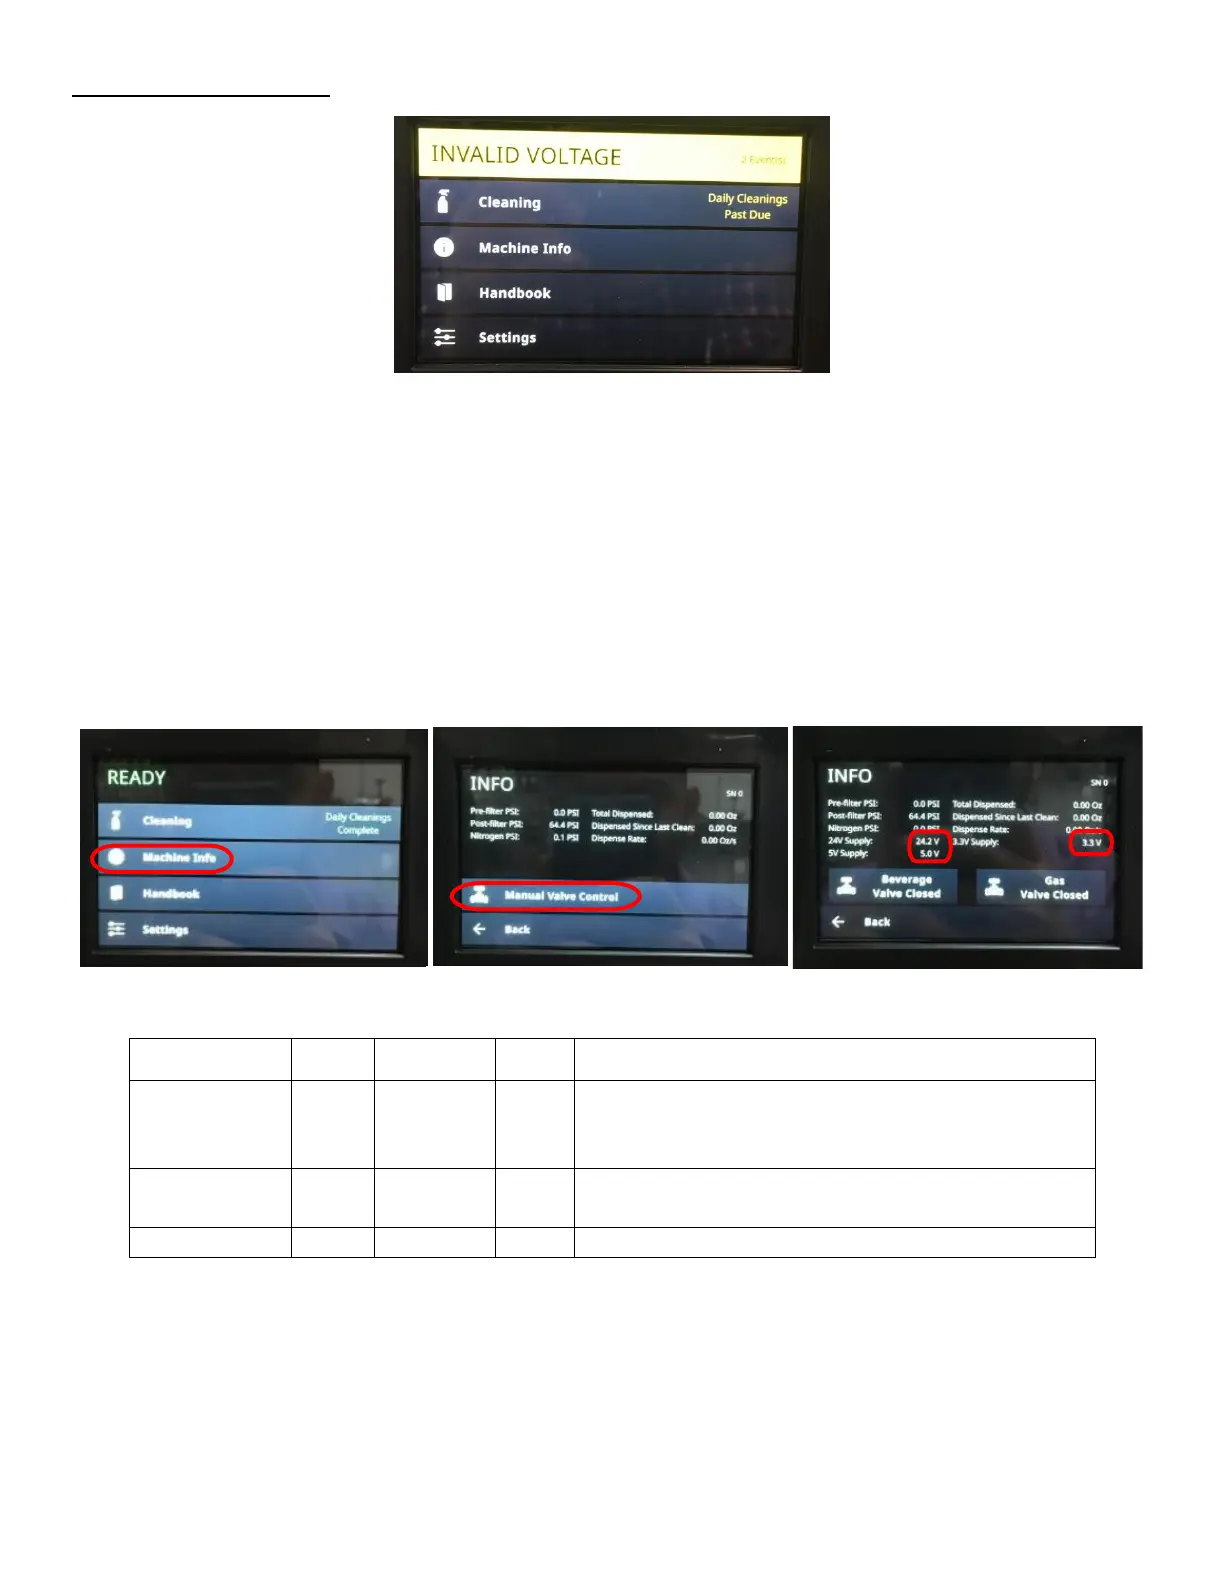
Symptom 3: Invalid Voltage:
1. If Invalid Voltage is accompanied with Communication Down check that the Ethernet Cable is plugged in. See
Symptom 4: Communication Down for more details.
2. Verify if the correct voltage is read:
a. Navigate Display Screen to Manual Valve Control.
i. Select MACHINE INFO. See Figure 10.
ii. Select MANUAL VALVE CONTROL. See Figure 11.
iii. Enter passcode 2186 and select enter.
b. Verify reading on touchscreen of “24V, 5V, 3.3V” Supply is within tolerances on. See Figure 12 and Figure
13. If all voltages are within tolerance, restart the Fridge (Unplug and plug back in) and check the voltage
again. If issue persists, update the software. Refer to Appendix F: Software Update.
c. If there is a voltage reading but is on incorrect setting, remove the Rear Enclosure Cover Panel and locate
the potentiometer on the power supply. Turn the potentiometer with a Phillips Head Screwdriver to adjust
the voltage to 24V with a tolerance of +/- 0.5V. See Figure 14.
Screen Harness - Green Connector
Power Supply - Output Terminals
PCB Power Input - Green Terminal
Pressure Transducer - Black and Red Pins in Connector
Flowmeter Harness - Black and Gray Pins in Connector