Page | 23
4. Replacing the Check Valve: If access is limited Refer to Appendix I: Disassembling The Tower to see how to
disassemble and reassemble the Tower.
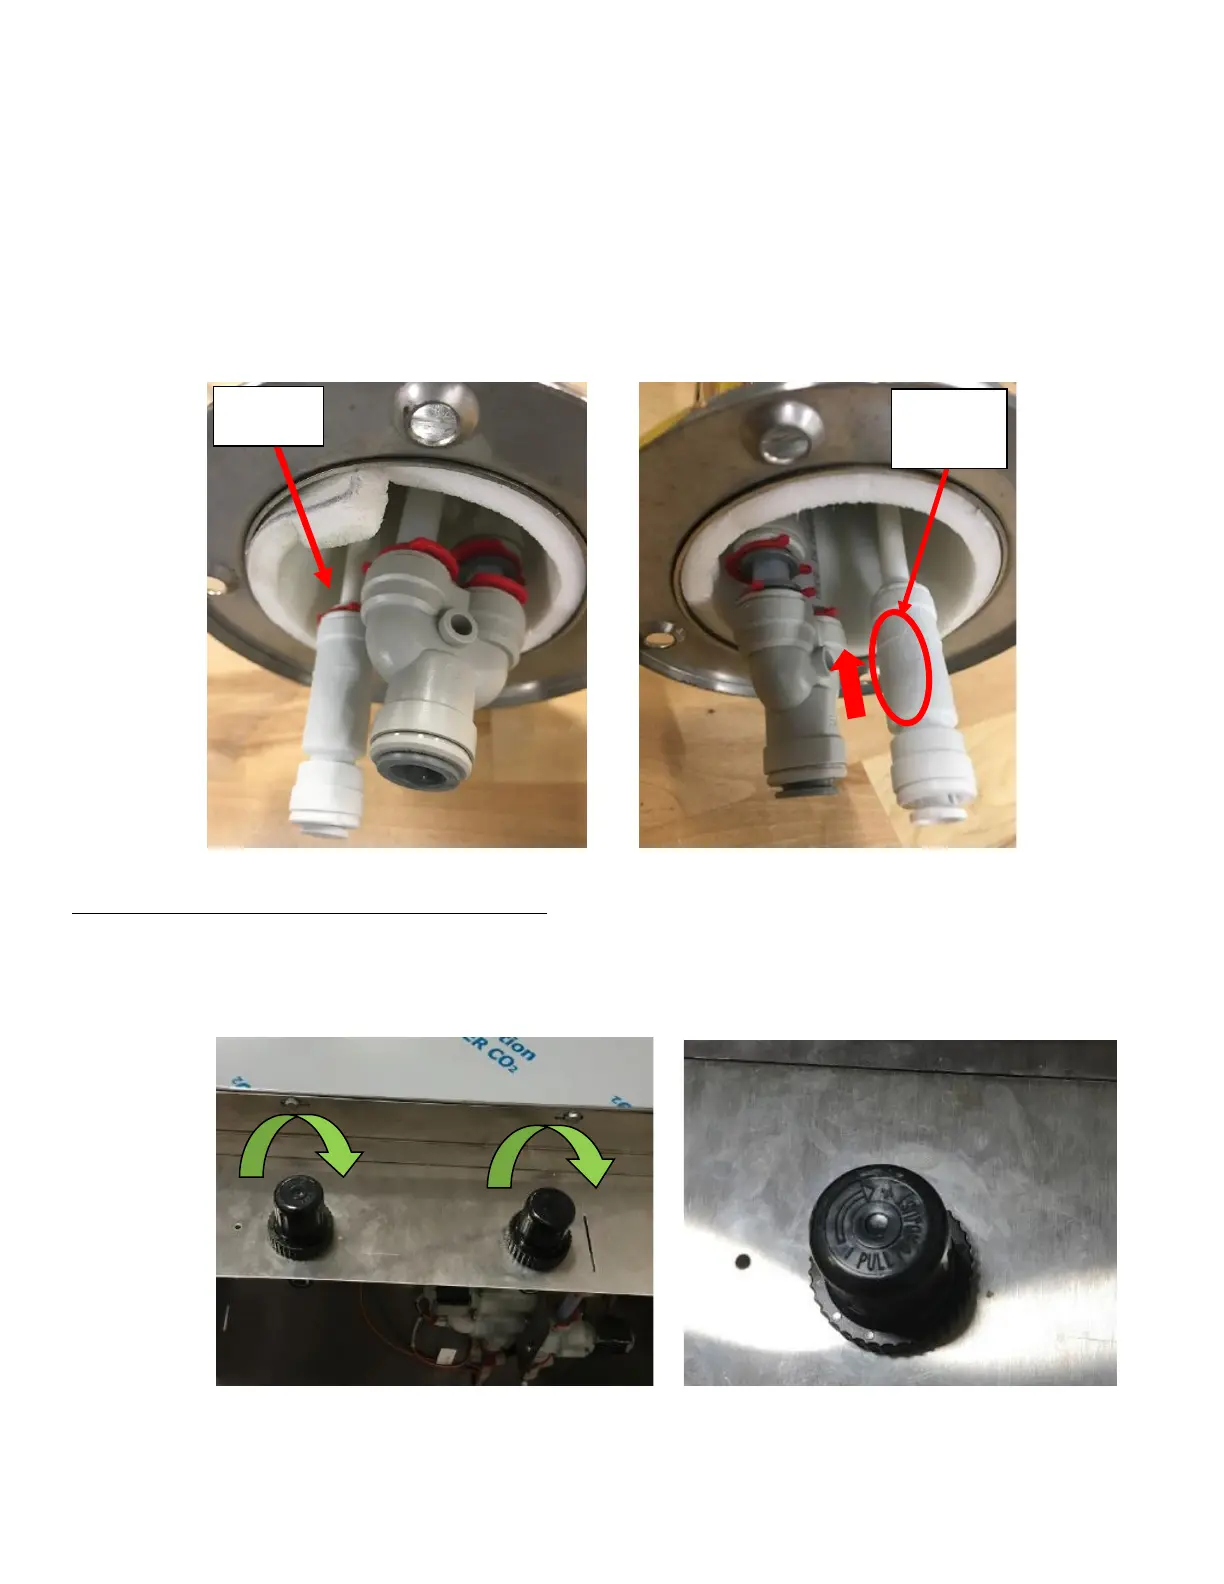
a. Remove the Locking Clip from the Check Valve. See Figure 45a.
b. Remove the Check Valve by pulling on the collet on the Check Valve. See Appendix D: John Guest Speed Fit
Guide for reference.
c. Replace the Check Valve:
i. Ensure the arrow on the check valve is facing UP into the tower towards the faucets. See Figure 45b.
ii. Seat the tubing fully into the Check Valve. Support the tubing with one hand and firmly push down on
the check valve. You will feel it push past the O-Ring. The tubing must be seated past the O-ring within
the check valve. See Appendix D: John Guest Speed Fit Guide for reference.
d. Replace red clip where the tubing and check valve meet.
Symptom 11: Gas Leak/Generator keeps Turning On
1. Check the connection at the Nitrogen Generator to make sure that it is not that the source of the leak.
2. Once verified that leak is in the NITCOM Unit, Power the unit off by unplugging it from the wall. Then remove the
Regulator Cover and turn both Regulators to its max pressure. See Figure 46a and Figure 46b.