Page | 14
Symptom 7: Lockout:
1. Run weekly cleaning cycle. If cleaning cycle fails to complete go to Symptom 2: Unit Stuck in Cleaning Cycle.
2. If issue persists, update the software and run another weekly cycle. Refer to Appendix E: Software Update
Instructions.
3. If updating the software does not resolve the issue, replace the Touch Screen.
4. If replacing the Touch Screen does not resolve the issue, replace the PCB.
5. If previous steps do not resolve the issue, manually reset data through settings. This will get the unit up and
running until root problem is found out or replacement unit is sent:
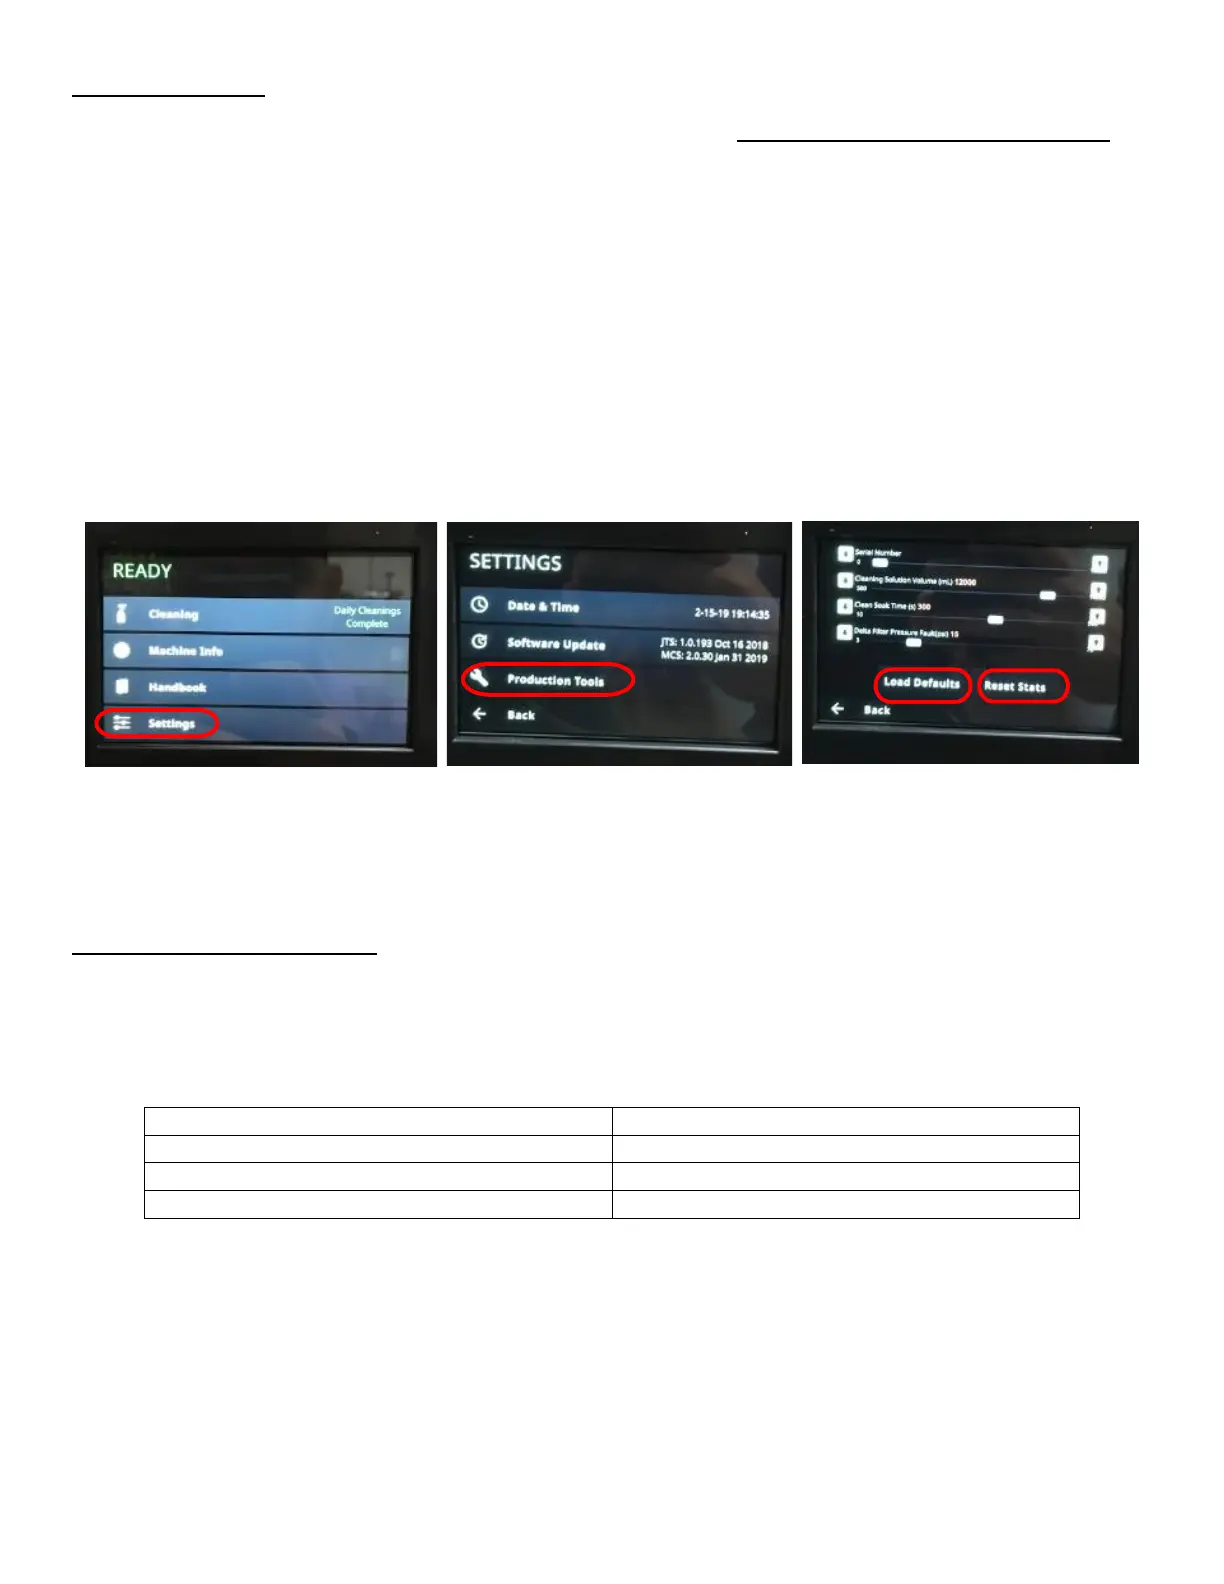
a. From Home Screen select Settings. See Figure 25a.
b. Enter passcode 2186.
c. Select PRODUCTION TOOLS. See Figure 25b.
d. Enter passcode 2186.
e. Select LOAD DEFAULTS. See Figure 25c.
f. Select RESET STATS. See Figure 25c.
g. Select BACK. See Figure 25c.
h. Select BACK. See Figure 25b.
i. Wait until READY indicator appears at top of screen. See Figure 25a.
Symptom 8: Incorrect Foam Level
1. If foam level is too high/low, check the pressure setting and set it to the settings as shown in table 1. If the foam
height is between ¼”- ½” then the system is functioning properly. If customer requests more foam still, adjust
the nitrogen pressure up. If the customer requests less foam still, adjust the nitrogen pressure down. See Figure
26:
a. Select Machine Info from the Home Page to see the pressure readings from the Pressure Transducers. See
Figure 26a and Figure 26b.
b. Turn the Regulator Knobs on top of the Rear Enclosure while monitoring the touch screen until proper
pressures are seen. See Figure 26c.
c. If pressure is not changing on the screen when adjusting, refer to Appendix I: Verify Pressure Transducer
Functionality to check if the Pressure Transducers are malfunctioning.