Page | 28
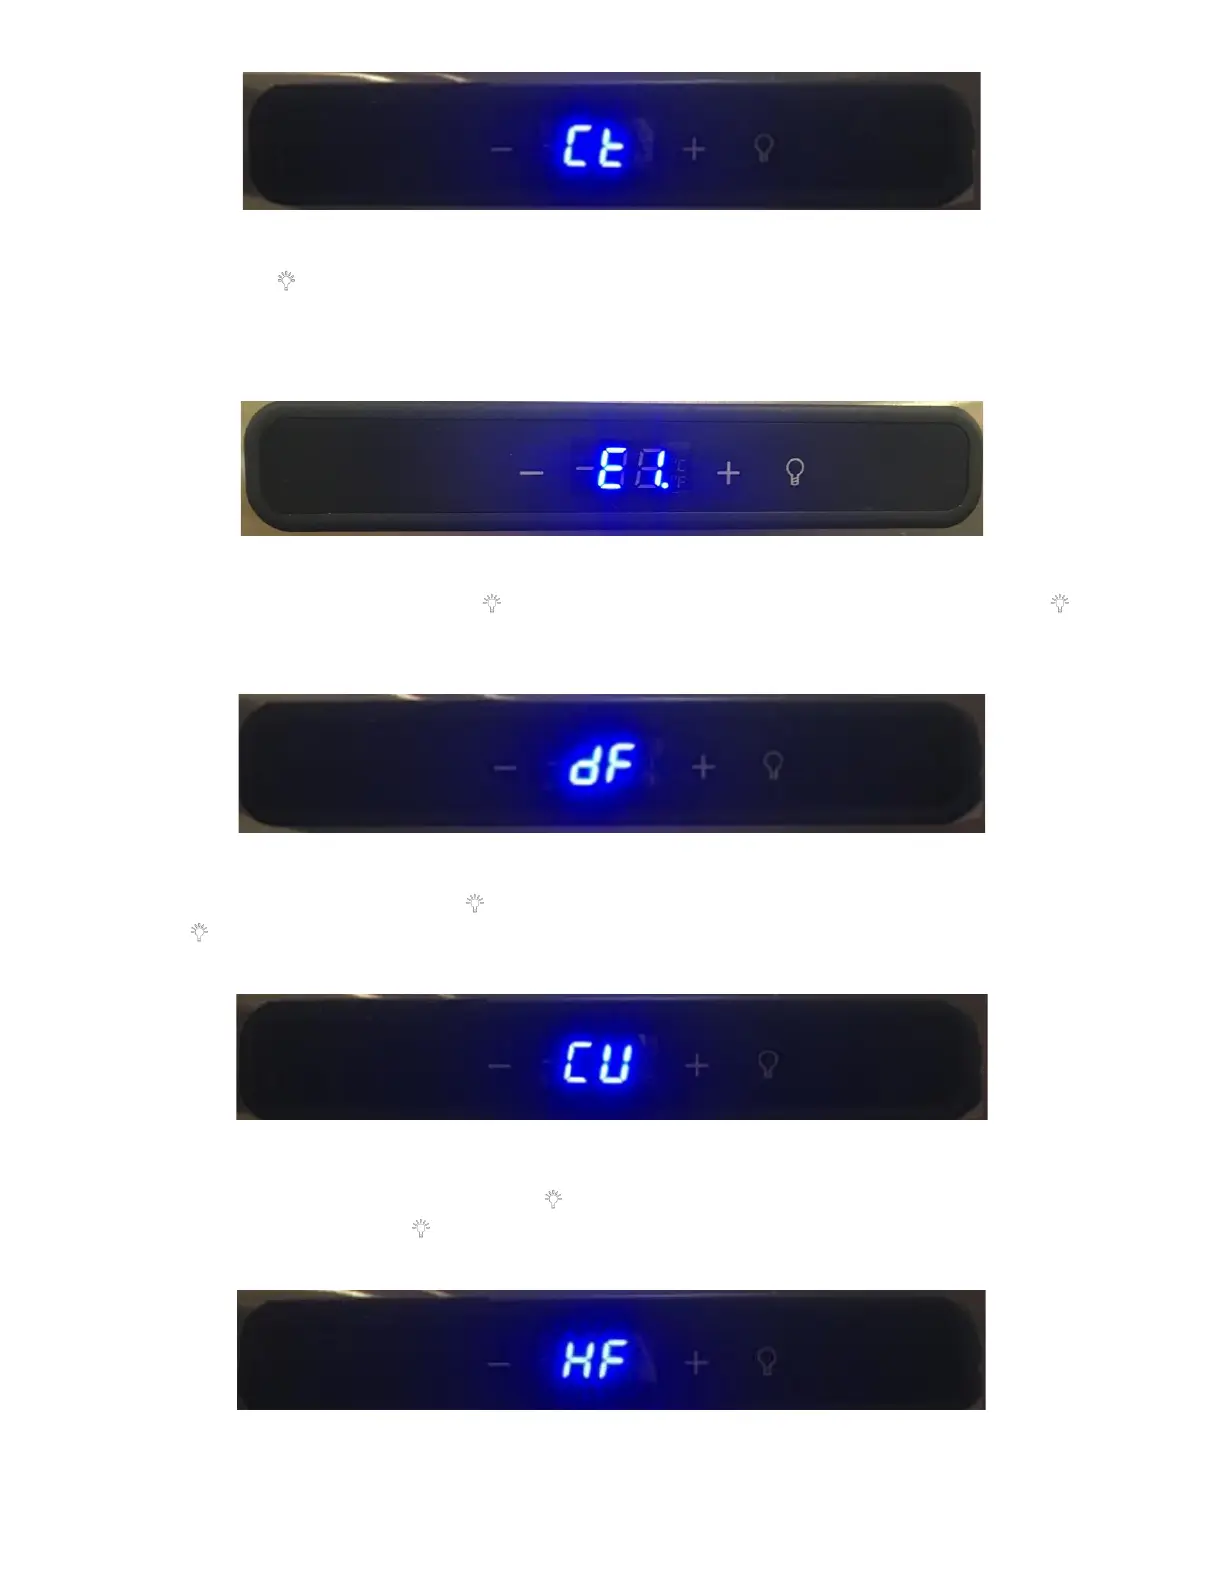
b. Press the “ ” key once, it will display the Current Temperature the unit is running at. Verify that the
temperature is displayed. If the temperature is not displayed, there is an issue with the fridge thermistor. In
this case the display will show E1. See Figure 57. This would indicate a malfunctioning Thermistor, replace
the Thermistor. See Appendix L: Fridge Thermistor Replacement Procedure for directions.
c. Defrost Duration (dF): Press the “ ’’ key once, it will display “dF” (means defrosting). Press the “ ” key
once again, it will display “00-99” minutes of the Defrost Duration. Use the “+” key to increase the time or
reduce the time by pressing the “-” key to adjust the Defrost Duration to 60mins. See Figure 58.
d. Defrost Period (CU): Press the “ ’’ key once, it will display the “CU” (means Accumulation). Then press the
“ ’’ key once again, it will display “00-99” minutes of current Defrost Period. Press the “+” and “-” key to
adjust Defrost Period to 06. See Figure 59.
e. Offset Temperature set (HF): Press the “ ’’ key once again, it will display the “HF” (means set Offset
Temperature). Press the “ ’’ key once again, it will display the Offset Temperature (range -20℉~20℉).
Press the “+” and “-” key to adjust Offset Temperature to 04. See Figure 60.