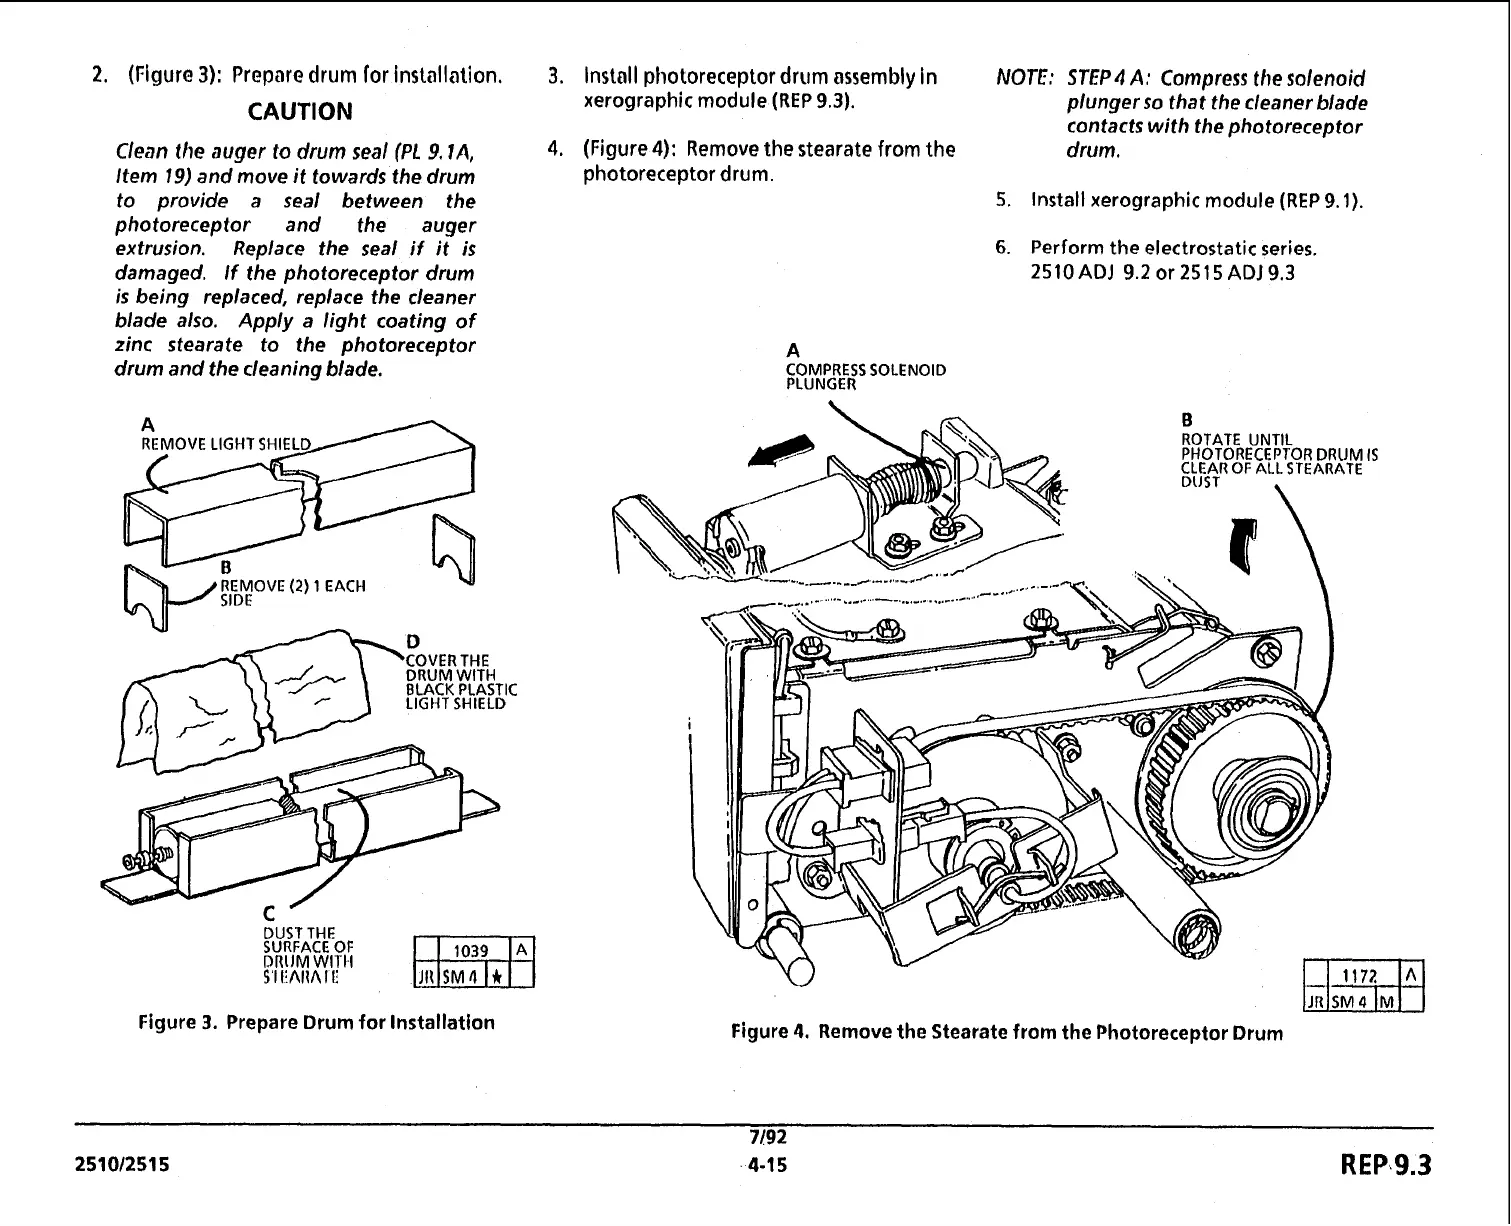
2.
(Figure
3):
Prepare
drum
lor installation,
CAUTION
Clean
the
auger
to
drum
seal
(PL
9,1A,
Item
19)
and move
it
towards the drum
to provide a seal between the
photoreceptor and the auger
extrusion. Replace the seal if it is
damaged. If the photoreceptor drum
is being replaced, replace the cleaner
blade also. Apply a light coating of
zinc
stearate to the photoreceptor
drum and the cleaning blade.
1\p
F:$ovE
(2)
1
EACH
VI
BLACK PLASTIC
LIGHT SHIELD
DUST THE
SURFACE OF
DRUM
WITH
S'l
IiAIIA
I II
Figure
3.
Prepare Drum for Installation
3.
Install photoreceptor drum assembly in
NOTE:
STEP4
A:
Compress the
solenoid
xerographic module
(REP
9.3).
plunger so that the cleaner blade
contacts with the photoreceptor
4.
(Figure
4):
Remove the stearate from the drum.
photoreceptor drum.
5.
Install
xerographic module
(REP
9.1).
6.
Perform the electrostatic series.
2510 ADJ 9.2
or
251 5 AD1 9.3
A
COMPRESS SOLENOID
PLUNGER
ROTATE UNTIL
PHOTORECEPTOR DRUM
IS
CLEAR OF ALL STEARATE
1172
IR
JR SM4
]MI
Figure
4.
Remove the Stearate from the Photoreceptor Drum
 Loading...


