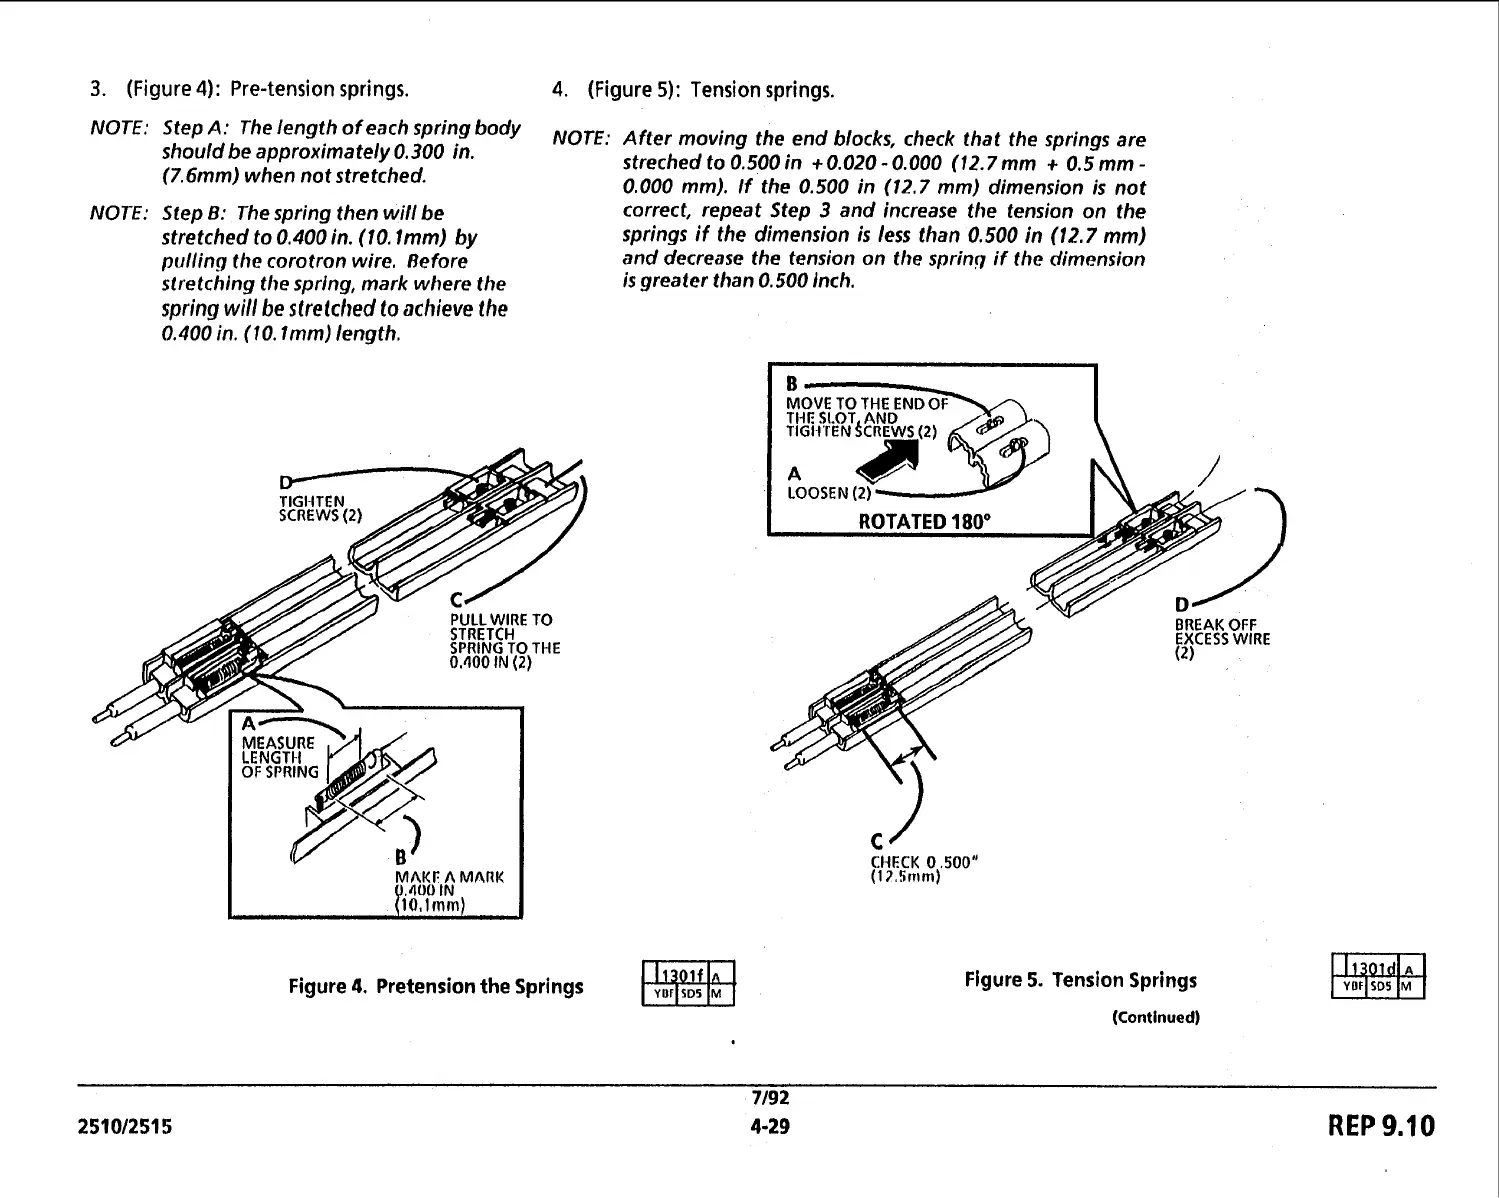
3.
(Figure
4):
Pre-tension springs.
4.
(Figure
5):
Tension springs.
Step
A:
The
length
of
each
spring
body
NOTE: After moving the end blocks, check that the spring are
should be approximately 0.300 in.
(7.6mm) when not stretched.
NOTE: Step
B:
The spring then will be
stretched to 0.400 in. (10. Imm) by
pulling the corotron wire. Refore
stretching the sprlng, mark where the
spring will be stretched to achieve the
0.400 in. (10. Imm) length.
streched to 0.500 in
+
0.020
-
0.000 (1 2.7 mm
+
0.5mm
-
0.000 mm).
If
the 0.500 in (12.7 mm) dimension is not
correct, repeat Step
3
and increase the tension on the
springs if the dimension
is
less than 0.500 in
(12.7
mm)
and decrease the tension on the spring if the dimension
is greater than 0.500 Inch.
MARK
1Q.lmm)
Figure
4.
Pretension
the
Springs
CHECK
0,500"
(1
7,5mm)
Figure
5.
Tension Springs
(Continued)
REP
9.10
 Loading...


