3.
Switch on the power switch of the dmm
and then switch on the onloff switch of
the temperature probe.
4.
Switch the functional switch of the dmm
to the dc voltage measurement mode.
5.
Press 20v range switch of
DMM.
6.
Turn the select switch of the temperature
probe to
BATT
TEST.
check to see that a
voltage higher than 1.7~
is
indicated. if
lower than
1.7~
is
indicated, replace the
battery
of
the temperature probe with
a
new one.
7.
Turn the select switch of the temperature
probe to""C" position and press the
200mv
range switch of the dmm.
NOTE:
You are now ready
to
check the
temperature after you expose the
fuser roll for easy access. The
DMM
will indicate a value that represents
a
temperature reading in degrees
C.
CHECK
1.
Lower the copy feed shelf and the
transport latching cover.
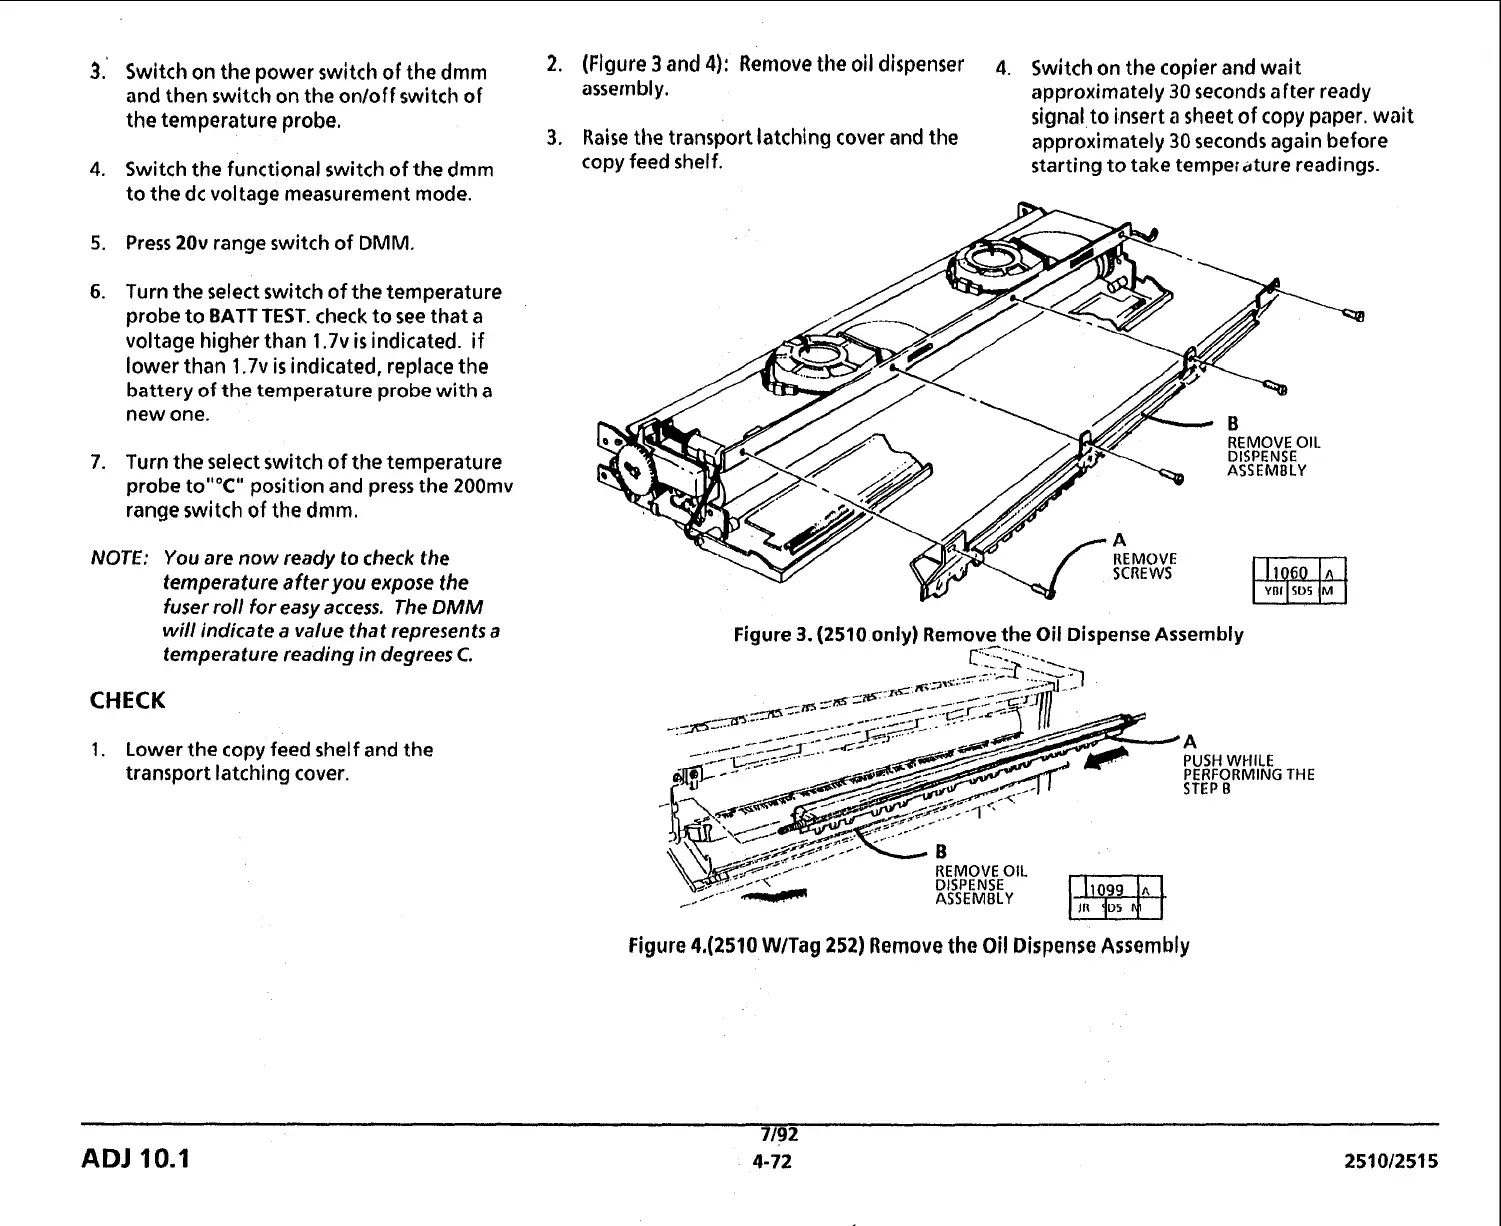
(Figure
3
and
4):
Remove the
oil
dispenser
4.
Switch on the copier and wait
assern bl
y.
approximately
30
seconds after ready
signal
to
insert a sheet of copy paper, wait
Raise the transport latching cover and the
approximately
30
seconds again before
copy feed shelf.
starting to take
tempeidture readings.
Figure
3.
(2510 only) Remove the Oil Dispense Assembly
A
PUSH
WHILE
PERFORMING
THE
STEP
B
Figure
4,(2510
WITag
252)
Remove the
Oil
Dispense Assembly
7/92
ADJ
10.1
4-72 251012515
 Loading...


