Scanning from TWAIN and WIA
Xerox
®
DocuMate
®
4799
User’s Guide
7-117
• Gray scans the document using varying shades of gray to reproduce the document. The grayscale scan mode
is often used when scanning documents or graphics where the original color does not need to be retained,
but the graphics need to be legible. Grayscale scanning preserves the graphic quality while keeping the file
size less than that of a full color scan.
• Black and White scans the document in bitonal where everything on the page is either black or white. This
setting is often used when scanning typed or written documents. When there are not a lot of graphics, or if
the graphics are not needed, this setting is ideal for archiving documents to a server or on a disc, send
through email, or posting to a web page, as the file size is smaller than the other scanning modes.
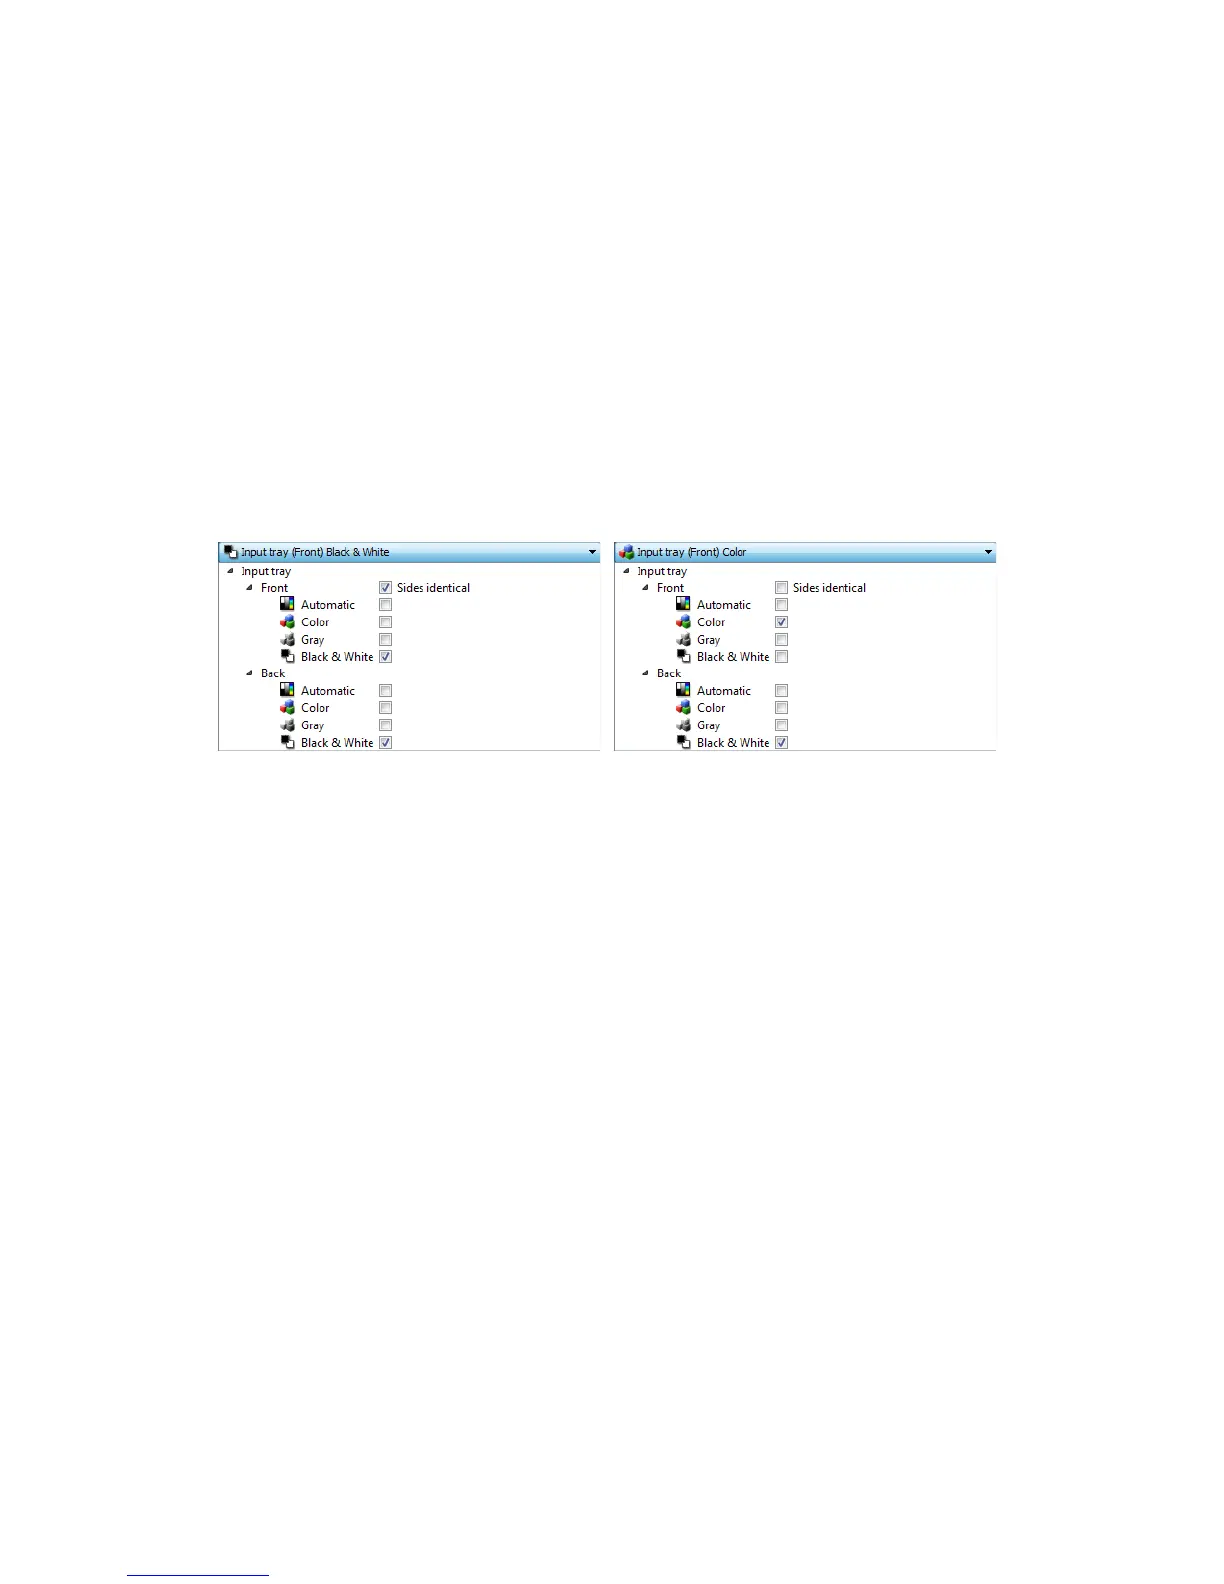
Sides identical
If the scanner supports two-sided (duplex) scanning, you can individually set the color mode and other options in
the scanner interface for each side of the page. This option is always selected and grayed out if the scanner
hardware does not support the feature.
While the option to enable or disable Sides identical is in the source configuration list, the color mode is not the
only option that can be individually configured for each side. Other options in the scanner interface, such as
resolution, brightness, contrast, etc... will also be individually set for each source. After you deselect Sides
identical, any changes you make in the scanner interface will only be applied to the option that appears at the
top of the list (for example, “Input tray (Front side) Color”).
To set the scanner options individually for each side:
1. Click the drop down menu and deselect Sides identical.
2. Select the color mode you want for the first side.
3. Click the top of the menu to collapse the list. Select the options in the scanner interface that you want to use
for the first side.
4. When you are done making changes for the first side, click in the source configuration list and select the color
mode for the second side.
That side selection will now be displayed in the top of the source configuration list (for example, “Input tray
(Back side) Gray”).
5. Click the top of the menu to collapse the list. Select the options in the scanner interface that you want to use
for the second side.
Tip: Save the changes to a Preset when you are done selecting options for each source. Please refer to Presets for
more information.
(Example: Sides are identical) (Example: Sides are different)
 Loading...