Scanning and Configuring One Touch
Xerox
®
DocuMate
®
4799
User’s Guide
6-73
– Standard ASCII text file—select this option if you want to have plain text, without formatting, sent to
your text editing application. Most text editing applications will accept plain text (*.txt) files.
– Adobe PDF format—select this option if you are adding a PDF viewing or editing application to the list.
This PDF format is an image format only, it will not recognize the document using OCR, and you will not
be able to search or edit the text in the final file. The application you are adding must be able to open
*.pdf files.
– Adobe searchable PDF—this is the PDF image format with a hidden searchable text layer. You will not
be able to edit the text the file. The application you are adding must be able to open *.pdf files.
The options you select at Step 4 determine the page format icons in the One Touch Properties window
for that group of applications. Refer to the documentation you received with the application to see
which text formats the application accepts.
5. When you are done making changes in this window, click the Add button to accept the changes and close
the window.
6. Click OK on the Link Properties window.
7. Click Refresh on the One Touch Properties window and the new application should now be available.
Creating an HTML Web Page from Your Scanned Documents
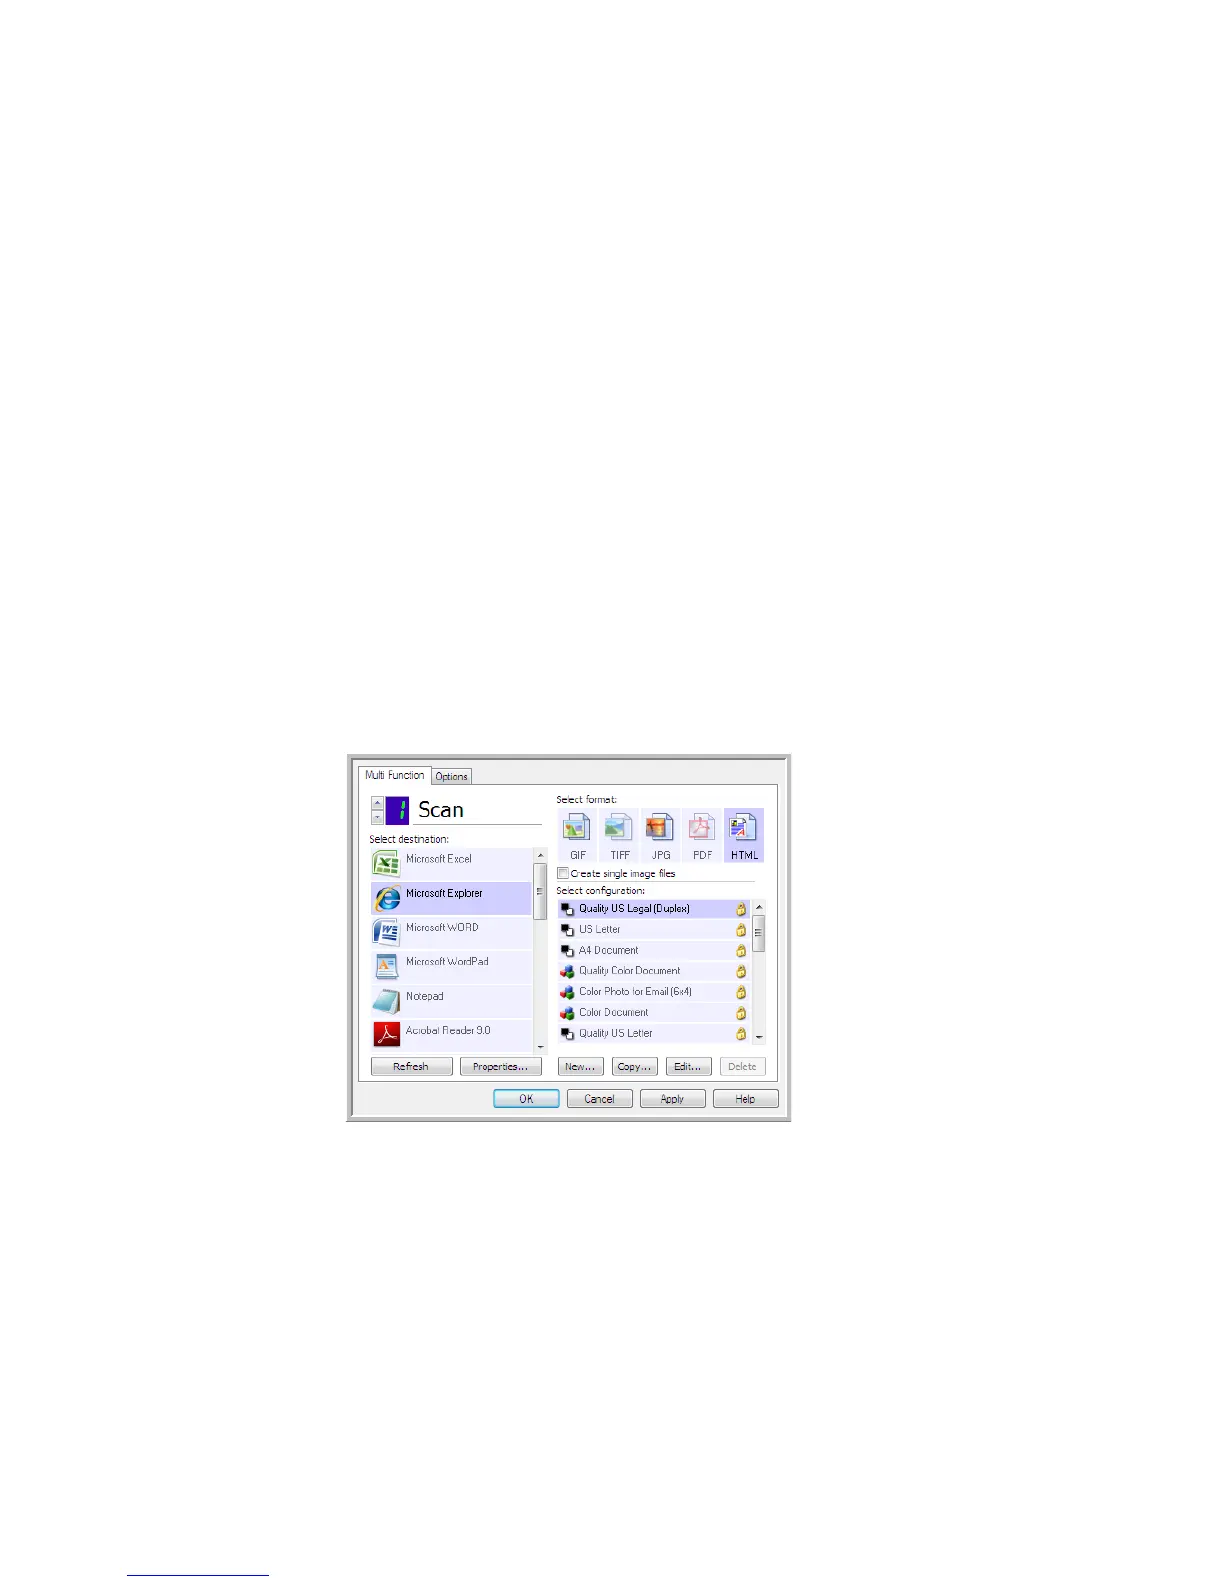
1. Open the One Touch Properties window.
2. Select your web browser as the Destination Application and choose HTML as the Format.
3. Choose a Scan Configuration that has the settings for how you want any images, on the pages you are
scanning, to be displayed. For example, choose a color or grayscale scan configuration if your documents
contain images that you want posted to your website with the HTML text.
4. Click OK.
5. Start scanning using the button you selected for scanning with the HTML format.
When scanning is finished, the document is first converted to editable text using the OCR process, then
converted into an HTML format. Any images detected by the OCR engine are isolated and linked as *.gif files.
6. Microsoft Internet Explorer, or other web browser you scanned to, then opens showing your converted page.
The application’s URL field shows the location where One Touch saved the HTML files for you to locate and
post to your website.
 Loading...