Replacing the Consumables
11-9
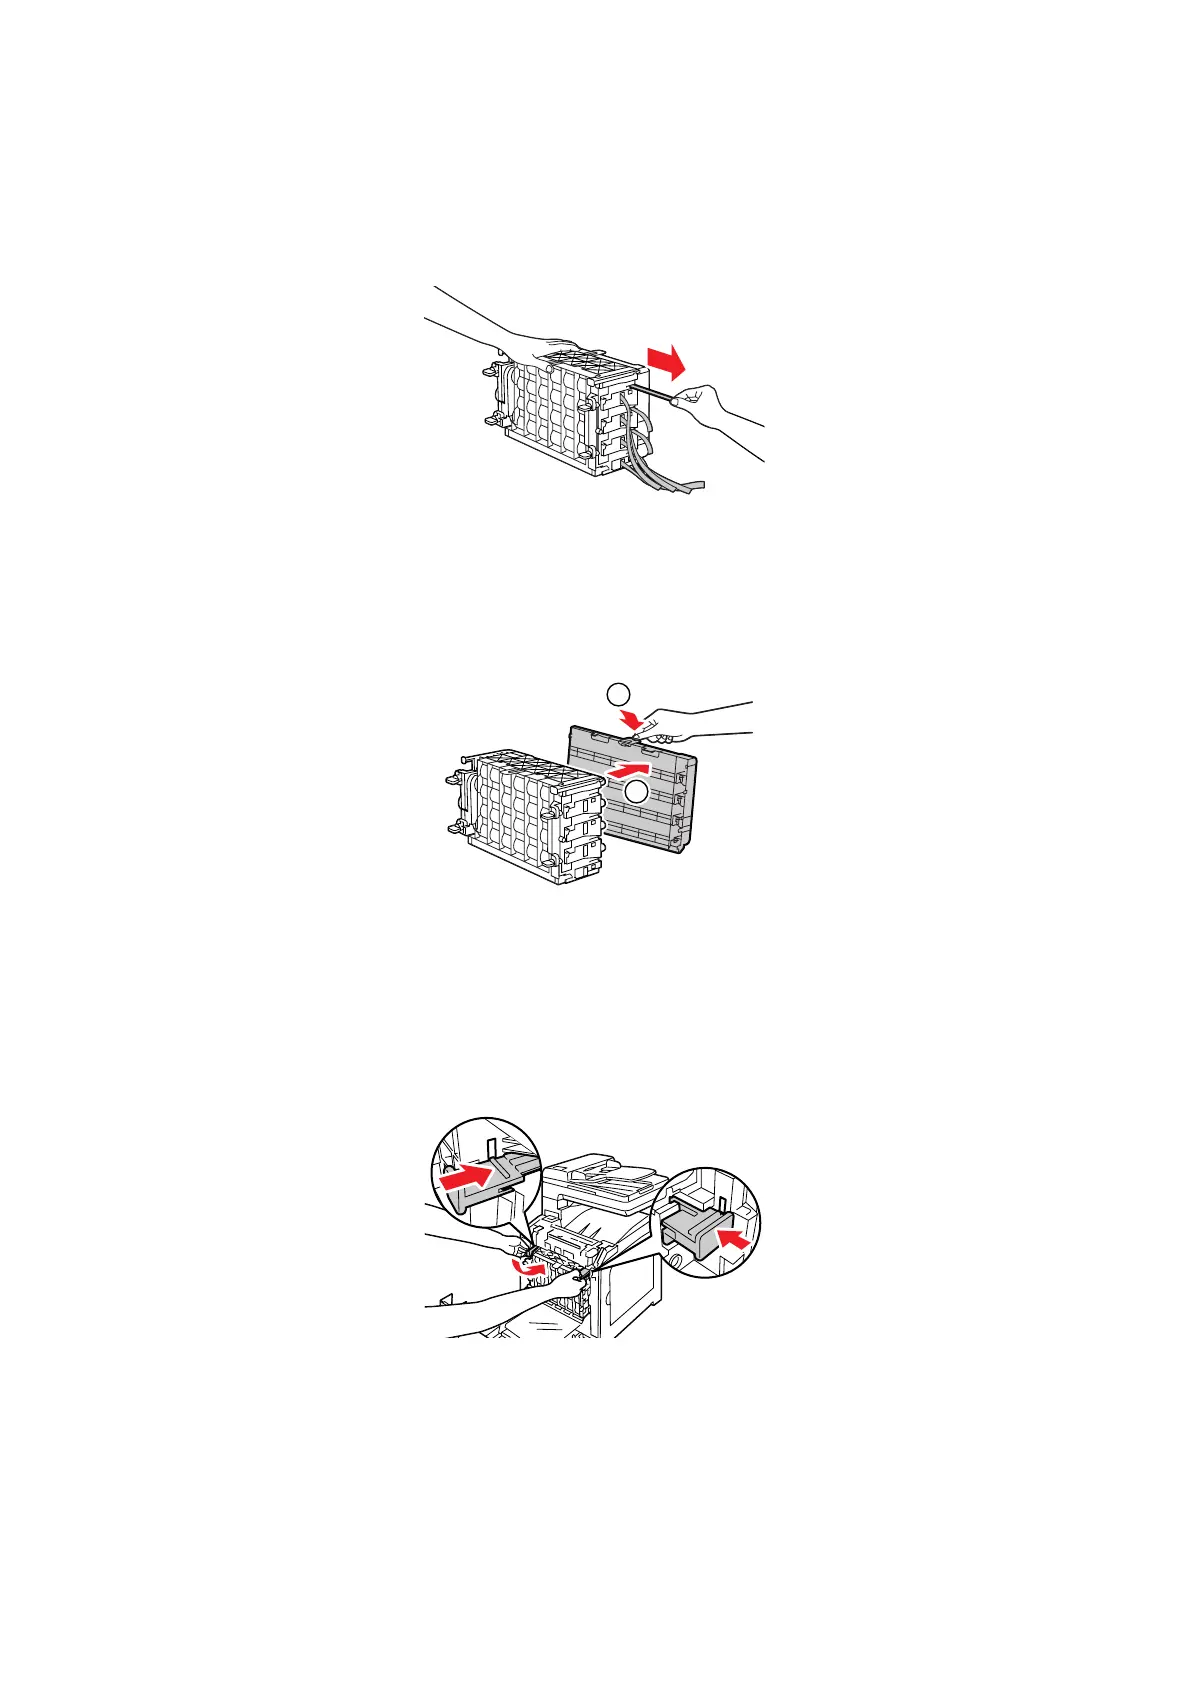
6. Place the drum cartridge on a flat surface, and completely pull out the eight strips of yellow ribbons
from the side of the drum cartridge.
Important: Make sure to pull the yellow ribbons straight out horizontally. If pulled out diagonally, the
ribbons may rip.
7. Hold the rear protective cover by the tab on top, and remove the cover from the drum cartridge.
Important: The front protective cover should be removed after installing the drum cartridge to the
printer. Do not remove the cover in this step.
8. Hold the drum cartridge by both ends as shown in the figure, and then slide the cartridge along the
guides inside the printer until it stops.
Note: Make sure to insert the drum cartridge into the printer until the lines on the cartridge and the
printer match.
1
2

 Loading...


