Chapter Three - Installation
53
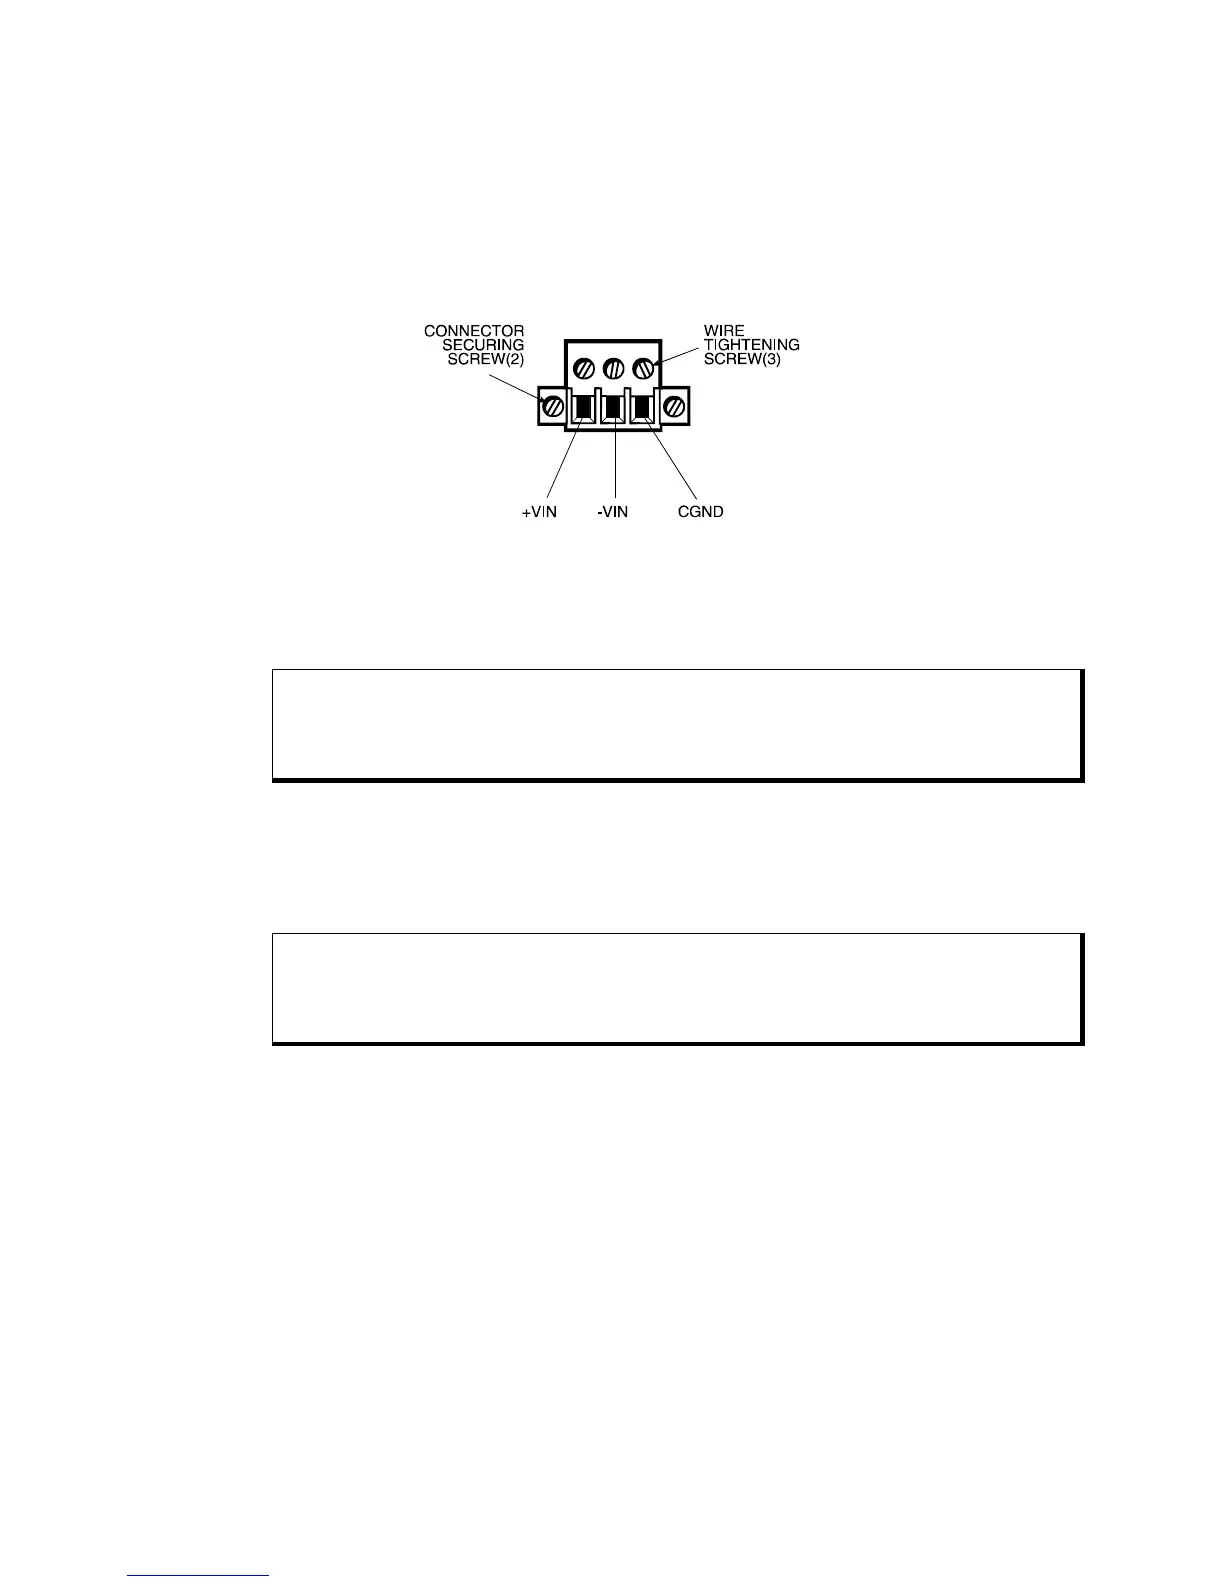
4. Insert the three wire ends of the power cable into the three holes of the block
plug. Insert the Protective Earth GND ground, + (positive), and - (return) wires
into the corresponding holes, as shown in Figure 3.19. Be sure that no bare wires
are exposed.
Figure 3-22. DC Power Connector
5. Tighten the three screws above the wires to hold them firmly in place.
Warning
Never tighten the three screws of the block plug when the cable is connected to a power
source. The screws are conductive and have full contact with the cable wire.
6. Use a plastic cable clamp and #6-32 screw (provided) to secure and strain-relief
the cable. When installing the power cable to the unit, use the securing screws on
each side of the plug.
Warning
Completely loosen the two securing screws on the plug when disconnecting the power
cord from the unit
Installation is complete once the power and other optional interface cables are installed.
Mounting the Unit
Once the conditions in the preceding sections have been met, follow the instructions
below to mount the unit:
1. Locate a position for your system that meets the specifications required (see
previous sections and Appendix A).
2. Cut the hole according to the cutout dimensions in Figure 3.20 or Figure 3.21.
3. Make sure the area around the cutout is clean and free from metal burrs.
4. Install the unit.