Periodic Inspection and Maintenance
8
8.5 Replace the Drive
YASKAWA SIEPC71061753C GA500 Technical Manual 319
*3 Use a torque wrench that can apply this torque measurement range.
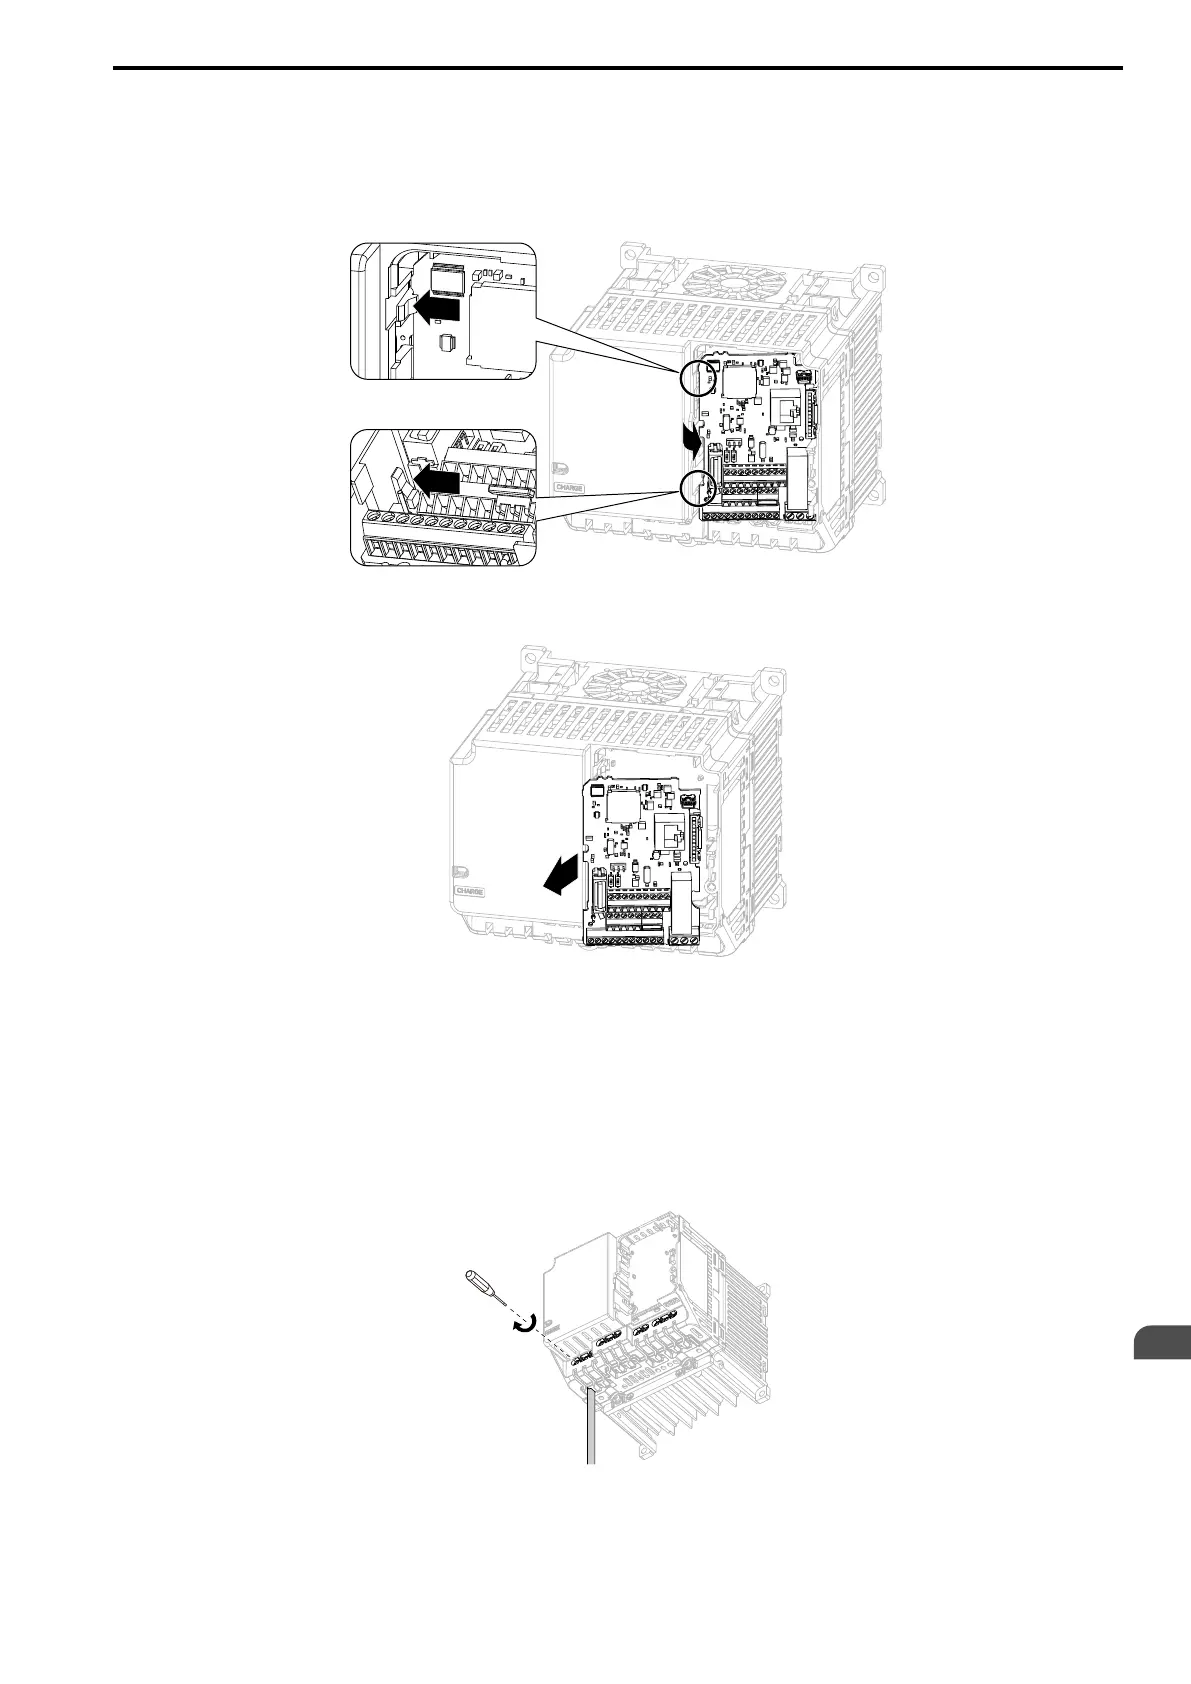
■ Remove the Control Circuit Board
Remove the front cover and keypad from the drive.
1. Push the tabs to the left that hold the control board to the drive.
Figure 8.20 Unhook the Tabs
2. Pull the left side of the control circuit board out first.
Figure 8.21 Remove the Control Circuit Board
■ Put the Control Circuit Board in a New Drive
Remove the keypad, front cover, and control circuit board of the new drive.
Wire the main circuit terminals of the new drive, then attach the wired control circuit board.
1. Wire the main circuit terminals.
Note:
To wire terminals +1 and +2, remove the jumper between terminals +1 and +2.
Figure 8.22 Wire the Main Circuit Terminals
2. Attach the wired control circuit board to the drive.
Push the control circuit board until the hooks click into place on the drive.
 Loading...