n
Reattaching the Protective Covers
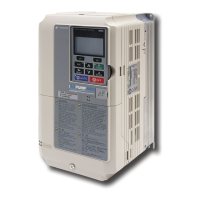
Pass power wiring and control signal wiring through the exit holes on the bottom of the conduit bracket of the drive. Place
power wiring and control signal wiring in separate conduits. Properly connect all wiring after installing the drive and connecting
other devices. Reattach all protective covers when wiring is complete.
A
A –Pass power wiring and control signal wiring through different exit holes at the
bottom of the drive.
Figure 3.9 Reattach the Protective Covers and Conduit Bracket on an IP20/NEMA 1, UL Type 1 Drive
u
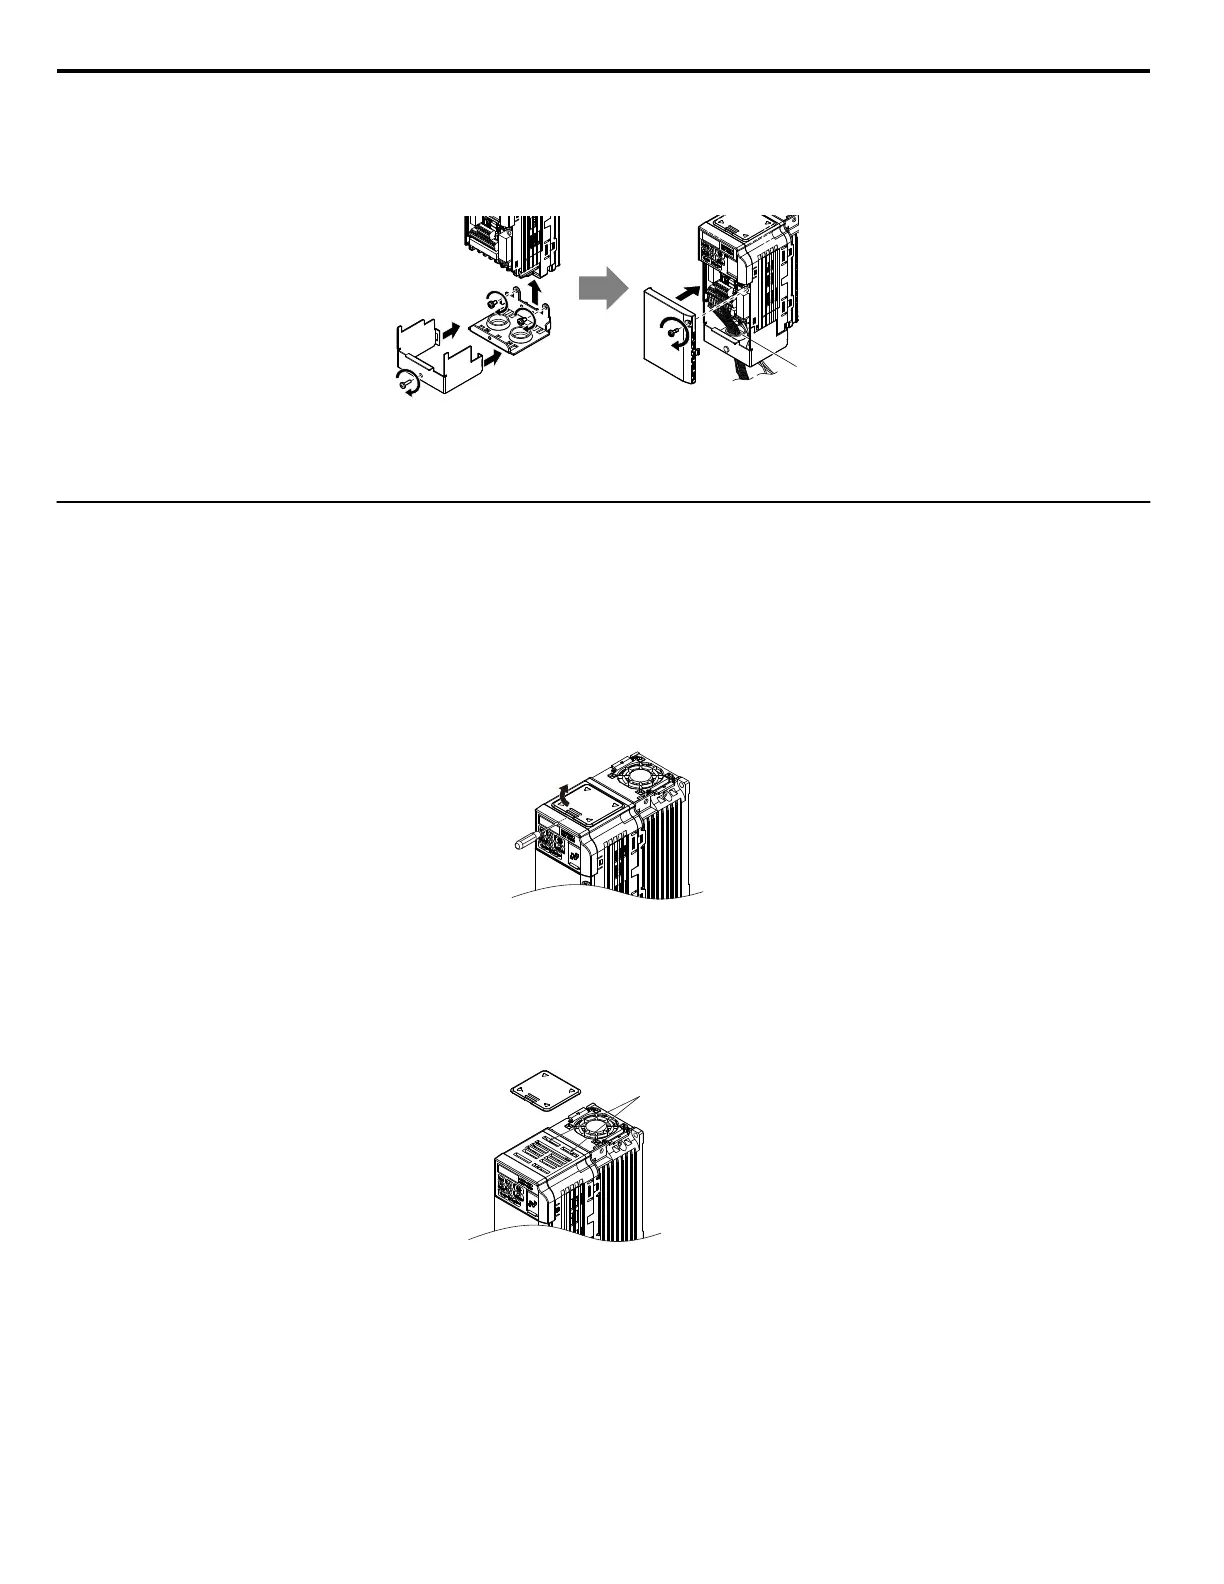
IP20/NEMA 1, UL Type 1 Top Cover Removal and Installation
To improve the ambient temperature rating of a NEMA 1, UL Type 1 drive from 40 °C to 50 °C or to mount NEMA 1, UL
Type 1 drives side-by-side, the top cover can be removed. Remove the top cover and set L8-35 to 2.
Note: Removing the top cover of a NEMA 1, UL Type 1 drive converts the drive to an IP20/Open-Chassis rating, and the drive will no longer
have a NEMA 1, UL Type 1 rating.
n
Removing the Top Cover
Insert the blade of a straight-edge screwdriver into the opening of the top cover. Gently lift up on the front cover as indicated
by the arrow in
Figure 3.10 to remove it from the drive.
Figure 3.10 Removing the Top Cover
n
Reattaching the Top Cover
Align the connection tabs on the underside of the top cover with the connection tabs on the drive. Pinch in on the top cover
to click the cover into place on the drive.
Connection tabs
Figure 3.11 Reattaching the Top Cover
3.4 Protective Covers
46
YASKAWA TOEP YAIQPM 03B YASKAWA AC Drive - iQpump Micro User Manual

 Loading...