1-2
168542-1CD
168542-1CD
MLX200 Software and
Operations
1 Introduction
1.2 System Layout for the MLX200 Control Module
1.1.2 RSLogix 5000 files included with the MLX200 Control Module:
• MLX200_ControlLogix.ACD - preconfigured project for use with
ControlLogix systems
• MLX200_CompactLogix.ACD - preconfigured project for use with
CompactLogix systems
• MLX200_Import.L5X - skeleton application for importing MLX200
AOIs and User Defined Types (UDTs)
• MLX200Communications_[0-3].L5X - RSLogix task for MLX200
communications
• MLX200HMI.APA - MLX200 HMI Project File
• MLX200Conveyor_[0-3].L5X - conveyor update task (used only for
conveyor tracking)
• HMIUpdates.L5X - a RSLogix task that is needed to communicate
with the MLX200 HMI
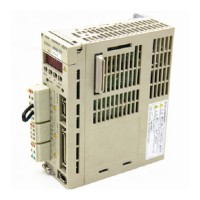
1.2 System Layout for the MLX200 Control Module
Fig. 1-1 "MLX200 Connection System Layout" on page 1-3 shows an
overall diagram of how the system should be connected. Ethernet port 1
on the MLX200 Control Module should be connected directly to the servo
drive panel. Ethernet port 2 should be connected through an Ethernet
switch to the PC running RSLogix as well as the CompactLogix or
ControlLogix system.
• The Ethernet cable between the MLX Control Module and Drive
Panel must be a Shielded Twisted Pair Cat 5E cable to prevent
noise-related issues that can vary greatly due to location and
system setup. All other cables can be standard Ethernet.
• The Ethernet Switch should not be used to handle any other
network communications besides those shown in the layout. Other
network traffic could cause poor performance or loss of
communications.

 Loading...