Maintenance and Inspection
8-
15
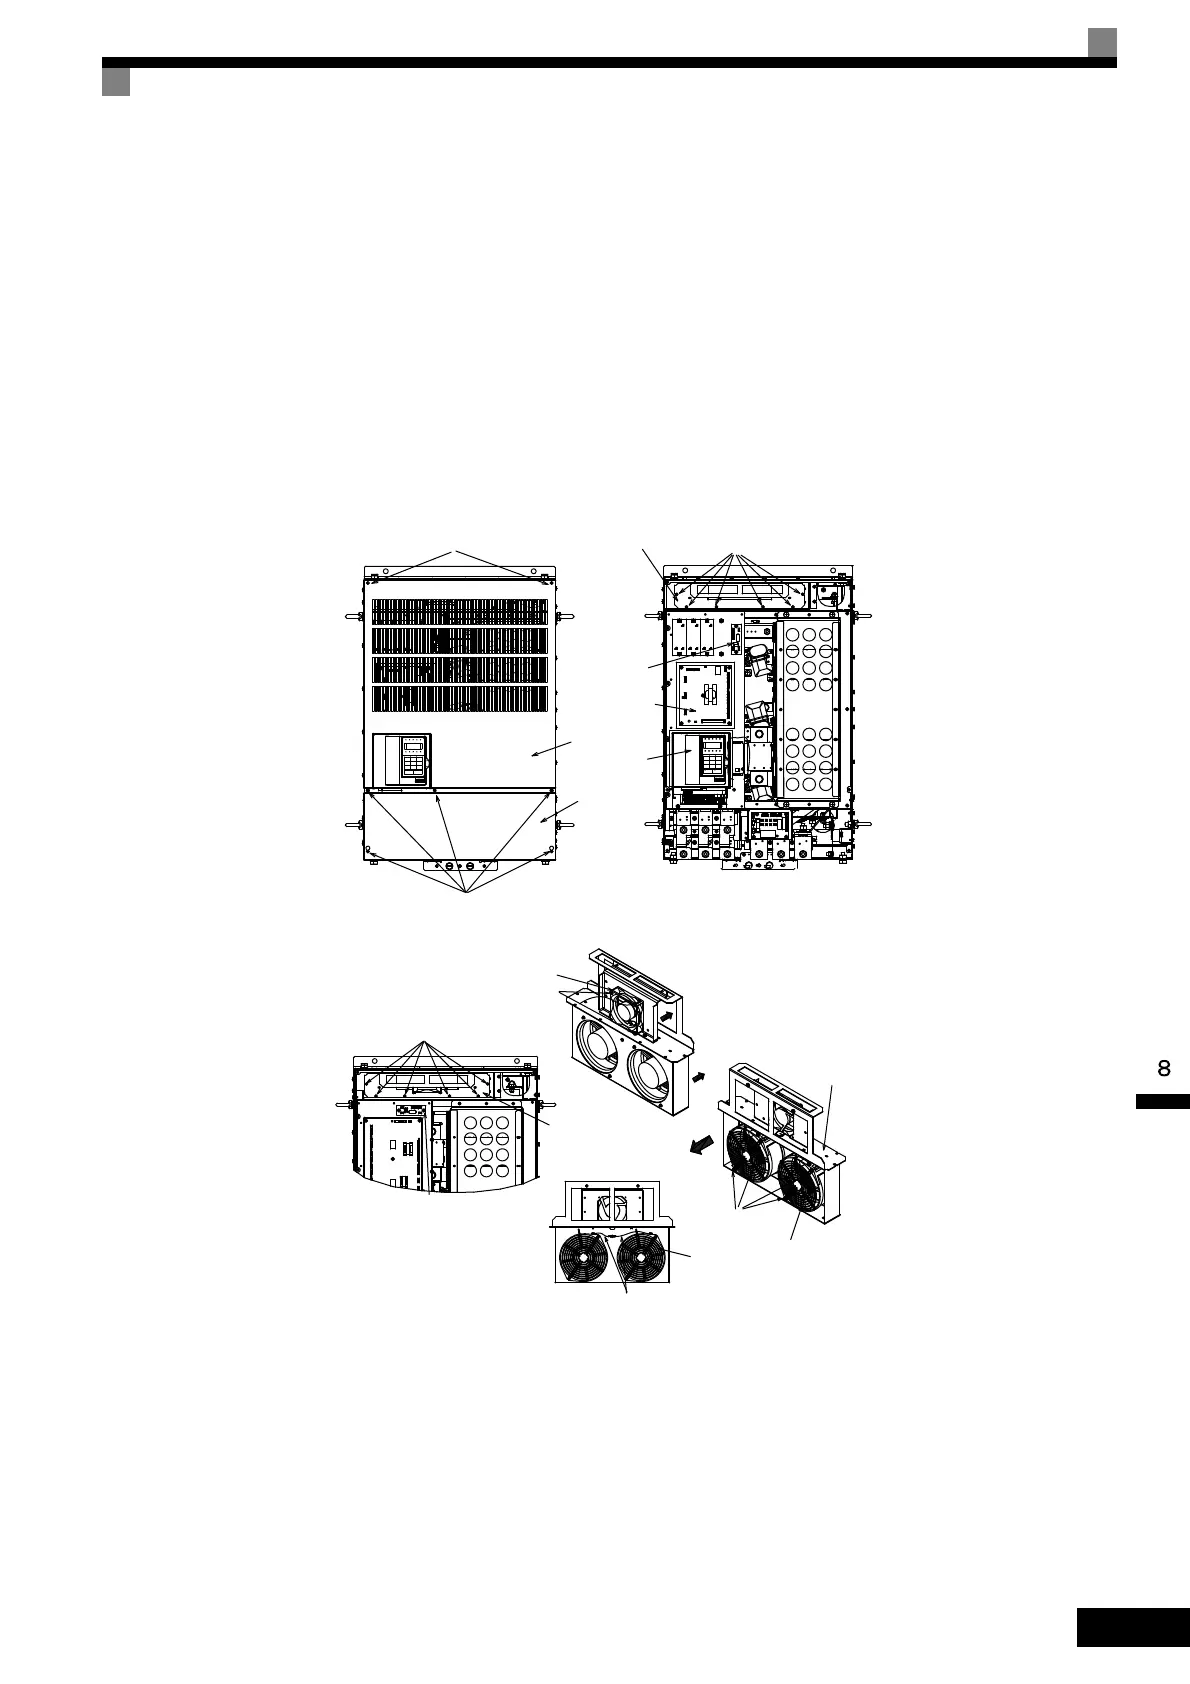
200 V Class Inverters of 90 kW and 110 kW/400 V Class Inverters of 132 kW and 160 kW
Removing the Cooling Fan
1. Remove the terminal cover and the front cover from the front of the Inverter.
2. Remove any cables that are connected to the cooling fan power relay board.
3. Remove the fan cover screws and pull out the fan cover from the Inverter.
4. Remove the cooling fan from the fan cover and replace it with a new one.
Mounting the Cooling Fan
After attaching a new cooling fan, reverse the above procedure to attach all of the components.
When attaching the cooling fan to the mounting bracket, be sure that the airflow faces the top of the Inverter.
* 1. There is no finger guard mounted to the fan for some capacities. (There is a guard on the Inverter side.)
* 2. There is no fan ground cable for the capacities without a finger guard.
Fig 8.11 Cooling Fan Replacement (200 V Class Inverters of 90 kW and 110 kW)
Front cover mounting screws
Terminal cover mounting screws
Terminal
cover
Control board
Front cover
Gate drive
board
Fan power
relay board
Fan cover
Fan cover mounting screws
Circulation fan
Circulation fan mounting screws
Fan cover mounting screws
Fan cover
Fan power relay board
Circulation fan
airflow direction
Fan cover
Fan ground cable
*2
Cooling fan
Finger guard
*1
Fan mounting
screws
Fan airflow
direction
TOE-S616-60.1.book 15 ページ 2017年8月4日 金曜日 午後3時41分
 Loading...