Customizing Your Phone
73
to edit, delete, search or simply dial a contact from the local directory.
Note
Adding Groups
Procedure:
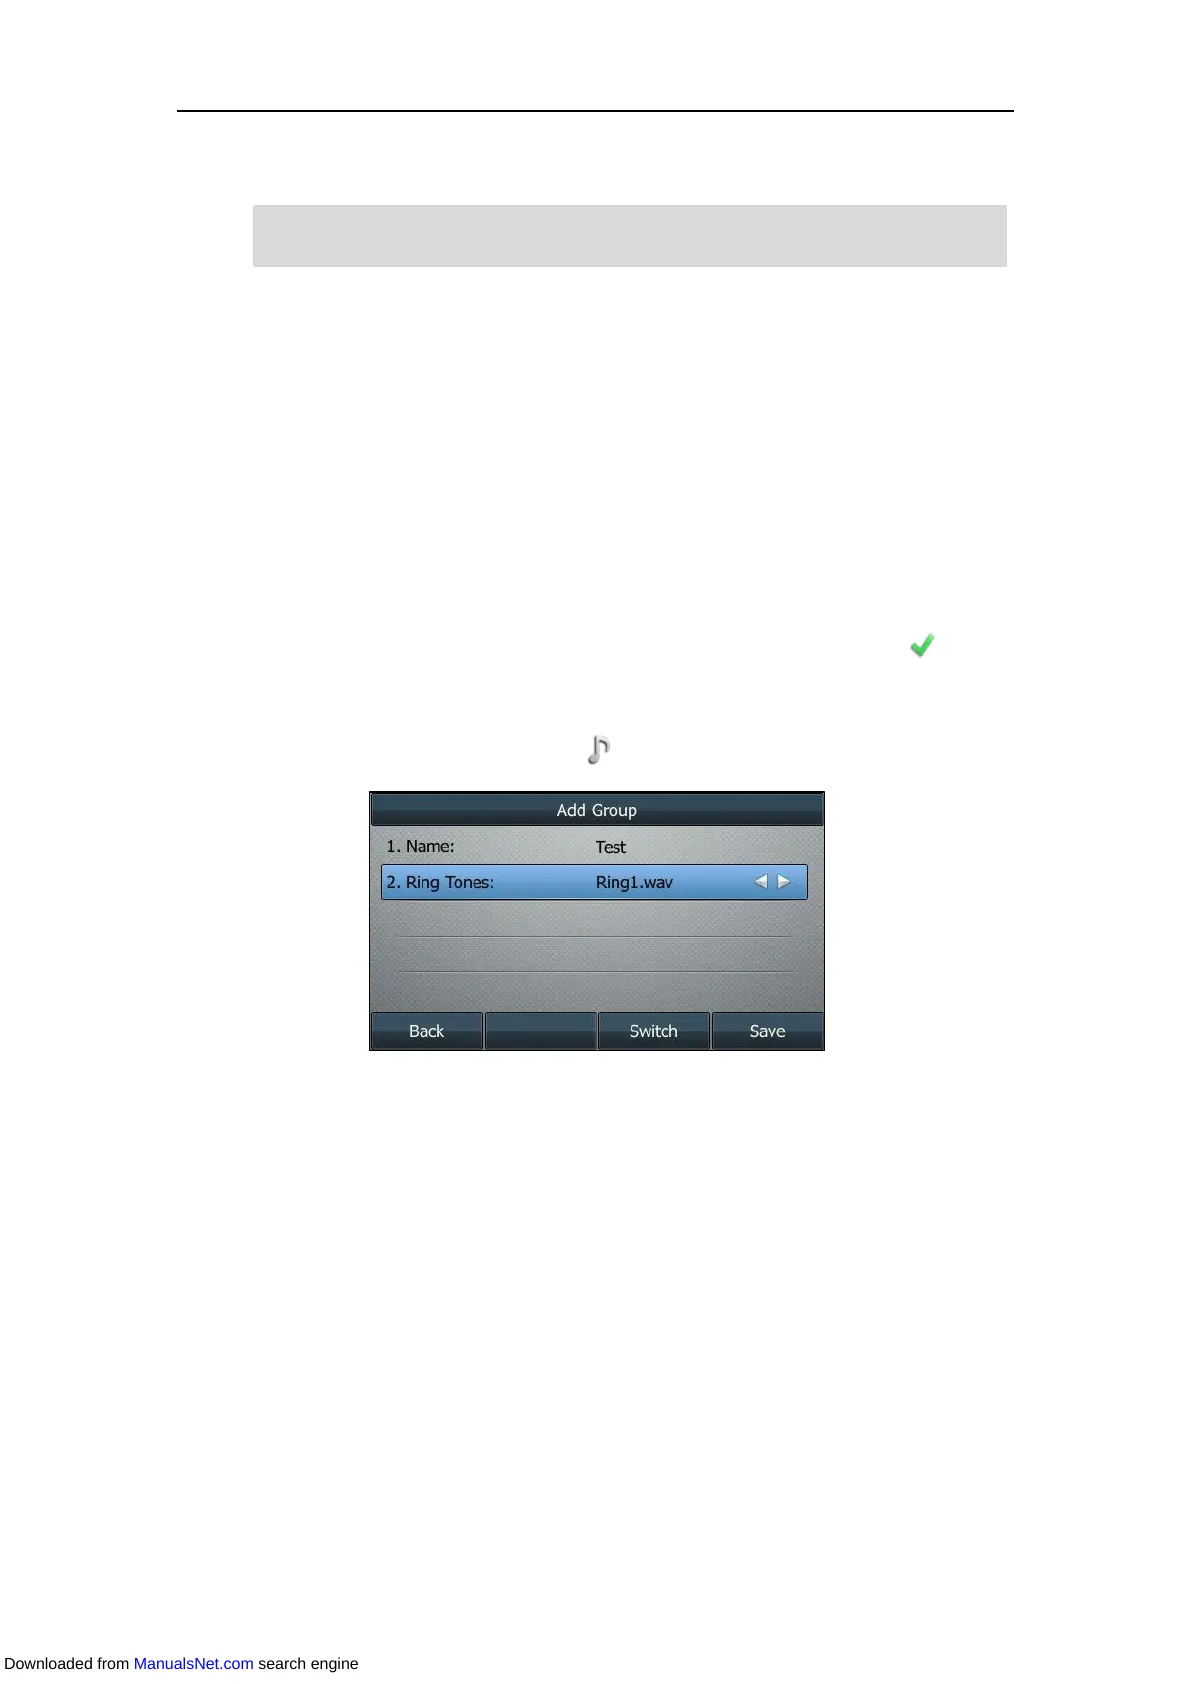
1. Press Directory (Dir) or navigate to Menu->Directory->Local Directory to enter the local
directory.
On the SIP-T48S/T48G IP phone, tap Directory or navigate to Menu->Directory.
2. Press AddGroup (AddGr).
On the SIP-T48S/T48G IP phone, tap Setting->New Group.
3. Enter the desired group name in the Name field.
On the SIP-T48S/T48G IP phone, enter the desired group name, and then tap to
accept the change.
4. Select the desired group ring tone from the Ring field.
On the SIP-T48S/T48G IP phone, tap to specify a ring tone for the group.
If Auto is selected, this group will use the ring tone according to the priority: Contact ring
tone (refer to Adding Contacts) >Account ring tone (refer to Ring Tones) >Phone ring tone
(refer to Ring Tones). If a specific ring tone is selected, this group will use the ring tone
according to the priority: Contact ring tone (refer to Adding Contacts) >Group ring tone.
5. Press Save.
On the SIP-T48S/T48G IP phone, tap OK.
On the SIP-T42S/T42G/T41S/T41P/T40G/T40P IP phone, press Add.
Adding groups is configurable via web user interface at the path Directory->Local Directory.
You can back up the local directory to the provisioning server. For more information, contact your
system administrator.
Downloaded from ManualsNet.com search engine
 Loading...