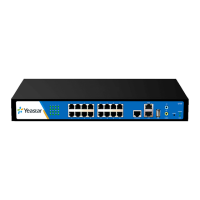
MyPBX U100 & U200 Installation Guide
http://www.yeastar.com 9/16
3. MyPBX U100 & U200 Installation
To avoid unexpected accident, personal injury or device damage, please read the following instructions
before installing MyPBX U100 & U200.
3.1 Placement Instructions
Ambient Temperature: to avoid overheating, please do not run MyPBX U100 & U200 in the place where
the ambient temperature is above 122°F (50°C).
Ventilation: please make sure that the device has good ventilation around.
Anti-jamming: there may be some sources of interference that might affect the normal running of
MyPBX U100 & U200. It’s highly recommended that the device
Should be placed away from high-power radio, radar transmitters and high frequency, and
high-current devices.
Is using independent power junction box and effective anti-grid interference measures have been
taken.
Mechanical load: Please make sure that the device is placed steadily to avoid any accident that might
cause damage. If placed on the desktop, please ensure it is horizontally placed.
3.2 Installation Instructions
After placing MyPBX U100 & U200 in a suitable place, please connect the power adapter and all other cables
to complete the installation.
3.2.1 Connection of Ethernet Ports
MyPBX U100 & U200 provides two 10/100M adaptive RJ45 Ethernet ports, that is, LAN port and WAN port.
WAN Port Connection
Connect one end of a network cable to the WAN port of MyPBX U100 & U200, and the other end to the
Ethernet port of a hub, switch or ADSL modem.
LAN Port Connection
Connect one end of a network cable to the LAN port of MyPBX U100 & U200, and the other end to any
port of company’s LAN switch/router.
If the LAN port is connected to PC directly (not via a switch), please use cross-over cable.
3.2.2 Connection of FXO/GSM/UMTS/BRI ports
MyPBX U100 & U200 supports various outside lines (e.g. FXO, GSM/UMTS, or BRI). Below are the connection
instructions of each kind of outside line taking the device installed with 2 FXO ports, 2 GSM ports, and 2 BRI
ports as an example.

 Loading...