JOHNSON CONTROLS
8
FORM 155.32-ICOM1.EN.GB
ISSUE DATE: 10/13/2017
LIST OF FIGURES
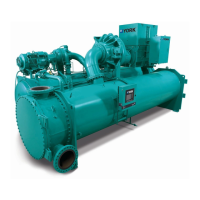
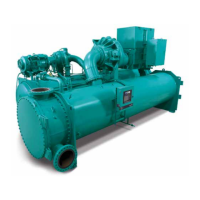
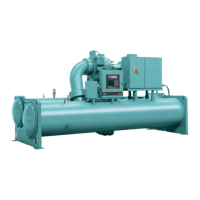
FIGURE 1 - YHAU-CGN/H-120~300EX(H/S) and 360EX~1600EXW3(H/S) .......................................................... 15
FIGURE 2 - Two Step Direct Fired Absorption Chiller-Heater Cycle Diagram (Cooling Mode) ...............................16
FIGURE 3 - Warning ...............................................................................................................................................21
FIGURE 4 - Vibration and Isolation Details .............................................................................................................26
FIGURE 5 - YHAU-CGN/H-120-300EX(H/S) and 360EX(H/S)-1600EXW3(H/S) Nozzle Locations .......................27
FIGURE 6 - Fuel Gas Piping System ......................................................................................................................28
FIGURE 7 - Hot/Cold Insulation .............................................................................................................................29
FIGURE 8 - Interior of Control Panel (mm) .............................................................................................................30
FIGURE 9 - Exterior of Control Panel (mm) ............................................................................................................30
FIGURE 10 - Power Wiring .....................................................................................................................................46
FIGURE 11 - Power Supply Wiring..........................................................................................................................48
FIGURE 12 - PLC Input Wiring................................................................................................................................52
FIGURE 13 - PLC Output Wiring .............................................................................................................................56
FIGURE 14 - PLC Analog Input Wiring....................................................................................................................60
FIGURE 15 - Display/Analog Input Wiring...............................................................................................................62
FIGURE 16 - External Connection Terminal Details ................................................................................................64
FIGURE 17 - 3 Phase 4 Wire Power Supply Wiring ................................................................................................65
FIGURE 18 - Remote Stop & Start Signal ...............................................................................................................66
FIGURE 19 - Signal Terminal Transition Wiring ......................................................................................................66
FIGURE 20 - Upper Communication System Conguration....................................................................................68
FIGURE 21 - Connection Detail for D-sub 9pin .......................................................................................................72
FIGURE 22 - 2-Wire 1:1 Connection with User-Created Cable...............................................................................73
FIGURE 23 - 2-Wire N:1 Connection with User-Created Cable .............................................................................. 74
FIGURE 24 - 4-Wire 1:1 Connection With User-Created Cable ..............................................................................74
FIGURE 25 - 4-Wire N:1 Connection With User-Created Cable .............................................................................75
FIGURE 26 - Sample Sound Testing ....................................................................................................................... 76
FIGURE 27 - Cooling Start Diagram .......................................................................................................................80
FIGURE 28 - Cooling Stop Diagram........................................................................................................................80
FIGURE 29 - Direct Fire Sequential Operation Flowchart .......................................................................................81
FIGURE 30 - Stopping Absorption Chiller-Heater Direct Fire Flowchart .................................................................81
FIGURE 31 - Main Screen.......................................................................................................................................93
FIGURE 32 - Data Screen .......................................................................................................................................95
FIGURE 33 - Solution Analysis / Control Panel Parts Replacement Screen ...........................................................97
FIGURE 34 - Solution Pump Overhaul / Refrigerant Pump Overhaul Screen.........................................................98
FIGURE 35 - Burner Parts Replacement/ Burner Combustion Check Screen ........................................................99
FIGURE 36 - Trend Screen ...................................................................................................................................100
FIGURE 37 - Hourly Operation History .................................................................................................................101
FIGURE 38 - Minutely Operation History ..............................................................................................................103
FIGURE 39 - Failure History Screen .....................................................................................................................105
FIGURE 40 - Alarm History Screen ....................................................................................................................... 107
FIGURE 41 - Failure and Alarm Screen ................................................................................................................109
FIGURE 42 - Setting Screen ................................................................................................................................. 114
FIGURE 43 - Single Loop Controller ..................................................................................................................... 117
FIGURE 44 - Run Mode ........................................................................................................................................ 118
FIGURE 45 - Ready Mode .................................................................................................................................... 118
FIGURE 46 - Alarm Mode...................................................................................................................................... 119
FIGURE 47 - Air Damper Control .........................................................................................................................121
FIGURE 48 - Hot Water Control Valve ..................................................................................................................122
FIGURE 49 - Changing Information in Manual Mode ............................................................................................123
FIGURE 50 - Changeover Valve Locations ...........................................................................................................126
FIGURE 51 - Location of Manual Valve in Purging System 120-300EX(H/S) .............................................. 131
FIGURE 52 - Location of Manual Valve in Purging System 360-500EX(H/S) .............................................. 132

 Loading...