Chapter 3 Hardware Panels
XMG1930 Series User’s Guide
46
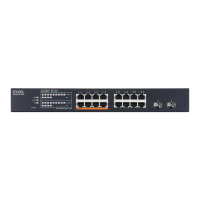
3.1.1 Multi-Gigabit Ethernet Ports
The Switch has 10GBase-T auto-negotiating, auto-crossover Ethernet ports. In Multi-Gigabit Ethernet, the
speed can be 100M, 1G, 2.5G, 5G, or 10G. The duplex mode can be full duplex only.
An auto-negotiating port can detect and adjust to the optimum Ethernet speed (100M, 1G, 2.5G, 5G,
and 10G) and full duplex mode of the connected device.
An auto-crossover (auto-MDI/MDI-X) port automatically works with a straight-through or crossover
Ethernet cable.
When auto-negotiation is turned on, an Ethernet port negotiates with the peer automatically to
determine the connection speed and duplex mode. If the peer Ethernet port does not support auto-
negotiation or turns off this feature, the Switch determines the connection speed by detecting the signal
on the cable and using half duplex mode. When the Switch’s auto-negotiation is turned off, an Ethernet
port uses the pre-configured speed and duplex mode when making a connection, thereby requiring
you to make sure that the settings of the peer Ethernet port are the same in order to connect.
3.1.1.1 Default Ethernet Negotiation Settings
The factory default negotiation settings for the Gigabit ports on the Switch are:
• Speed: Auto
•Duplex: Auto
• Flow control: Off
• Link Aggregation: Disabled
1G, 10G SFP+ Slots
Port 29 – 30
Use SFP+ transceivers in these ports for high-bandwidth backbone connections. You can
also insert an SFP+ Direct Attach Copper (DAC) in the SFP+ slot.
Reset Press the RESET button to reboot the Switch without turning the power off. See Section 3.3 on
page 54 for more information about the LED behavior.
Restore
IN STANDALONE MODE
Press the RESTORE button for 3 to 7 seconds to have the Switch automatically reboot and
restore the last-saved custom default file. See Section 3.3 on page 54 for more information
about the LED behavior.
Press the RESTORE button for more than 7 seconds to have the Switch automatically reboot
and restore the factory default file. See Section 3.3 on page 54 for more information about
the LED behavior.
IN NEBULA CLOUD MODE
Press the RESTORE button for more than 3 seconds to have the Switch automatically reboot
and restore the factory default file.
USB Port This USB Type C port is for debugging use only.
Note: When the Access L3 license is activated in your Switch, connect this port to
your computer (using an USB Type C console cable) if you want to configure
the Switch using the command line interface (CLI) through the console port.
Table 8 Front Panel Connections (continued)
CONNECTOR DESCRIPTION

 Loading...