NoteAction
Release the brakes of axis 2 to rest the
weight of the axis against the lock screw.
6
Release the brakes of axis 3 to rest the
weight of the axis against the pallets.
7
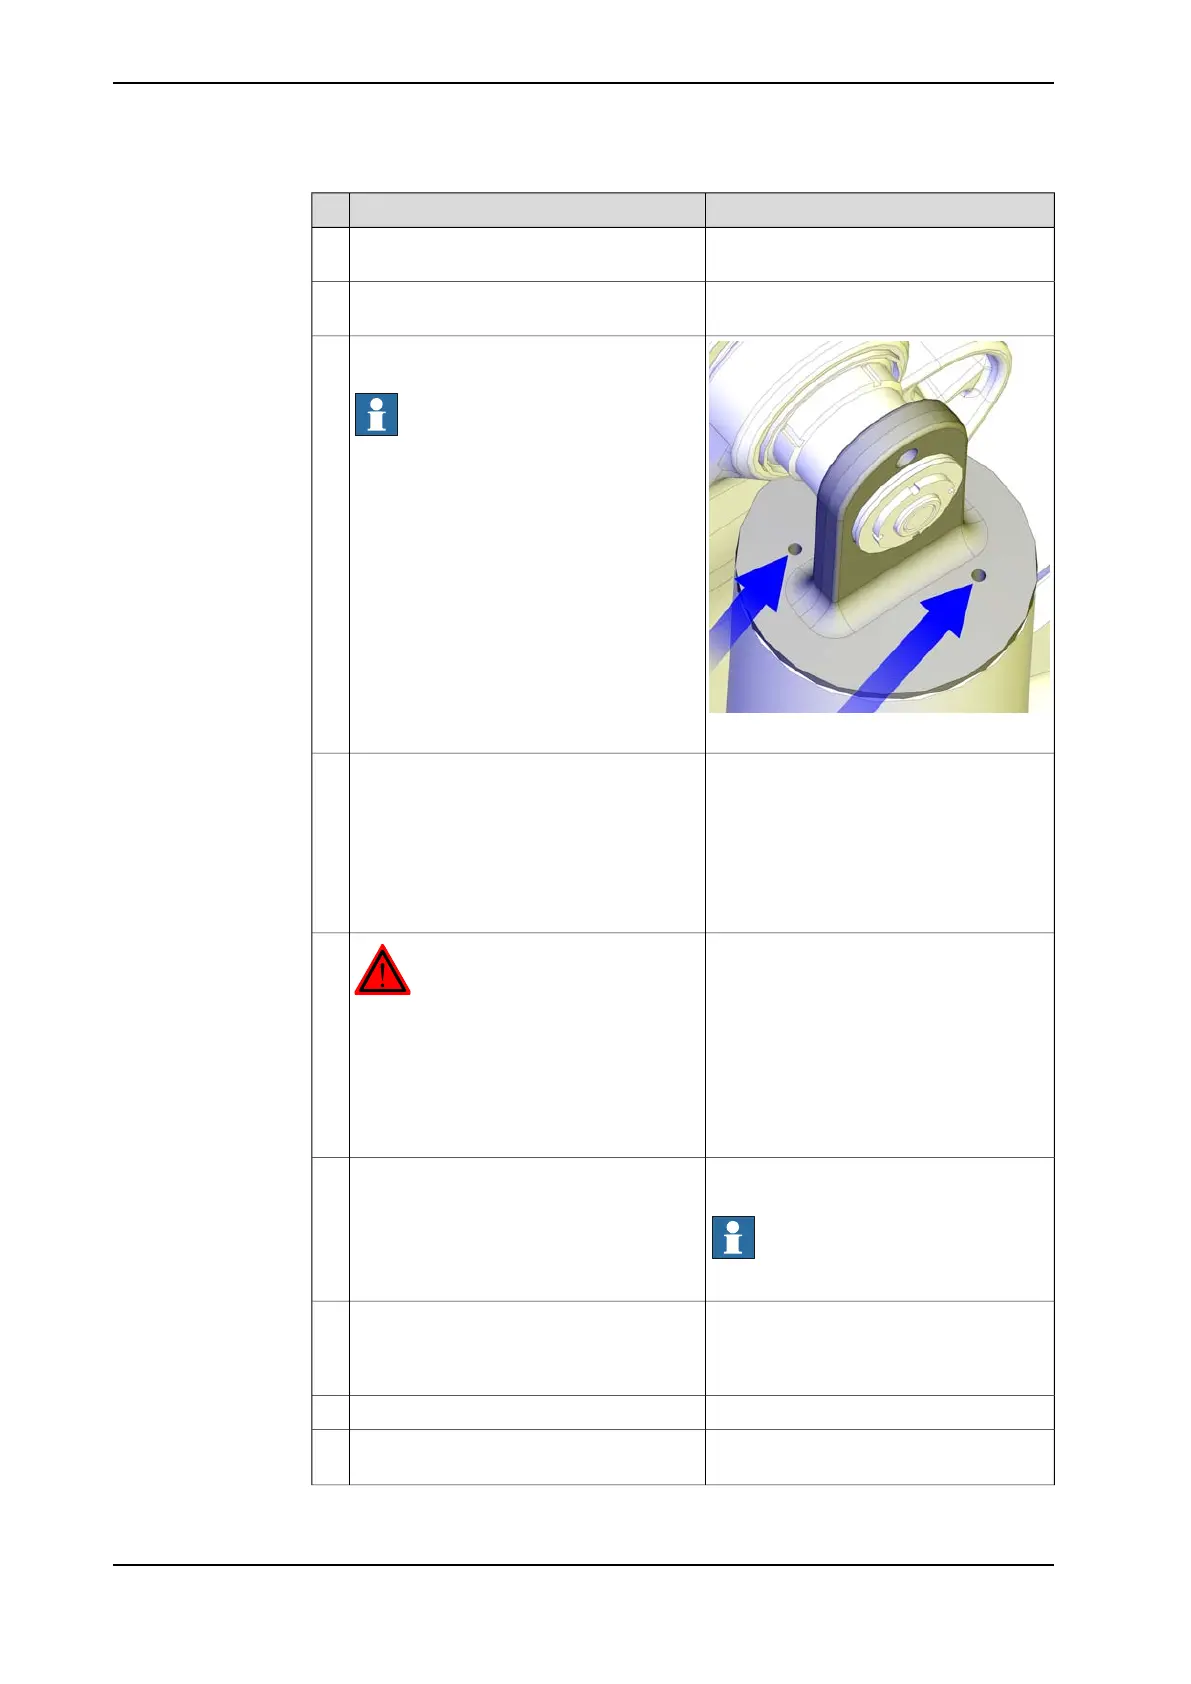
xx1000001111
Remove the two plastic screws in the upper
end of the balancing device.
Note
Keep the plastic screws. They will be refit-
ted later.
8
See the previous figure!Insert two screws, M12x50 in the holes to
neutralize the spring force. Screw in the
screws until they have proper contact with
the cylinder inside.
9
The length of the cylinder is now locked
and the balancing device is unloaded. It
should now be possible to easily rotate the
balancing device.
DANGER
Turn off all:
• electric power supply
• hydraulic pressure supply
• air pressure supply
to the robot, before entering the robot
working area.
10
Detailed in section Draining, axes 2 and 3
on page 133.
Note
Time-consuming activity!
Drain the gearbox.11
Remove the motor cables of axis-2 or axis-
3 motor, depending on which gearbox is
being removed. Protect the cables from
getting damaged and from oil spill.
12
Remove one gearbox at a time!13
Detailed in section Replacing motors, axes
2 and 3 on page 284
Remove the axis-2 or axis-3 motor, depend-
ing on which gearbox is being removed.
14
Continues on next page
314 3HAC039838-001 Revision: C
© Copyright 2013 ABB. All rights reserved.
4 Repair
4.7.2 Replacing the gearbox, axes 2- 3
Continued