EN - 16
6 Putting into operation TCS-Compact
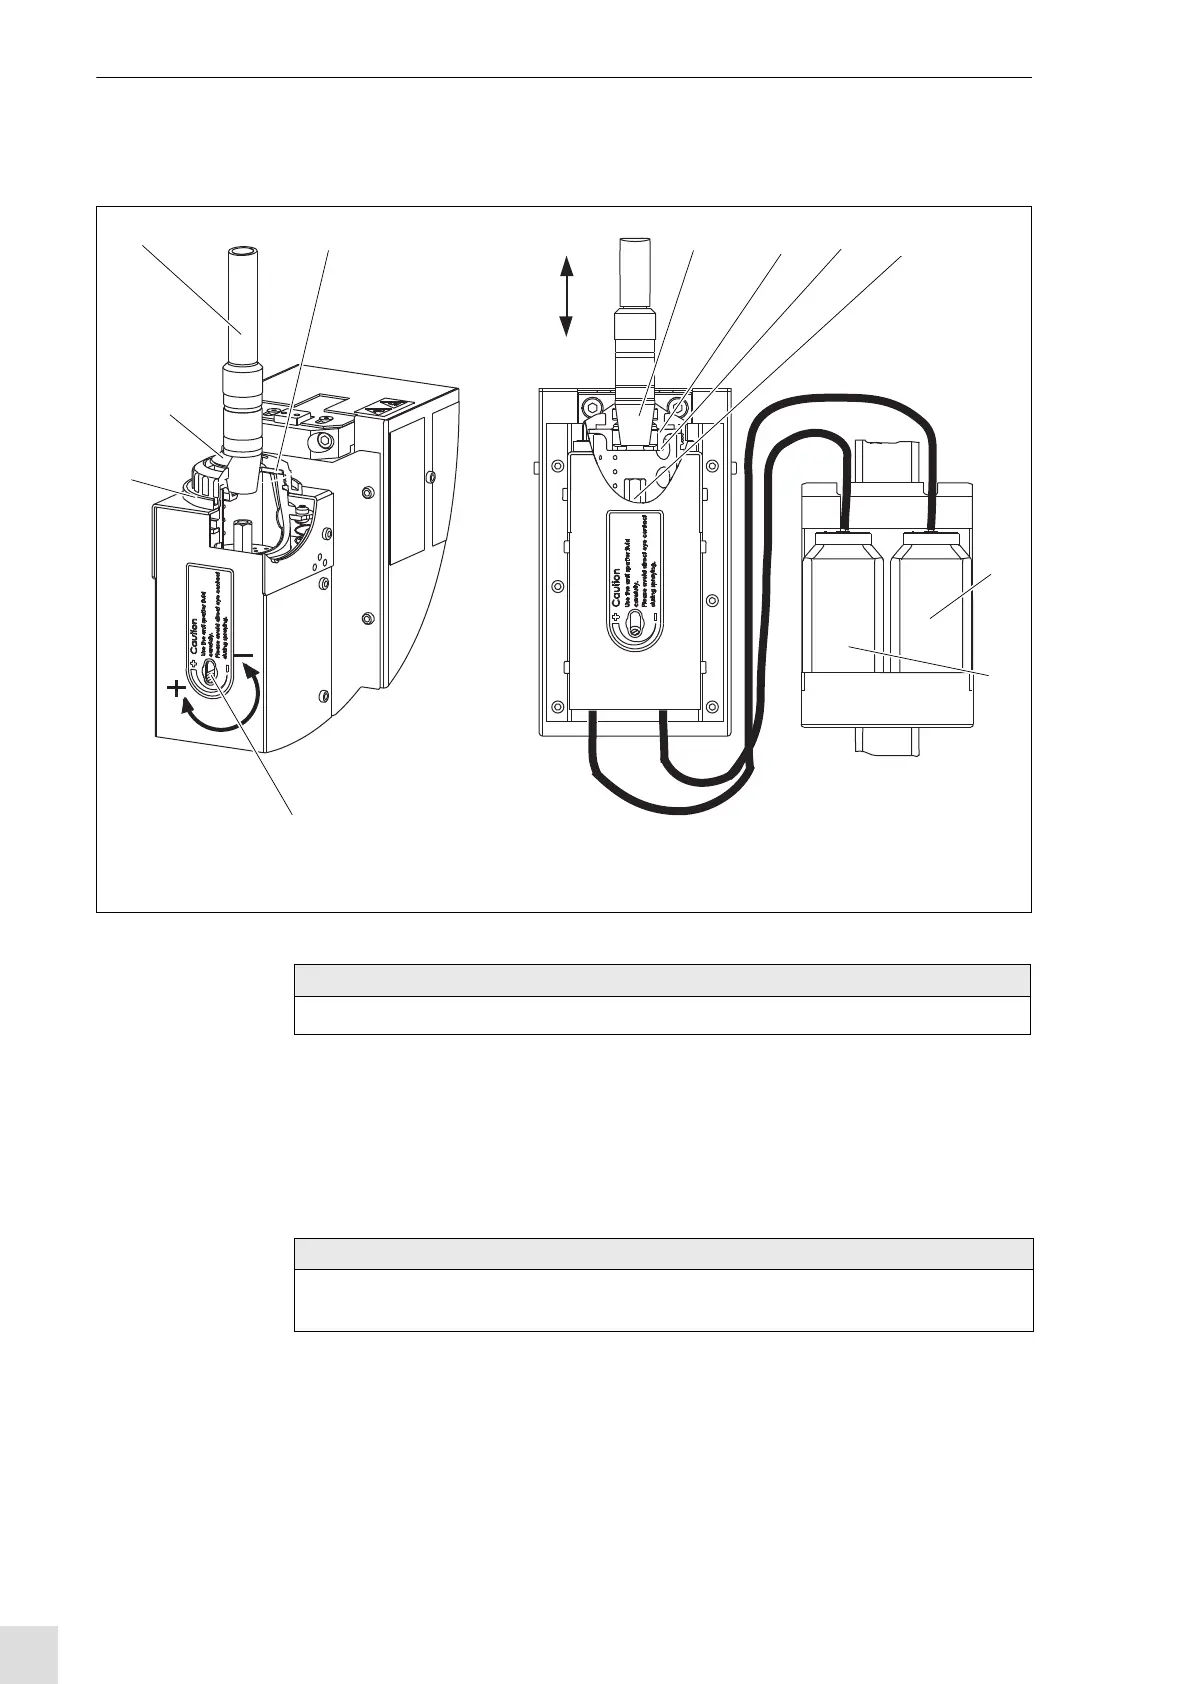
6.2.1 Adjusting the anti-spatter fluid
1 Place the welding torch (1) over the injection opening.
2 Move the welding torch (1) slowly downwards (in the direction of the arrow). Hereby, the rubber gasket
is "opened".
The immersion depth of the welding torch is limited by the stroke of the injection unit.
3 Move the gas nozzle with the front side to the thrust ring.
Move the welding torch further down to activate the injector function.
1 Welding torch
2 Rubber gasket for gas nozzle
3 Gas nozzle
4 Thrust ring
5 Injection nozzle
6 Anti-spatter bottle (full)
7 Drain bottle
8 Adjusting screw (volume control anti-spatter)
9 Cover
Fig. 11 Adjusting the anti-spatter fluid
Injection
opening
Activate injection impulse
max. 6 mm
Deactivate injection impulse
12 3425
6
8
9
NOTE
• Make sure that the welding torch / gas nozzle is placed concentrically over the injection unit.
NOTE
• Please observe the max. stroke of the injection unit (see Fig. 12 Stroke movement injection unit on
page EN-17)