Do you have a question about the AccuAir e-Level and is the answer not in the manual?
Emphasizes that sensor installation requires viewing suspension movement from under the vehicle, mandating a lift with ramps.
Specifies that sensor travel is limited to 2.75 inches to prevent over-extension or over-compression damage.
Instructions to choose a fixed point on the frame and mark it with an 'X' for measurements.
Measure from the marked dot on the suspension arm to the 'X' at the vehicle's highest travel point.
Measure from the marked dot to the 'X' again, this time at the vehicle's lowest travel point.
Move sensor closer to or further from the pivot point to achieve a travel of less than 2.75 inches.
Drill or weld to attach the provided ball stud at the determined point that yields 2.75 inches of travel.
Procedure to shorten the sensor linkage rod and plastic tubing if necessary for proper fitment.
With the vehicle at the bottom, adjust linkage for approximately 1/4" clearance between the stop and arm.
Compare bottom clearance to top travel clearance, repeating steps 8 & 9 until clearances are approximately equal.
Use the final sensor location to mark and drill the two mounting holes, then install hardware carefully.
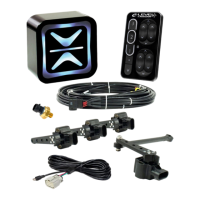
Stresses the extreme importance of wiring ride-height sensors correctly to the ECU based on numbered labels.
States that the system must be calibrated before it can operate to learn vehicle characteristics.
Detailed step-by-step guide for performing the automatic system calibration to learn vehicle characteristics.
Includes warnings against use with specific systems and notes on tank pressure settings before calibration.
Alternative procedure for suspensions prone to over-extension, allowing user-defined maximum height.
Instructions to adjust all four corners to the desired maximum travel using the rocker switch.
Guides on how to change the system's tank pressure setting to 150, 175, or 200 PSI.
Important note stating that the system must be recalibrated after any new tank pressure setting is applied.
Provides instructions on how to toggle the Ride-Height-On-Start feature ON or OFF.
Instructions for toggling the RideMonitor mode ON or OFF as needed.
Guidance on how to change the accuracy setting to increase or decrease correction frequency from the factory default.
Describes the warning for tank pressure not increasing and lists possible causes like wiring or compressor issues.
Details warnings related to the pressure sensor not reading, with checks for wiring and sensor failure.
Covers warnings for valves not opening after ECU activation, suggesting checks for wiring and valve integrity.
Lists specific warnings for each ride height sensor not reading and troubleshooting steps.
| Type | Air suspension management system |
|---|---|
| Features | Automatic leveling |
| Control | Via smartphone app |
| Sensors | Height sensors for each corner of the vehicle |
| Power Supply | 12V DC |
| Installation | Requires professional installation |
| Compatibility | Designed for use with air suspension systems |