36
RTCA SP Instrument Operator’s Manual
C
C
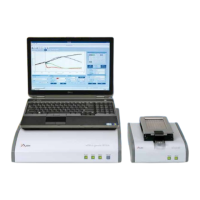
3. Preparing and Starting a Run on the RTCA
SP Instrument
3.1 Running a Quick Experiment
When the RTCA Analyzer is turned on, a self-test is performed and all LED indica-
tors should be green.
If a RED LED lights up, it means that the instrument has failed the self-test, and you
should contact a local ACEA representative immediately.
A cell titration experiment being run on e RTCA SP Instrument is used for illustration
purpose. e procedure for this experiment includes:
Adding culture media to the E-Plate 96
Inserting the E-Plate 96
Starting the RTCA So ware
Setting up Exp Notes, Layout, and Schedule pages
Starting the experiment
Removing the E-Plate 96 and adding cells to the E-Plate 96 wells
Reinserting the E-Plate 96
Checking and plotting the Cell Index data on the Plot page
Add Culture Media to the E-Plate 96
Add 100 µl of cell culture media to each of the 96 wells in the E-Plate 96.
For optimal results, leave the E-Plate 96 in the tissue culture hood for 30 minutes
at room temperature. This ensures that the culture media and E-Plate surface
achieve equilibrium.
Please consider the maximal volume of each well for your experimental setup. It is
not recommended to use > 200 µl total volume for each well.
Do NOT touch the E-Plate 96 on the electrical contacts and do NOT wear
powdered safety gloves. Always bear in mind that the system is especially
dependent on a clean, dust-free environment.
Please avoid scratching the gold electrodes on the bottom of the wells with pipette
tips. This could infl uence functionality of the gold electrodes.
The 96 wells within E-Plates 96 are organized in such a way that each column of
8 wells is divided into two 4-well groups. To achieve consistent and accurate data
during the experiment it is necessary to use the wells within a group in the same
experiment. Examples of such 4-well groups are: A1, B1, C1 and D1 as a group;
E3, F3, G3 and H3 as a group, A7, B7, C7, D7 as a group, etc.
Please always use the whole plate at one time. Using only part of the wells on a
plate is not recommended.
This is because, during the experiment in the incubator, the properties of the
micro sensor arrays in the unused wells may be affected, so that their qualitative
performance with cells can no longer be. If using only a fraction of the E-Plate 96
wells can not be avoided, it is best to fi ll the remaining wells with buffer (e.g., PBS).
Preparing and Starting a Run on the RTCA SP Instrument
Running a Quick Experiment
RTCA SP Instrument Operator’s Manual
3. Preparing and Starting a Run on the RTCA
3.1 Running a Quick Experiment
When the RTCA Analyzer is turned on, a self-test is performed and all LED indica-
If a RED LED lights up, it means that the instrument has failed the self-test, and you
should contact a local ACEA representative immediately.
A cell titration experiment being run on e RTCA SP Instrument is used for illustration
purpose. e procedure for this experiment includes:
Adding culture media to the E-Plate 96
Starting the RTCA So ware
Removing the E-Plate 96 and adding cells to the E-Plate 96 wells
Reinserting the E-Plate 96
Checking and plotting the Cell Index data on the
Add Culture Media to the E-Plate 96
Add 100 µl of cell culture media to each of the 96 wells in the E-Plate 96.
For optimal results, leave the E-Plate 96 in the tissue culture hood for 30 minutes
at room temperature. This ensures that the culture media and E-Plate surface
Please consider the maximal volume of each well for your experimental setup. It is
not recommended to use > 200 µl total volume for each well.
Do NOT touch the E-Plate 96 on the electrical contacts and do NOT wear
powdered safety gloves. Always bear in mind that the system is especially
dependent on a clean, dust-free environment.
Please avoid scratching the gold electrodes on the bottom of the wells with pipette
tips. This could infl uence functionality of the gold electrodes.
The 96 wells within E-Plates 96 are organized in such a way that each column of
8 wells is divided into two 4-well groups. To achieve consistent and accurate data
during the experiment it is necessary to use the wells within a group in the same
experiment. Examples of such 4-well groups are: A1, B1, C1 and D1 as a group;
experiment. Examples of such 4-well groups are: A1, B1, C1 and D1 as a group;
E3, F3, G3 and H3 as a group, A7, B7, C7, D7 as a group, etc.
Please always use the whole plate at one time. Using only part of the wells on a
Please always use the whole plate at one time. Using only part of the wells on a
plate is not recommended.
This is because, during the experiment in the incubator, the properties of the
This is because, during the experiment in the incubator, the properties of the
micro sensor arrays in the unused wells may be affected, so that their qualitative
micro sensor arrays in the unused wells may be affected, so that their qualitative
performance with cells can no longer be. If using only a fraction of the E-Plate 96
performance with cells can no longer be. If using only a fraction of the E-Plate 96
wells can not be avoided, it is best to fi ll the remaining wells with buffer (
wells can not be avoided, it is best to fi ll the remaining wells with buffer (
Preparing and Starting a Run on the RTCA SP Instrument
Running a Quick Experiment