46
RTCA SP Instrument Operator’s Manual
D
D
Cleaning and Exchanging the RTCA Contact Pins 96
3. Cleaning and Exchanging the RTCA
Contact Pins 96
e RTCA Contact Pin 96 contacts provide an important signal path from the microsensor
array in the E-Plate 96 to the control and measurement circuits. To guarantee the proper
function of the RTCA SP Station, clean the RTCA Contact Pins regularly. In addition,
whenever a particular RTCA Contact Pin shows signi cantly higher contact resistance
compared to the others, that pin should be cleaned. If one of the CI values during RTCA
Resistor Plate 96 veri cation tests is higher than 0.063, the RTCA Contact Pins 96 should
either be cleaned or replaced.
e RTCA Contact Pin 96 cleaning procedure takes 10 to 15 minutes and recommend-
ed to ensure helpful obtaining consistent optimum experimental data. Regular cleaning
every three months, or whenever contaminants are present on the RTCA Contact Pin
contacts, produces the most reproducible and accurate measurements.
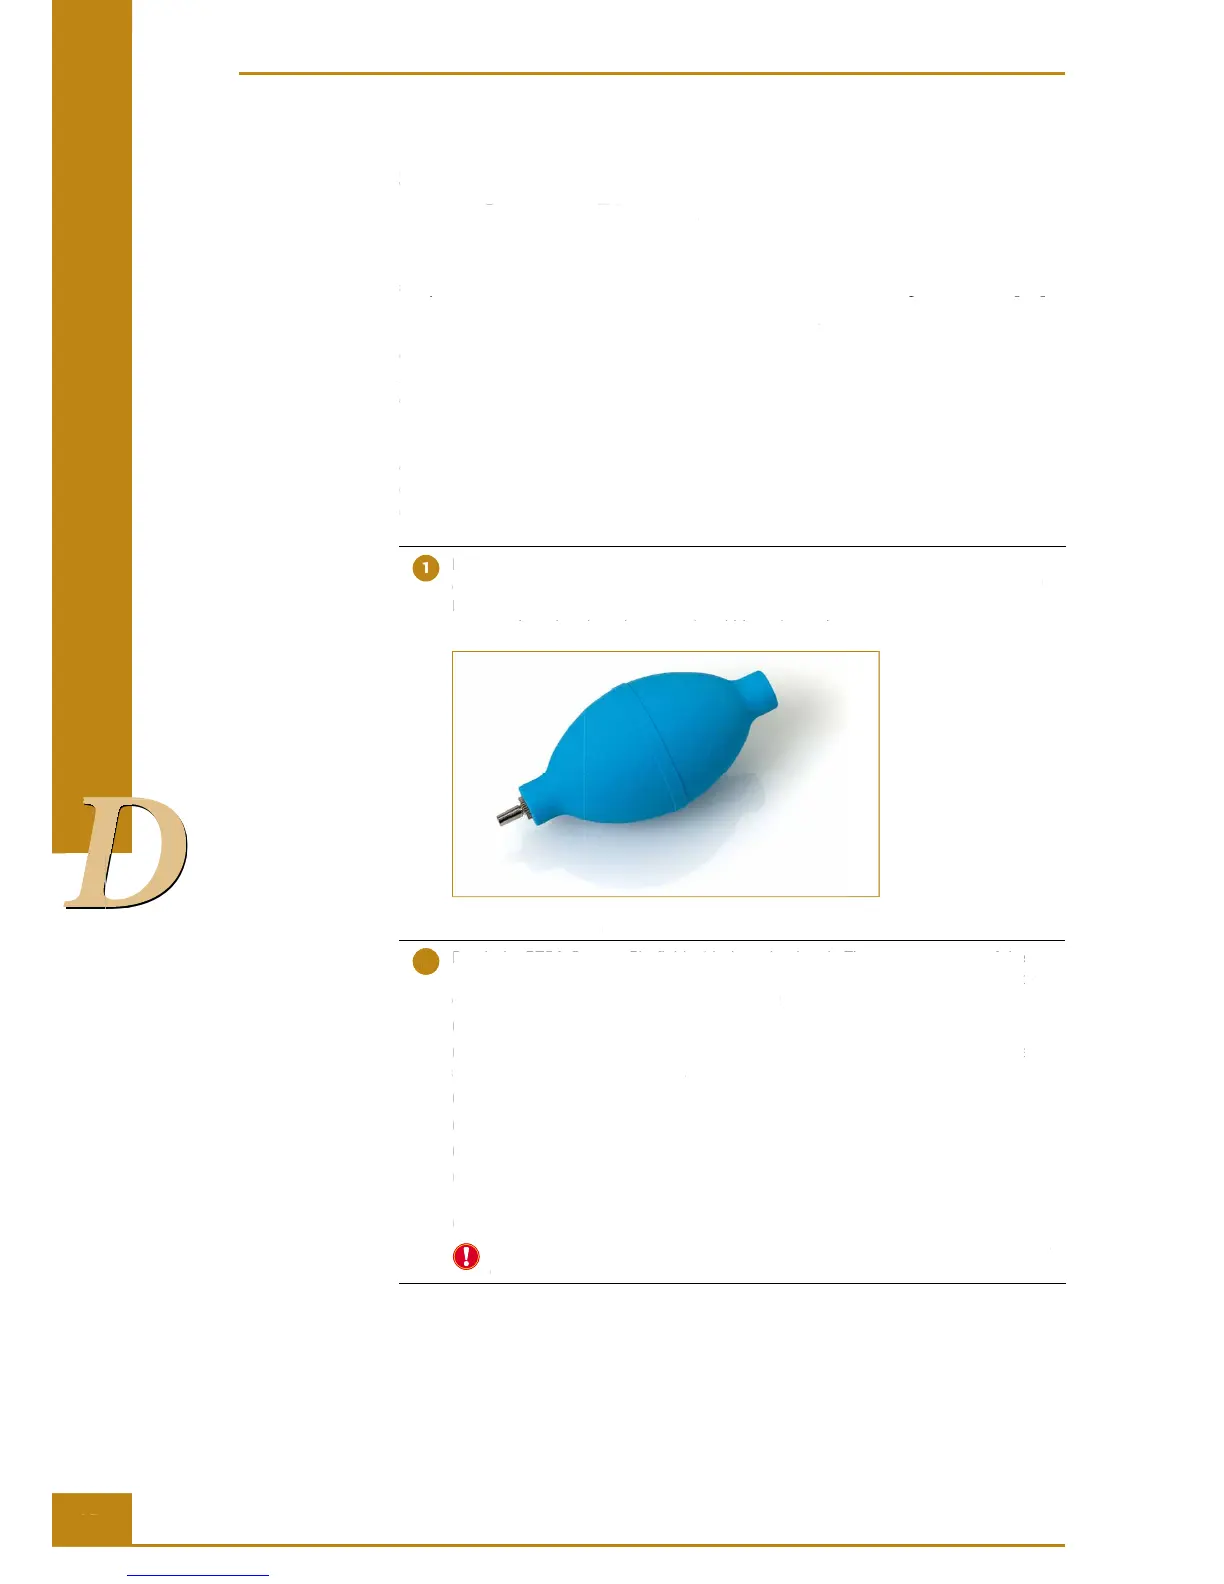
Remove the RTCA Protector Shield 96 from the cradle pocket. Blow the entire surface
of the RTCA SP Station using the small dust blower which comes with the RTCA SP
Instrument. If compressed air and nozzle are available, it can also be used. Use a
pressure less than less than 15 psi and blow air gently.
Figure 27: Dust Blower.
Brush the RTCA Contact Pin fi eld with the nylon brush. There are two rows of the
Contact Pins and each row contains 12 groups of Contact Pins. The procedure for
cleaning one row of Contact Pins is as follows:
(a) Position the nylon brush to cover 3 groups of Contact Pins.
(b) Brush across the tips of the Contact Pins gently in only one direction at a time, as
shown (up to down) in Figure 28.
(c) Repeat the motion in (b) at least ten times.
(d) Position the brush to cover and clean the next 3 groups of Contact Pins.
(e) Repeat above process (a) through (d) to cover the entire row of Contact Pins.
(f) Use the air blower to remove any dust from the surface close to this row of Contact
Pins.
(g) Repeat this routine (a) through (f) in the opposite direction (down to up).
When using blower to remove dust, always remember to blow the air towards the
outside of the cradle area.
RTCA SP Instrument Operator’s Manual
Cleaning and Exchanging the RTCA Contact Pins 96
array in the E-Plate 96 to the control and measurement circuits. To guarantee the proper
function of the RTCA SP Station, clean the RTCA Contact Pins regularly. In addition,
whenever a particular RTCA Contact Pin shows signi cantly higher contact resistance
compared to the others, that pin should be cleaned. If one of the CI values during RTCA
Resistor Plate 96 veri cation tests is higher than 0.063, the RTCA Contact Pins 96 should
either be cleaned or replaced.
e RTCA Contact Pin 96 cleaning procedure takes 10 to 15 minutes and recommend-
ed to ensure helpful obtaining consistent optimum experimental data. Regular cleaning
every three months, or whenever contaminants are present on the RTCA Contact Pin
contacts, produces the most reproducible and accurate measurements.
Remove the RTCA Protector Shield 96 from the cradle pocket. Blow the entire surface
of the RTCA SP Station using the small dust blower which comes with the RTCA SP
Instrument. If compressed air and nozzle are available, it can also be used. Use a
pressure less than less than 15 psi and blow air gently.
Brush the RTCA Contact Pin fi eld with the nylon brush. There are two rows of the
Brush the RTCA Contact Pin fi eld with the nylon brush. There are two rows of the
Contact Pins and each row contains 12 groups of Contact Pins. The procedure for
Contact Pins and each row contains 12 groups of Contact Pins. The procedure for
cleaning one row of Contact Pins is as follows:
(a) Position the nylon brush to cover 3 groups of Contact Pins.
(b) Brush across the tips of the Contact Pins gently in only one direction at a time, as
(b) Brush across the tips of the Contact Pins gently in only one direction at a time, as
shown (up to down) in Figure 28.
(c) Repeat the motion in (b) at least ten times.
(d) Position the brush to cover and clean the next 3 groups of Contact Pins.
(e) Repeat above process (a) through (d) to cover the entire row of Contact Pins.
(f) Use the air blower to remove any dust from the surface close to this row of Contact
(g) Repeat this routine (a) through (f) in the opposite direction (down to up).
When using blower to remove dust, always remember to blow the air towards the
outside of the cradle area.
3. Cleaning and Exchanging the RTCA
e RTCA Contact Pin 96 contacts provide an important signal path from the microsensor
array in the E-Plate 96 to the control and measurement circuits. To guarantee the proper
Brush the RTCA Contact Pin fi eld with the nylon brush. There are two rows of the