31
System Description
B
B
Installation
Resistor Plate Verifi cation of RTCA SP Instrument
3.6 Resistor Plate Verifi cation of the RTCA SP Instrument
Resistor Plate Veri cation is a very important step to verify the installation and the
functionality of the RTCA SP Instrument. e veri cation process can be done outside
of the incubator at room temperature. Ideally, a Resistor Plate Veri cation should be
performed before and a er the RTCA SP Station is put in an incubator. is ensures that
the installation is correct, and that no condensation is a ecting the RTCA SP Station a er
it is placed inside the incubator.
While a TWO hour equilibrium time is needed when the RTCA SP Station is rst put
into an incubator, resistor plate veri cation outside the incubator does not require
this waiting period.
Start the RTCA Software
Having connected the cables and installed the system correctly, start the RTCA
Software by double clicking the RTCA Software icon on the desktop. If the
program is already open, close it and then reopen it.
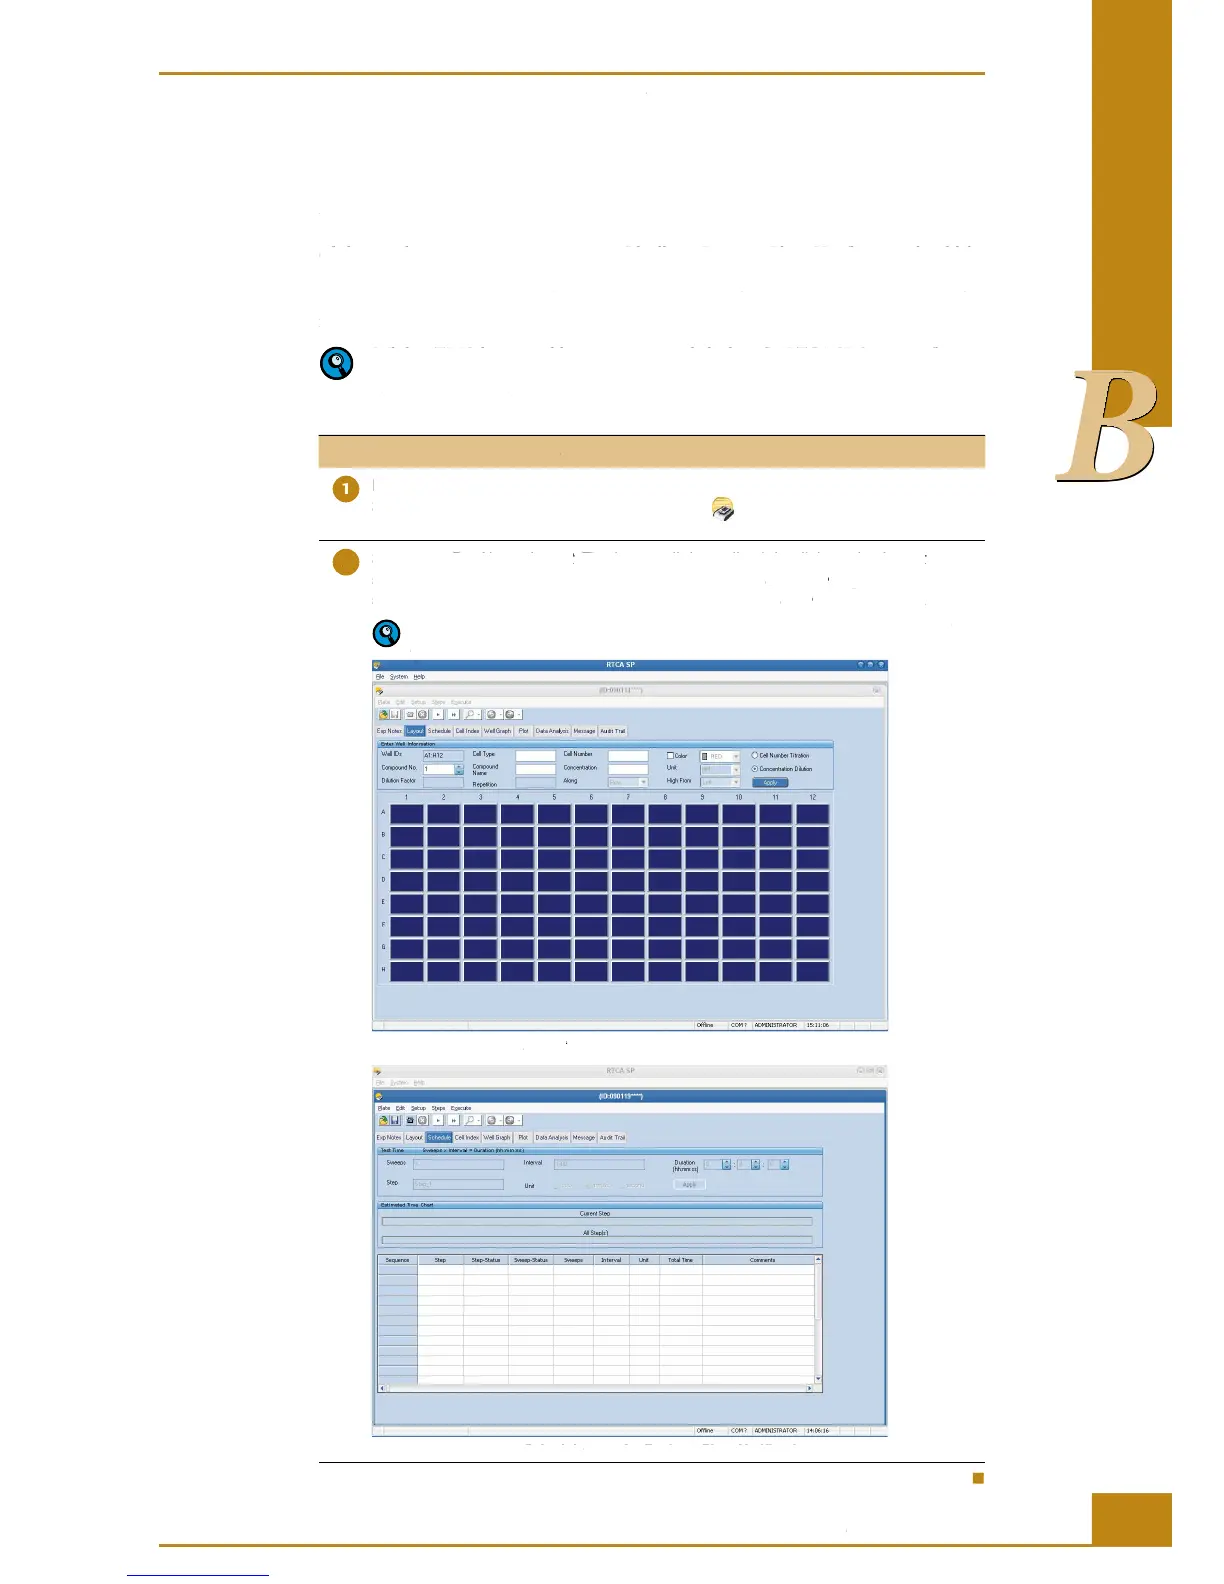
Set up the Exp Notes, Layout (Turning on all the wells, right click on the Layout page,
select all wells, then click apply button; Figure 16), and Schedule Pages (click add a
step, set 10 sweeps with an interval of 30 sec; Figure 17). Save the experiment.
For more information about setup, data format and storage, please refer to the
RTCA Software Manual.
Figure 16: Setup of the Layout page for Resistor Plate Verifi cation.
Figure 17: Setup of the Schedule page for Resistor Plate Verifi cation.
Resistor Plate Verifi cation of RTCA SP Instrument
3.6 Resistor Plate Verifi cation of the RTCA SP Instrument
Resistor Plate Veri cation is a very important step to verify the installation and the
functionality of the RTCA SP Instrument. e veri cation process can be done outside
of the incubator at room temperature. Ideally, a Resistor Plate Veri cation should be
performed before and a er the RTCA SP Station is put in an incubator. is ensures that
the installation is correct, and that no condensation is a ecting the RTCA SP Station a er
it is placed inside the incubator.
While a TWO hour equilibrium time is needed when the RTCA SP Station is rst put
into an incubator, resistor plate veri cation outside the incubator does not require
Having connected the cables and installed the system correctly, start the RTCA
Software by double clicking the RTCA Software
icon on the desktop. If the
program is already open, close it and then reopen it.
(Turning on all the wells, right click on the
Exp Notes, Layout (Turning on all the wells, right click on the Exp Notes, Layout
select all wells, then click apply button; Figure 16), and
Schedule Pages (click add a Schedule
step, set 10 sweeps with an interval of 30 sec; Figure 17).
For more information about setup, data format and storage, please refer to the
page for Resistor Plate Verifi cation.
Layout page for Resistor Plate Verifi cation.Layout
page for Resistor Plate Verifi cation.
Schedule page for Resistor Plate Verifi cation.Schedule