4-4 – Propeller Balance 4
this screen using the [⇓] and [⇑] keys. (Refer to Chapter 3, “Using the Model 4040 Viper
Analyzer” if you are unfamiliar with using the keypad or inputting data.)
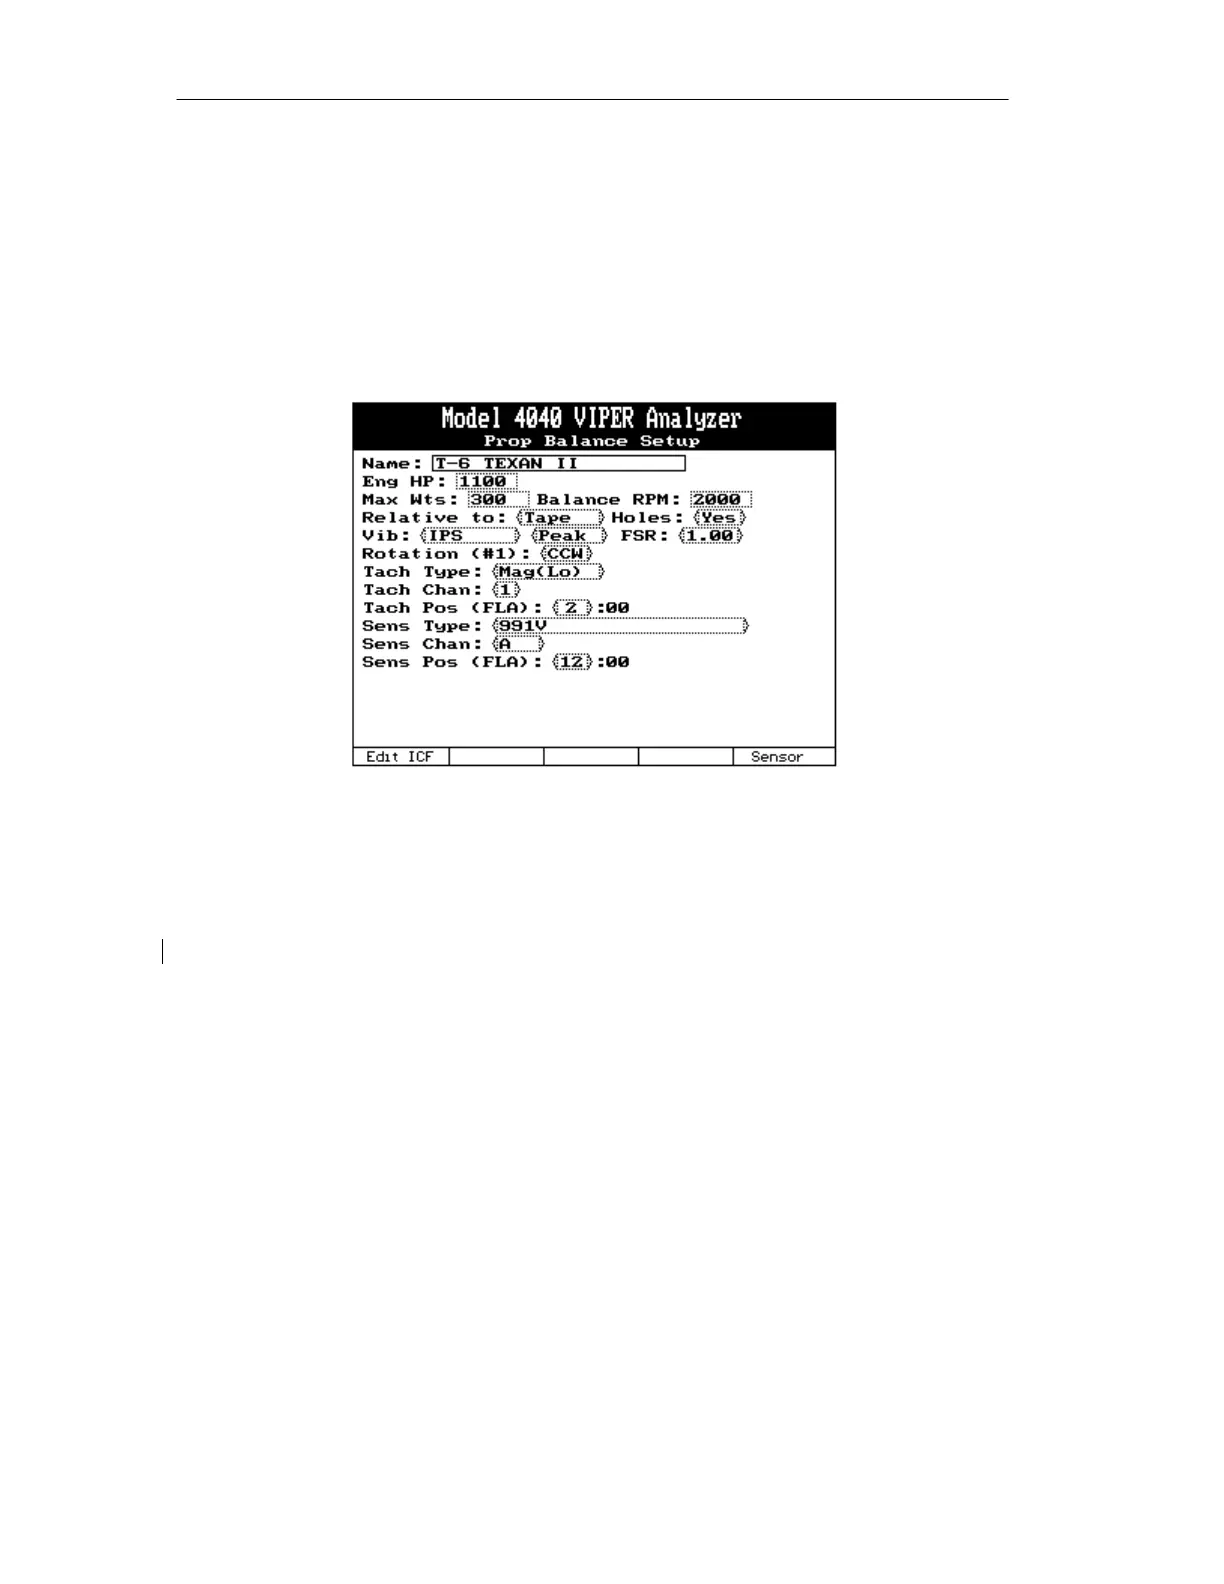
Complete the “Prop Balance Setup” screen per the following example.
4.1.1.1. – Propeller Balance Setup Screen
To complete the “Prop Balance Setup” banner screen (as shown below), do the following:
4.1.1.1.1. In the “Name” field, enter a name for this setup using the keypad. (Refer to
Chapter 3, “Using the Model 4040 Viper Analyzer” if you are unfamiliar with
using the keypad.)
The name you choose will aid you in differentiating this setup from other stored
setups should you choose to review it at a later time. The name should be one of
your choosing which you will be easily recognized and associated with this setup
such as “Cessna 150,” “King Air, ” or “T-6 TEXAN II.”
4.1.1.1.2. Using the [⇓] key, move down to the “Eng HP” field. Enter the rated horsepower
of the engine using the keypad. The valid range of values for this field is 0 to
5000.
4.1.1.1.3. Using the [⇓] key, move to the “Max Baln.Wts” field. Enter the maximum total
trim balance weight (in grams) allowed for this installation. If the manufacturer
does not specify a maximum weight, refer to the ACES Systems Guide to
Propeller Balancing. The valid range of values for this field is 1 to 9999.
4.1.1.1.4. Move to the “Balance RPM” field using the [⇓] key. Using the keypad, enter the
actual propeller RPM at which you intend to balance. If no manufacturer
recommendation is available, refer to the ACES Systems Guide to Propeller
Balancing included with the Propeller Balance option. A low cruise RPM is
usually best. The valid range of values for this field is 50 to 32767.



 To Next Page