VP-8-V2 and VP-16-V2 Series Encoder
·
User Manual
41
5.2 Configuring Video Settings
Steps:
1. Click Remote Configuration > Camera Settings >Video Settings to enter the Video Settings interface.
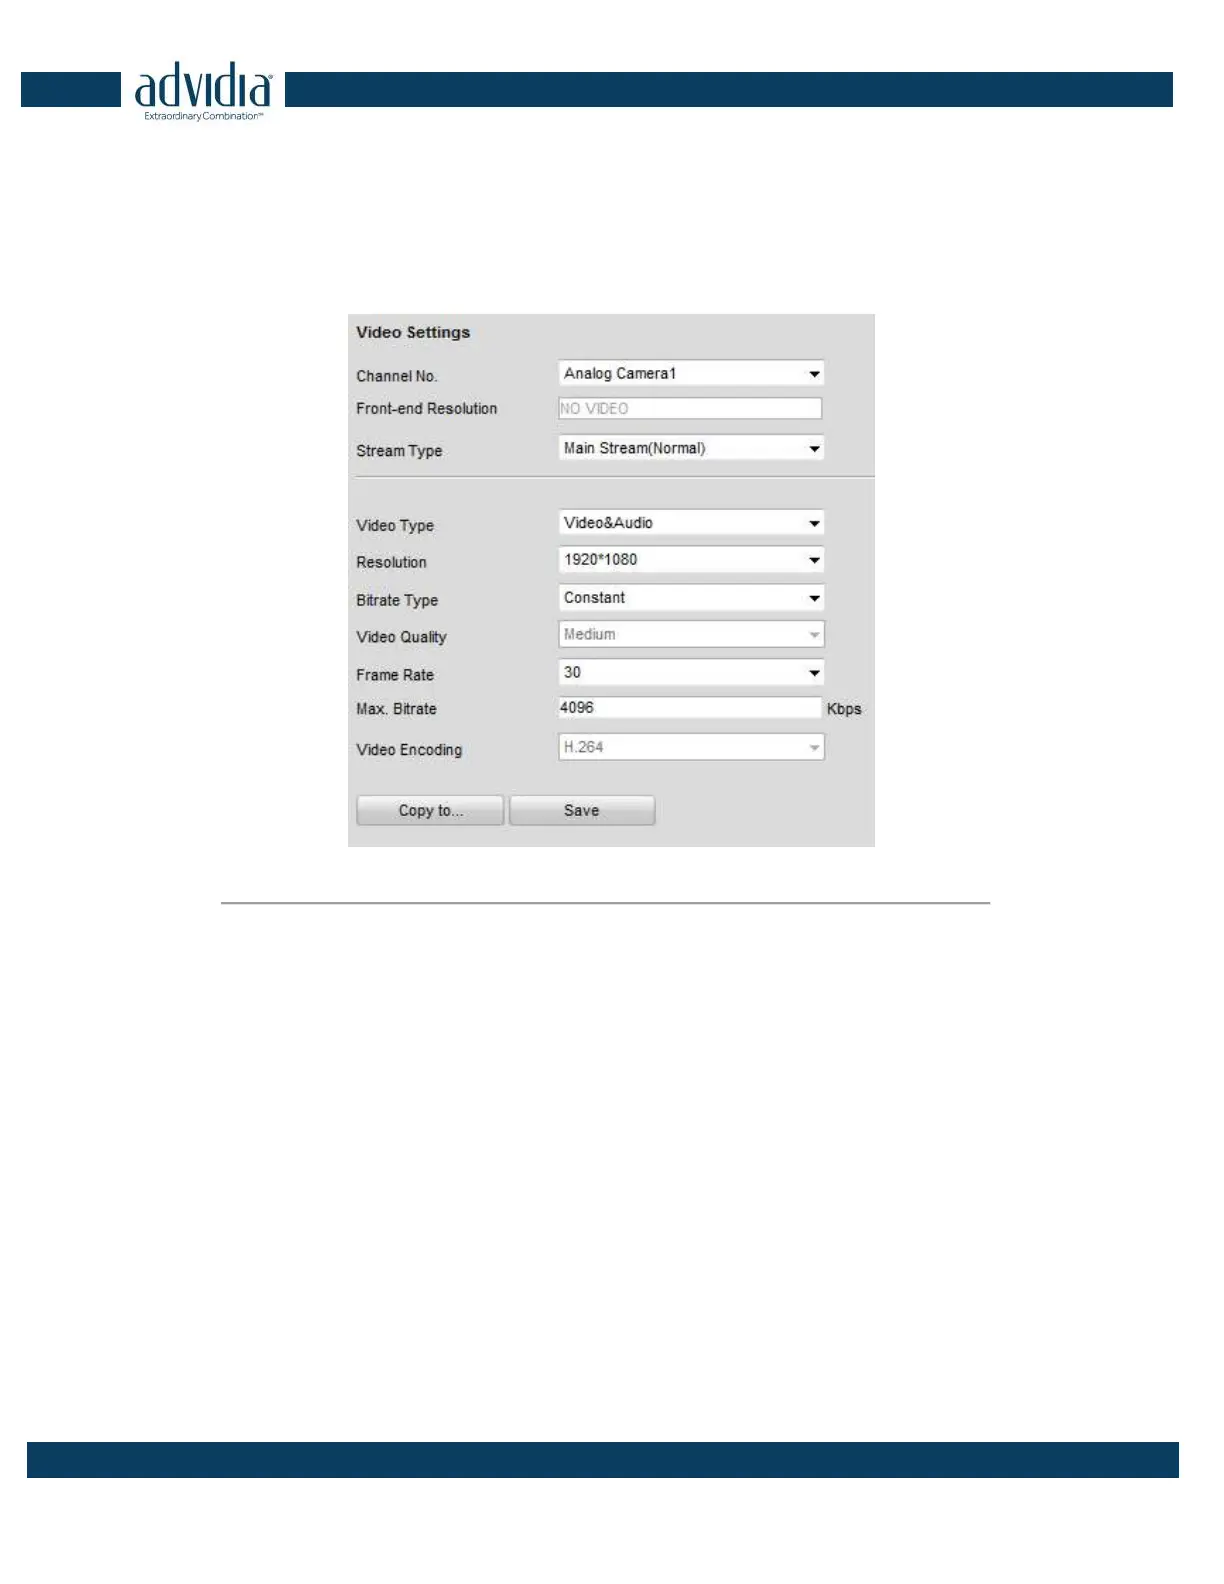
Figure 5. 7
Video Settings
2. Select the camera from the drop-down list to configure.
3. Select the Stream Type of the camera to Main Stream (Normal), Main Stream (Event) or Sub Stream.
The main stream is usually for recording and live view with good bandwidth, and the sub stream can be
used for live view when the bandwidth is low. Refer to the Chapter Local Configuration on changing the
main stream to sub stream for live view.
4. You can customize the following parameters for the selected Main Stream or Sub Stream:
Video Type: Select the video type to video stream, or video & audio composite stream. The audio signal will
be recorded only when the Video Type is Video & Audio.
Resolution: Select the resolution of the video input.
Bitrate Type: Select the bitrate type to constant or variable.
Video Quality: When bitrate type is selected to Variable, 6 levels of video quality can be configured.
Frame Rate: Set the frame rate to 1 to 30 fps.
The frame rate used to describe the frequency at which a video stream is updated is measured in frames
per second (fps). A higher frame rate is advantageous when there is movement in the video stream, as it
maintains image quality throughout.
Max. Bitrate: Set the Max. bitrate from 32 to 8192 Kbps.