EasyManuals Logo
Home>Agilent Technologies>Security Sensors>G1365B

Agilent Technologies G1365B User Manual

Agilent Technologies G1365B
182 pages
To Next Page IconTo Next Page
To Previous Page IconTo Previous Page
Page #117 background imageLoading...
Page #117 background image
1200 Series DAD and MWD User Manual 117
Maintenance 8
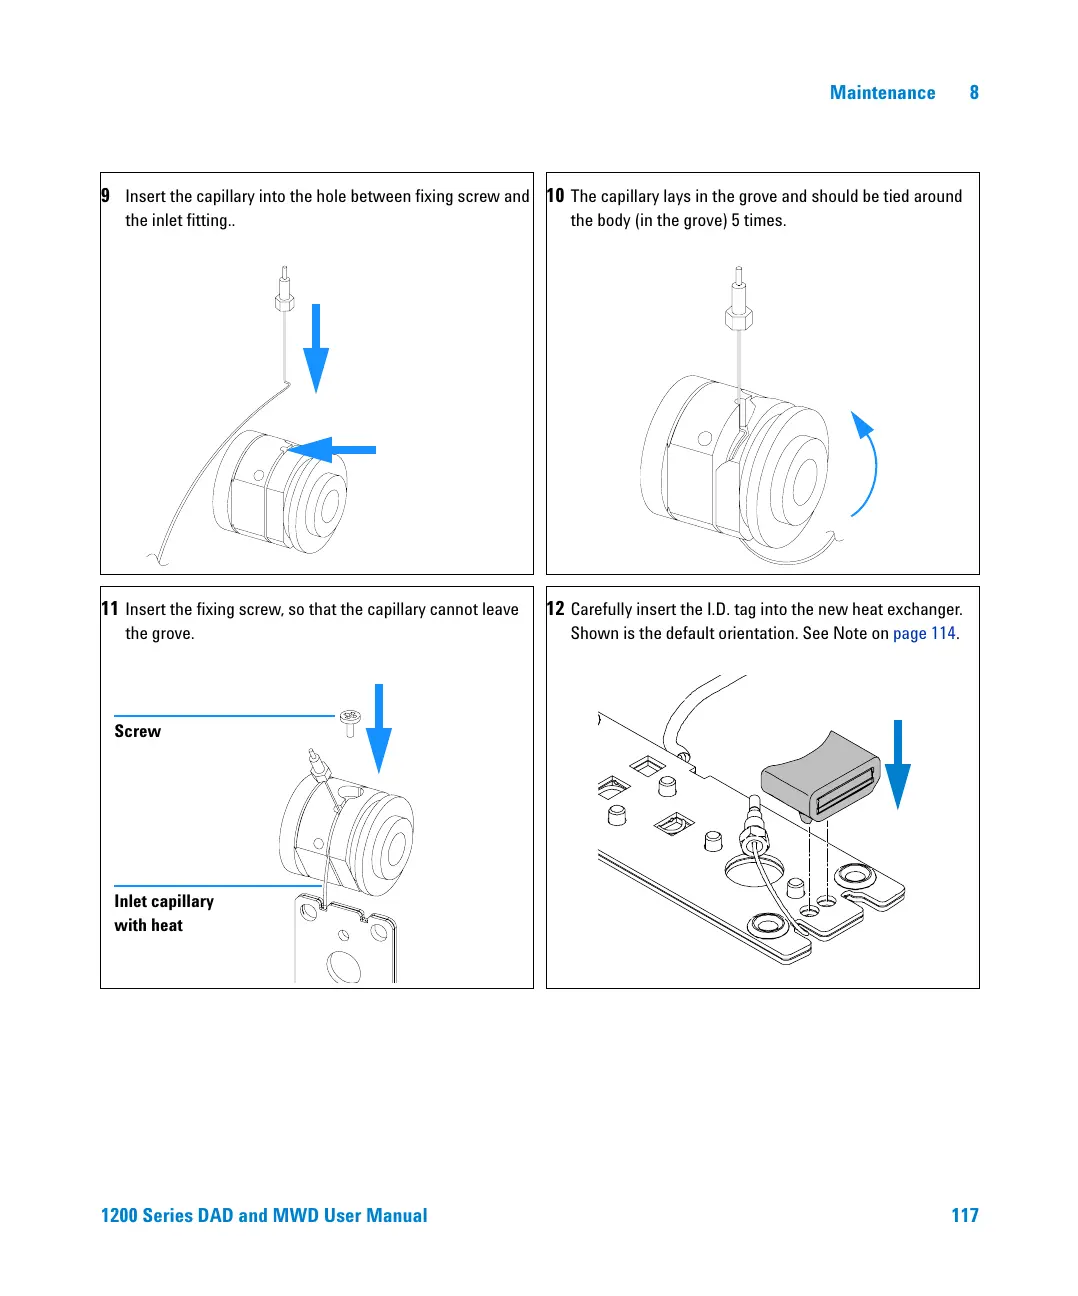
9 Insert the capillary into the hole between fixing screw and
the inlet fitting..
10 The capillary lays in the grove and should be tied around
the body (in the grove) 5 times.
11 Insert the fixing screw, so that the capillary cannot leave
the grove.
12 Carefully insert the I.D. tag into the new heat exchanger.
Shown is the default orientation. See Note on page 114.
Screw
Inlet capillary
with heat

Table of Contents

Questions and Answers:

Question and Answer IconNeed help?

Do you have a question about the Agilent Technologies G1365B and is the answer not in the manual?

Agilent Technologies G1365B Specifications

General IconGeneral
BrandAgilent Technologies
ModelG1365B
CategorySecurity Sensors
LanguageEnglish

Related product manuals