S220/S221/S230/S231/Z200 8-11
Maintenance 8
1 2
2
1 1
2
Figure 8-20
Figure 8-22
Figure 8-21
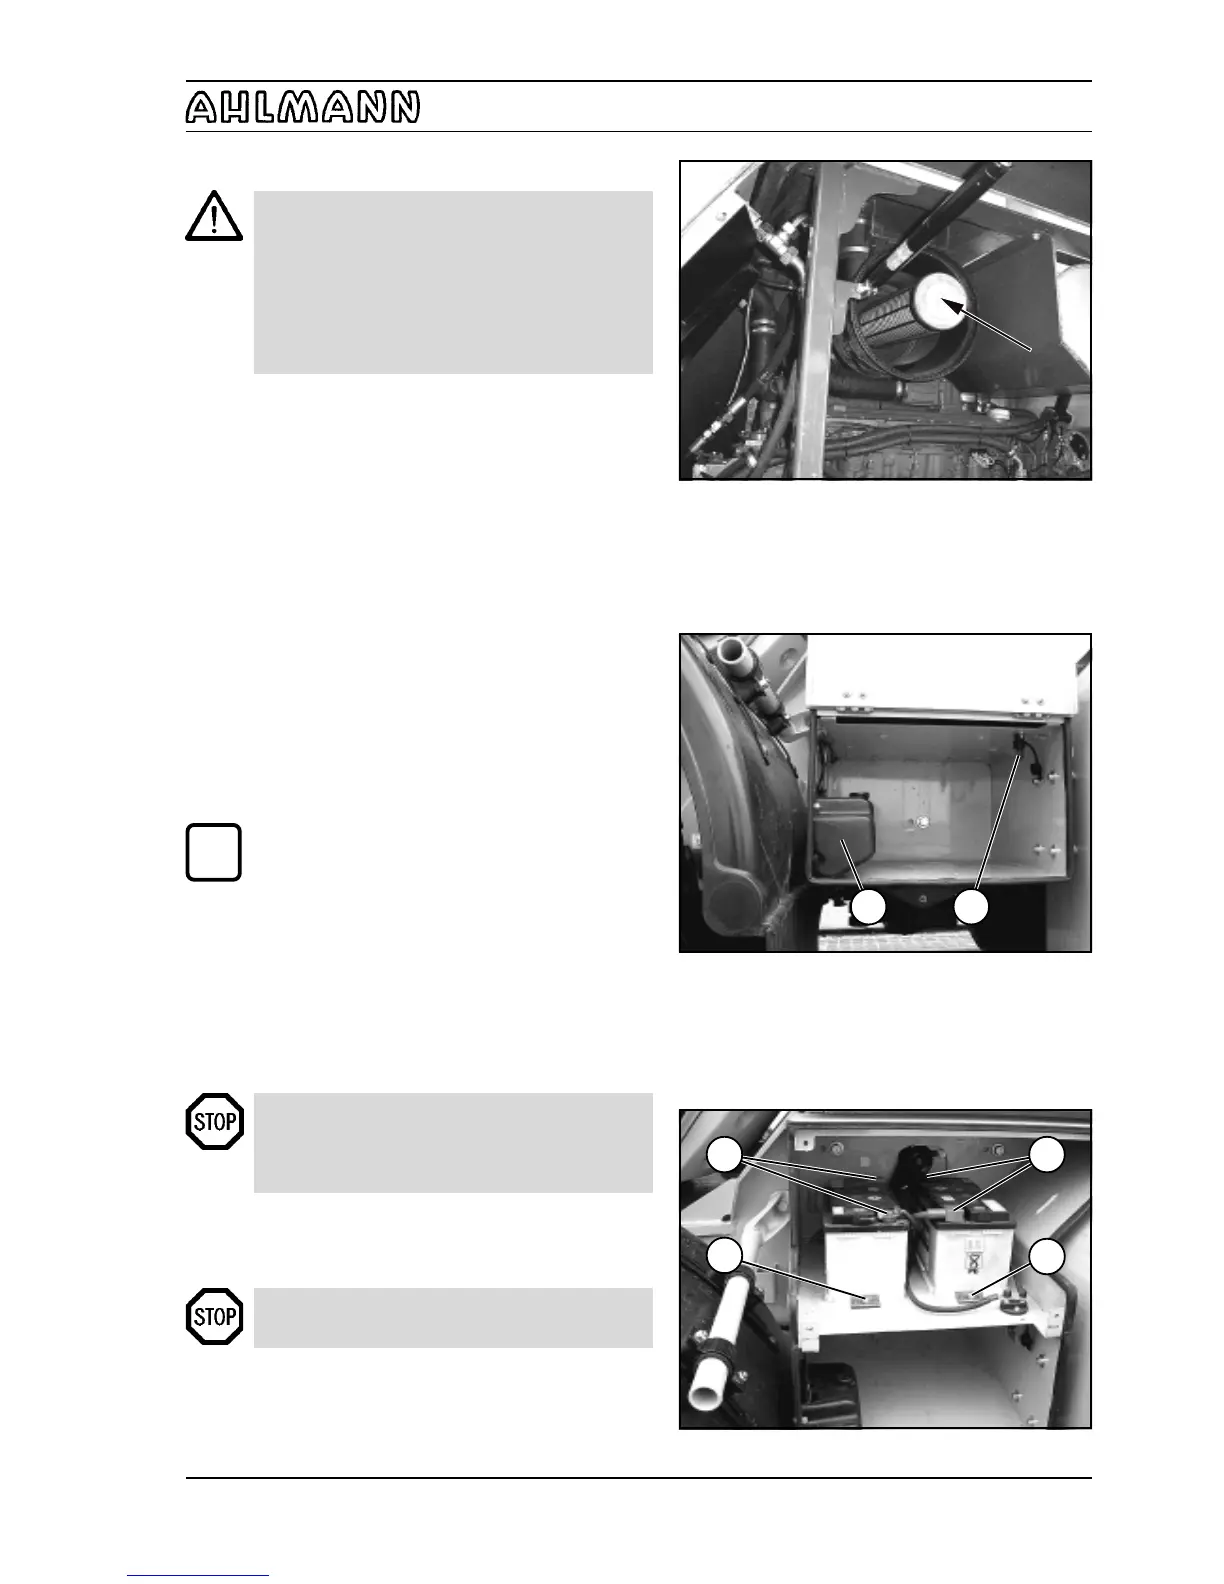
8.2.12 Replacing the safety cartridge
CAUTION
- The safety cartridge must not be cleaned.
- The safety cartridge must be replaced after
the filter cartridge has been maintained/
cleaned 5 times, but no later than two years.
- Make sure that no dirt or dust can enter the
filter housing during replacement of the safety
cartridge.
(1) Remove the filter cartridge (section 8.2.11).
(2) Pierce the seal of the safety cartridge (8-20/arrow)
from the inside by using a screwdriver or similar tool and
pull up both strips.
(3) Hold the safety cartridge by both strips and pull it out
by carefully turning it back and forth. Replace the safety
cartridge and the filter cartridge by new ones.
(4) The remaining installation is performed as described
in section 8.2.11 (6) - (8).
8.2.13 Replacing the fuel filter
See the operating instructions for the engine.
8.2.14 Replacing the starter batteries
NOTE
The starter batteries are maintenance-free
according to DIN 72311, section 7. They are
located on the left side of the cabin access area.
(1) Dismount the maintenance flap (8-22).
(2) Remove the main battery switch (8-21/2).
(3) Loosen the fastening screws (8-22/2) of the battery
holders and remove them together with the retaining
plates.
(4) Loosen and remove the connecting cables (8-22/1)
from the batteries (size 13).
DANGER
Always remove the negative terminal first and
then the positive terminal. Installation is in reverse
order.
(5) Remove both batteries and replace them.
(6) Apply grease to the terminals before fastening them.
(7) Installation is in reverse order.
DANGER
Make sure the fastenings are secure.
(8) Attach the maintenance flap and close and lock it.
i