EasyManuals Logo

Akuvox E16 Series User Manual

Akuvox E16 Series
198 pages
To Next Page IconTo Next Page
To Previous Page IconTo Previous Page
Page #19 background imageLoading...
Page #19 background image
AKUVOX SMART INTERCOM www.akuvox.com
8
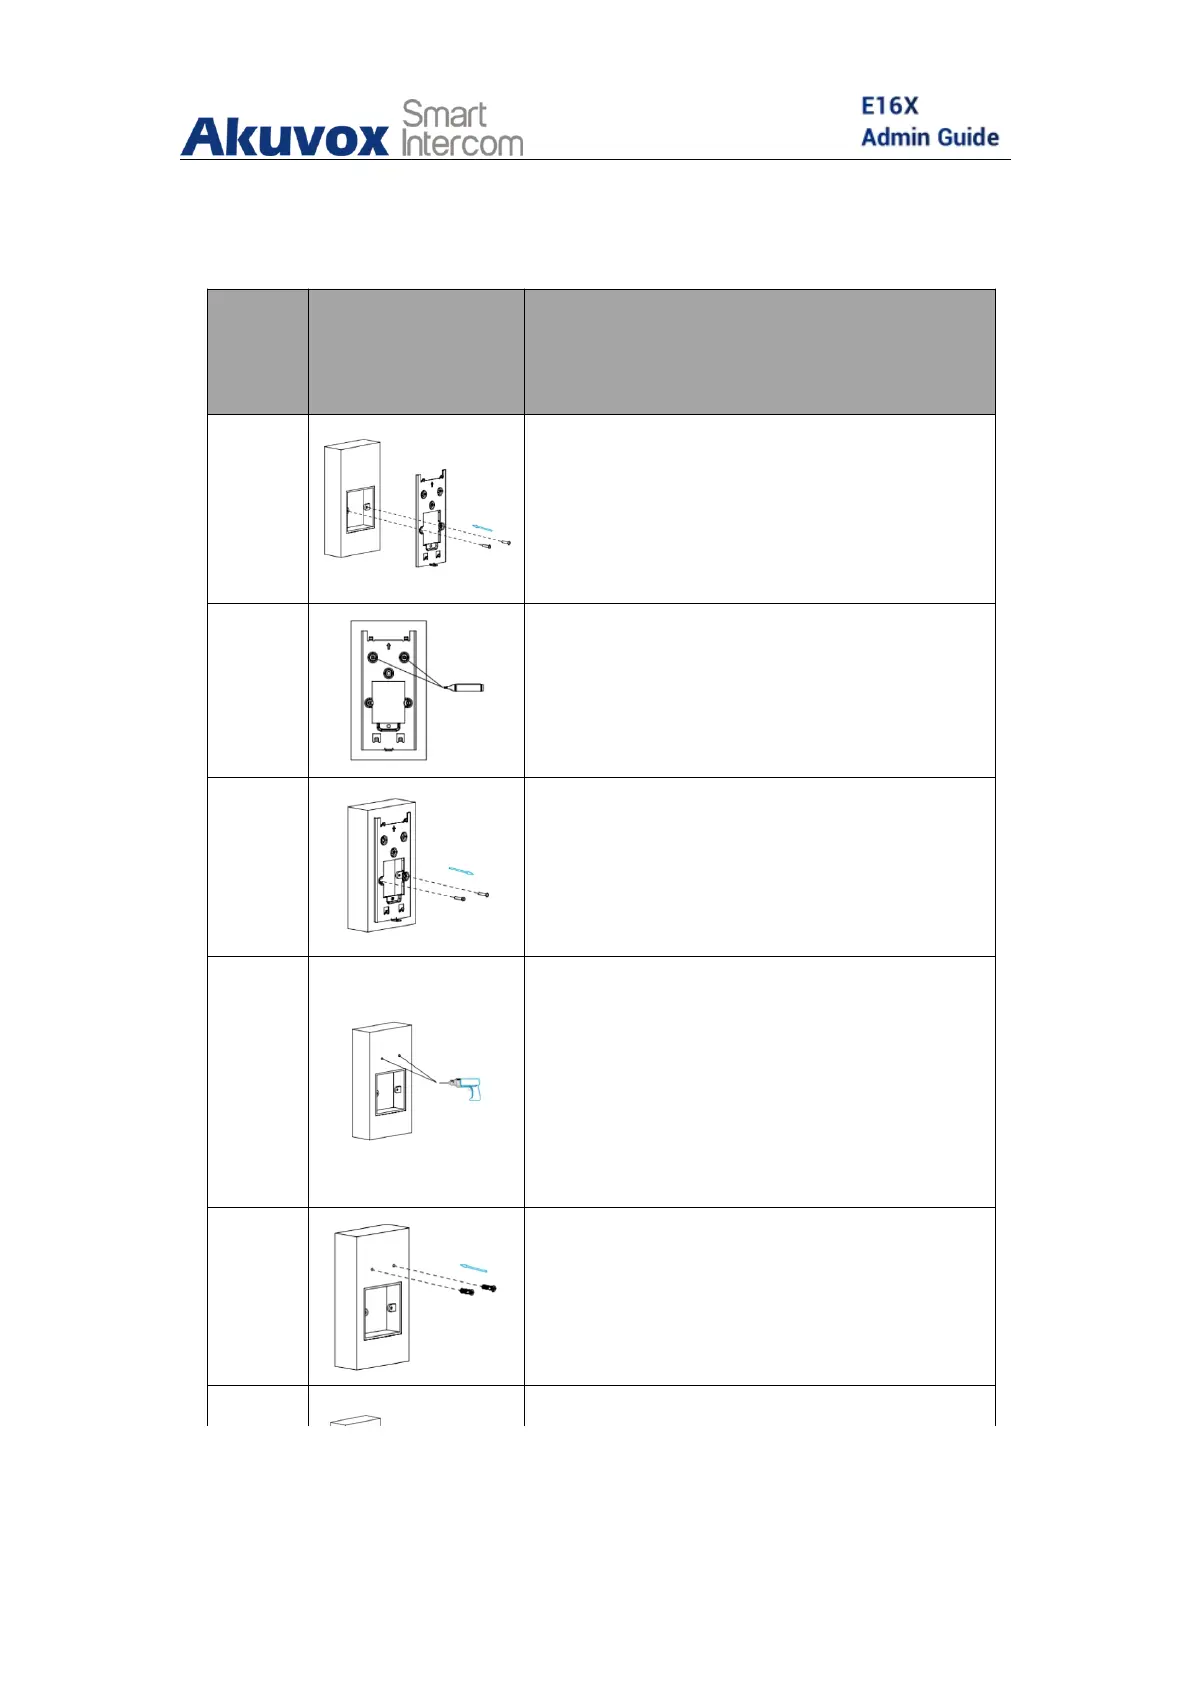
Wall-mounting bracket installation with 86x86 mm embedded
junction box in the wall.
Steps
Installation
Picture
Installation Description
1
Fix the wall-mounting bracket on the
embedded box with two M4x30
screws.
2
Mark the two positioning holes of the
wall-mounting bracket on the wall.
3
Remove the two M4x30 screws and
take off the wall-mounting bracket.
4
Use a hand drill with 5mm diameter
bit to make two positioning holes with
5mm in depth in the marked
positions.
5
Insert two plastic wall anchors into
the two drilled holes.
Fix the wall-mounting bracket with

Table of Contents

Questions and Answers:

Question and Answer IconNeed help?

Do you have a question about the Akuvox E16 Series and is the answer not in the manual?

Akuvox E16 Series Specifications

General IconGeneral
BrandAkuvox
ModelE16 Series
CategoryIntercom System
LanguageEnglish

Related product manuals