Rockwell Automation Publication 7000-UM202D-EN-P - May 2018 143
Control Component Definition and Maintenance Chapter 3
Replacing the UPS
1. Isolate and lock out the control power.
2. Remove the hardware that fastens the holding bracket to the cabinet
assembly and remove the holding bracket.
3. Disconnect the input and output wiring connected to and from the
UPS.
4. Disconnect the 15-pin status plug and remove the UPS.
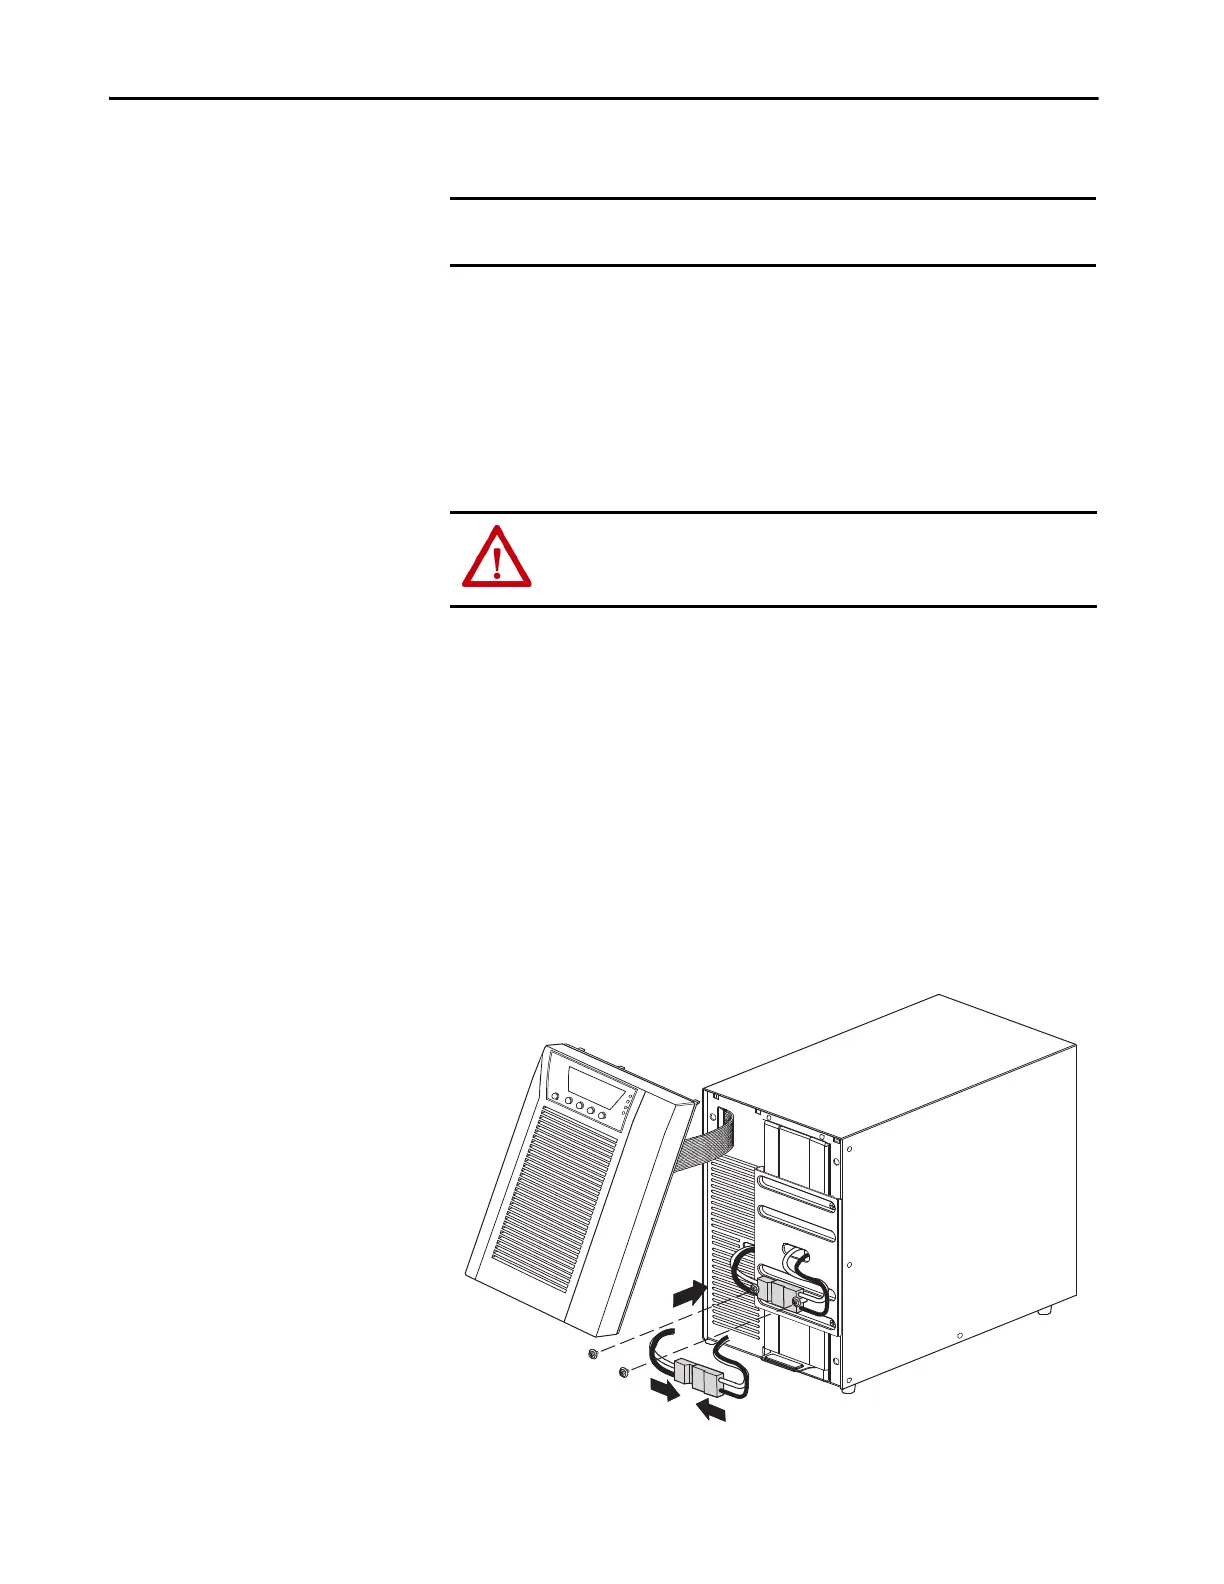
5. Before installing the new UPS, the internal battery must be
connected.
(1)
a. Remove the UPS front cover. Push down on the top of the cover and
pull the cover towards you to unclip it from the cabinet.
b. Connect the white connectors together, connecting red to red, and
black to black. Verify there is a proper connection.
c. Remove and retain the two screws from the screw mounts.
d. Place the battery connector between the screw mounts. Reinstall the
two screws to hold the connector in place.
e. Replace the UPS front cover.
Figure 124 - Connect the internal UPS battery
IMPORTANT To replace the UPS battery, see the UPS user manual that was shipped with
the drive.
ATTENTION: Before installing the new UPS, check the battery recharge date
on the shipping carton label. If the date has passed and the batteries were
never recharged, do not use the UPS. Contact Rockwell Automation.
(1) Reprinted from 700-3000 VA User Manual by permission of Eaton Corporation.

 Loading...


